Get Facebook Chats and Video Calls On Skype
I am not a big fan of instant messaging clients such as Google Talk, Skype and Facebook messenger, because I feel that IM clients are a real distraction and takes the focus away from work. But there are times when you can’t help but use an IM client to stay in touch with co-workers, colleagues and people with whom you work with. Google Talk and Facebook messenger are more of a social IM client so enterprises who have remote workers, prefer sticking to Skype for corporate communications.
If you’re a Facebook addict and want to receive Facebook chats in your Skype account, here is a quick guide which will help you do just that.
How to Receive Facebook Chats In Skype
To be able to receive Facebook chats in Skype, you will have to connect your Facebook account with your Skype account. Here is how to do it
1. Download Skype for your operating system, install the desktop client and sign in to your Skype account.
2. Click “Skype home” on the left sidebar and go to your Skype’s home screen. Next click the tiny “Settings” icon in the right panel and choose “Connect to Facebook”.

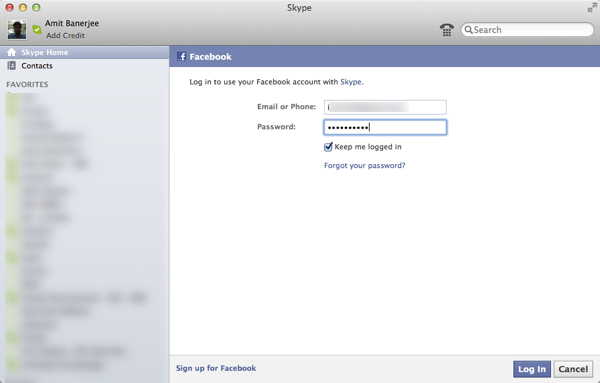
3. This will open Facebook’s login screen within Skype’s desktop client, login to your Facebook account and grant all the necessary permissions to Skype so that it can access your Facebook friends and contacts.
 Once you’ve granted all the permissions to Skype in your Facebook account, close Skype and restart it.
4. The next time you start Skype, go to “contacts” and you will see a “Facebook” tab, clicking which will show all your Facebook friends on Skype’s desktop client.

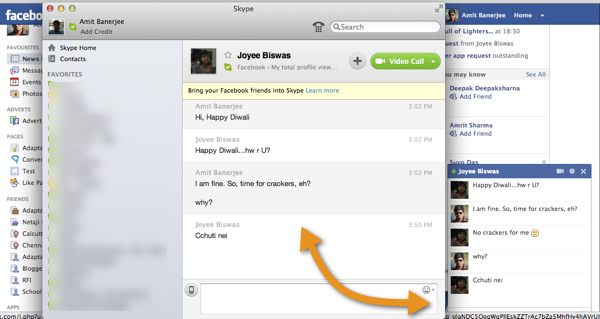
After you have connected your Facebook account with Skype, you will be able to see all your Facebook friends on Skype, filter all the Facebook friends who are currently online and send instant messages or “Facebook messages” to your Facebook friends.
Skype will automatically sync instant messages to your Facebook account, so if you chat with any of your Facebook friends on Skype, the conversation will be automatically saved in your Facebook inbox under “Messages”. If you’re using Facebook messenger on windows or using the Facebook app on your Mac, iPhone and other iOS devices, you would see the same message everywhere. This is because Facebook messages and chat conversations that are sent from any device is automatically synced across all devices where you’re logged into your Facebook account.
There are a couple of situations when adding your Facebook account to Skype can feel like a lifesaver. For example, you use Skype in your office or workplace and also want to stay online on your Facebook account. So instead of using Facebook messenger or other IM clients, you should connect your Facebook account in Skype and receive Facebook chats and messages within Skype itself.
Another good thing regarding connecting Skype with your Facebook account is that you can initiate voice and video calls with Facebook friends from Skype itself. No need to configure your browser and use it for Facebook video calling, if you’re already comfortable with Skype’s video and voice call features, you can use Skype’s desktop client to call Facebook friends, without having to login to your Facebook account from a browser. This saves a lot of time and is recommended if you often find yourself chatting or video calling with Facebook friends and Skype contacts.
To video chat with Facebook friends, you will have to install the Facebook video chat browser plugin and initiate a video chat request from the browser itself
Remove Facebook Friends and Contacts From Skype
Sometimes, adding Facebook friends on your Skype account can prove to be more of an annoyance. Your contact list gets cluttered with a huge list of contacts, you see random people on your Skype account and the most annoying part is – you are pinged quite often by Facebook friends on Skype.
If you’re anything like me and want to clean up your Skype account from unnecessary contacts and Facebook friends, here are the steps that needs to be followed:
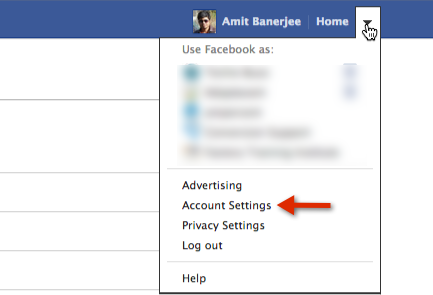
1. Login to your Facebook account, click the small arrow next to “Home” and select “Account settings”.
2. Select “Apps” from the left sidebar, find the “Skype” app and remove it from your Facebook account by clicking the tiny little “cross” at the right corner.

3. Restart Skype and you should see a notification
“Oops, something went wrong and we could not connect to Facebook”
Simply ignore that message and click “Hide”. That’s it, you won’t see any of your Facebook friends and contacts on Skype anymore. Since you have revoked application permissions from the Skype app on your Facebook account, you won’t see Facebook friends and contacts on Skype’s desktop application.
Related: Use multiple Skype accounts from the same PC