Protect Your Computer Against Malware Through Sandboxie
Users who are inexperienced or new to the Internet world often face the problem of unknowingly coming across malicious programs while surfing. And before they realise the security lapse, the malware has already wreaked havoc. There are many ways in which the PC can be attacked by the malware. The may range from downloading a malware infected file from a malicious website and clicking on bad advertisements to clicking on links that fool the user into thinking they already have a virus or malware on their system.
This problem, as common as it may seem, is not that difficult to solve. Today’s article is about that solution.
Enter Sandboxie. A software that protects your computer against all possible malware attacks.
What exactly is Sandboxie?
Sandboxie is a software based on the principle of sandboxing. A sandbox refers to an isolated computer environment in which your normal programs like your web browser are run. The experience of this environment is just like that of your real system, and you won’t even notice the difference. The purpose behind the idea is to keep all the changes that the malware makes local to this isolated sandbox environment, so that the real system is not affected at all. This concept is also how your everyday antivirus program works on. The user runs their browser inside sandboxie and that is the only difference in their experience. Everything else like surfing the net, clicking on links, downloading content remains the same. If the user encounters any malicious program in the process or the antivirus reports of one, the contents of the sandbox can be simply deleted with absolutely no breach to the real computer environment.
Using the program can be a bit confusing for a normal user. Therefore we have prepared a short tutorial that will explain you how to go about the basic useful features of the free version of the software (that anyway includes all the functions an everyday user would need).
Installation
The latest version of the software can be downloaded through this link.
Once downloaded, the .exe file can be run and the software will be installed through the usual process of next-next (pun-intended). After the installation, the following window will pop up and Sandboxie will tell you about the software compatibility. Any new required softwares can also be added through the Add button. Although this is not necessary. Clicking on okay will take you to the Tutorial window which will explain you how the software works and its purpose (but thanks to me you already know that).

After the tutorial finishes, you can see a new icon on your desktop named “Sandboxed Web Browser”. As you might have guessed, this will launch your default web browser in the sandbox mode.
How to Use
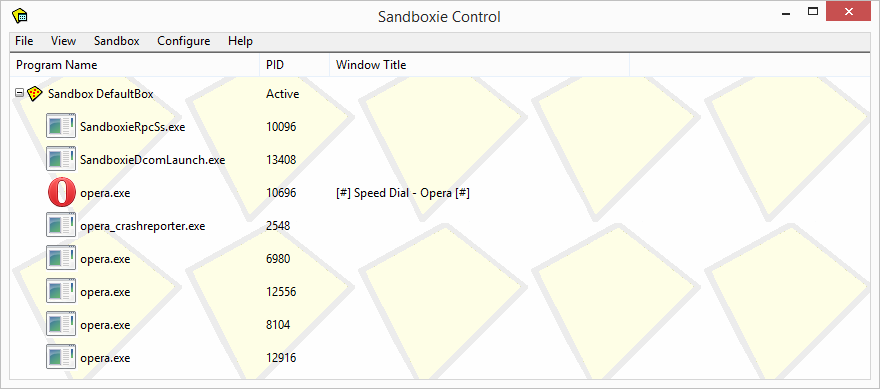
Once installed, you can see a window titled “Sandboxie Control” which will show all the current programs running inside the ‘sandbox’. All programs that are run under the software will be added to this list.
Running the Programs
There are basically 2 ways to launch any program in the sandbox mode.
1. Simply right click on the program you want to run and select “run sandboxed”. This will securely launch the program
2. Another way is to go to the ‘Sandbox Control’ (discussed earlier) and click on Sandbox –> Defaultbox –> Run Sandboxed –> Choose any of the various options given.
How to create shortcuts for sandboxed programs
Sandboxie Shortcuts for programs, similar to the default browser shortcut can also be easily created. Simply follow these steps –
1. From the Sandboxie Control window, click on Configure –> Windows Shell Integration
2. This will launch the depicted window which shows you various options on how to control the way Sandboxie works.
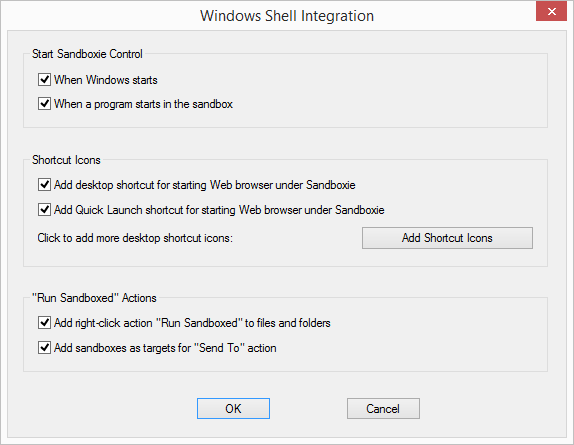
3) Under the Shortcut Icons section, click on “Add Shortcut Icons
4) This will show you a small message about the Sandboxie Start Menu. Simply click OK.

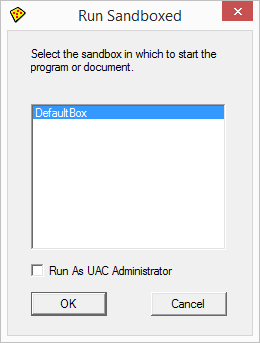
5) Now you will see a ‘Run Sandboxed’ window which will ask you to select the sandbox you want to launch. Select ‘DefaultBox’ and click OK. You can also select the check box if you want to launch the application as Administrator.
6) Clicking on OK will show you the Start Menu similar to that of a typical Windows. The required program can be selected from the menu and this will create its ‘Sandboxed Shortcut’ on the desktop. Pretty cool right?
Saving the downloaded files to the Real System
Now something important, as mentioned earlier, all files are downloaded and executed inside the sandbox environment. Nothing can come out of Sandboxie, that is of course until the user bypasses the security and transfers the downloaded files from the ‘virtual sandbox environment’ to the ‘real system’. The process of doing this is known as Recovery.
Recovering the files may seem intimidating at the first glance, but its actually easy. I will explain how to set up the most easiest way to recover files through Quick Recovery. Just stay with me and follow the following steps.
1) From the Sandboxie program windows, click on Sandbox –> DefaultBox –> Sandbox Settings.
2) A window that lists the various setting options like this will be launched.
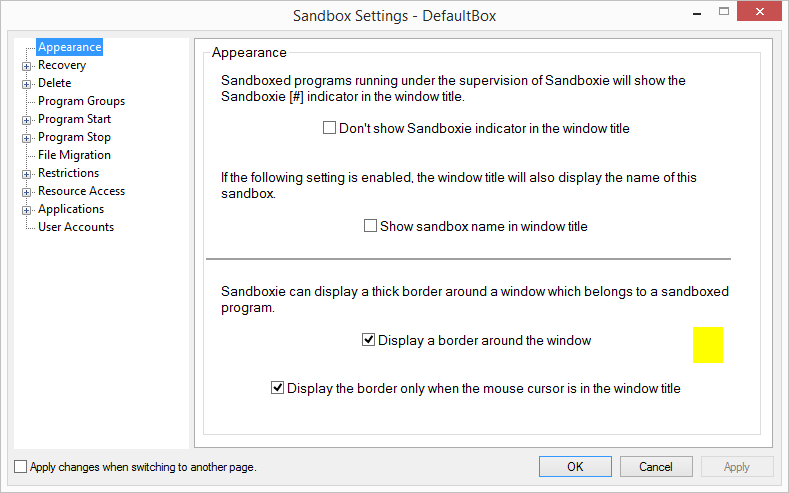
3) Click on Recovery –> Quick Recovery
This will show you the default folders where users generally download data to. If you do not download to any of these, you can also add your default download location through ‘Add Folder’.

4) After you have the required folder, simply click on OK. This will show a message box informing about the changes. Programs already running inside Sandboxie will have to be relaunched for changes to take place. Click OK again.

This will set up the Quick Recovery option.
Now whenever you download files to your sandbox and want to transfer them to your usual PC download folder, follow these steps –
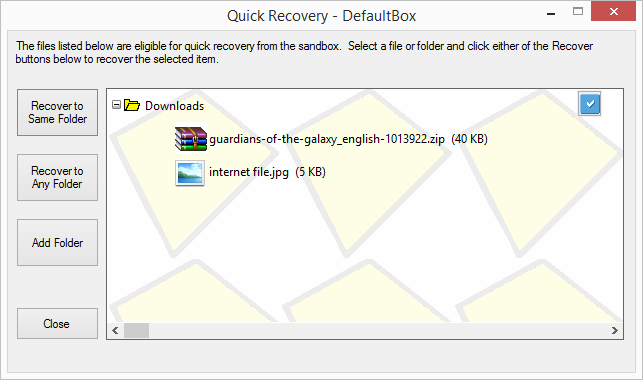
1) In the system application tray, right-click on the Sandboxie icon and goto DefaultBox –> Quick Recovery.
2) This will pop up the following window and show you the list of recently downloaded files that can be recovered to the real system. Select the files you want to recover and click on ‘Recover to Same Folder’ to recover in the downloaded folder itself. Files can also be recovered to other folders through respective options.
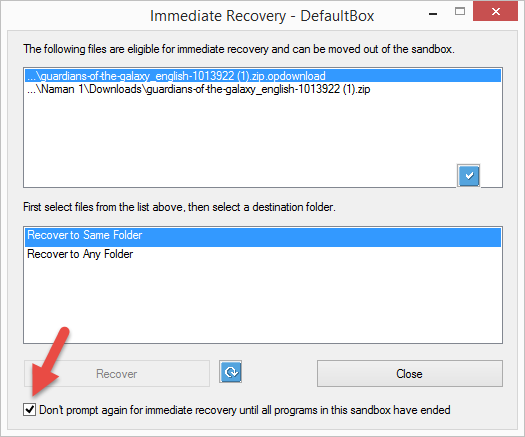
Note – When a file is downloaded in the sandboxed browser, Sandboxie also gives you a pop up of ‘Immediate Recovery’. Since this shows up every time you download a file, it may feel like a constant bugging. To turn it off simply select the indicated checkbox.
Now you are ready to surf the net without ever giving it a second thought again.
In conclusion, Sandboxie makes web surfing really secure and hassle free. Users can be assured that even if they encounter a malware, it will never be allowed to escape to the system environment. Moreover even the cookies will be deleted when you clear the Sandboxie contents through the Delete Contents option of the DefaultBox. This program thus keeps the user’s privacy as well as the system’s health under constant check. Note however that Sandboxie is not a substitute to an antivirus. Rather it adds an extra vigilance layer and couples the security. Use the Internet Responsibly.