 There are dozens of tools that will simply do the above mentioned task for you, but this free tool is among the best. I personally use Picture2Life to do my basic image editing jobs and I hope you will also enjoy using it. Carry on reading this tutorial to see how this tool can help you in maneuvering images.
Category: General
-
Create Collage, Animations or Edit Your Pictures Using Picture2life
-
How to Create Zip Files Online
Sometimes, you may want to create zip files online, without having to use an archiving utility such as Winzip or Winrar. You may have a bunch of files in your computer or in your cloud storage accounts and you may want to archive files online and send it to someone on Facebook, Gmail or share the zip files with friends.
Often times, I have found it extremely annoying to compress and zip files online. When I switched from a Windows environment to OSX – I could not use RAR formats (osx only supports .zip or .tar or .gz formats). Moreover, I tend to rely more on online tools rather than desktop applications hence I have prepared this list of online tools which lets you upload files from your computer, pack them into zip or rar formats and then you can send the file to anyone. These tools will also be useful when you want to unpack a zip file in your computer but do not have an archiving utility installed in your system
Use Gmail To Zip Files up to 25MB
If you have images, documents, PowerPoint presentations, excel spreadsheets or any other files that you would want to convert into a zip archive format, you can use your Gmail account to do that
1. Compose a new email message and upload the documents and images as attachments.
2. Send the email to yourself.
3. When you receive the email, you will notice a link to download all the files into a ZIP file.

That’s it. You have just converted the documents and images into zip files. Now you can download these attachments or send the zipped files to anyone else via email.
Related reading – Online tools to extract, convert and send zipped files.
Use Google Drive To Zip Word Documents, Spreadsheets and Presentations
Suppose you have a large number of official documents that you want to send to your friend. You cannot attach the zipped file because Gmail has a limit of 25 MB per attachment. And manually uploading files as an email attachment is certainly not an option as it will take hours to finish.
In that case, you can use Google drive to send zipped archives of up to 2 GB. Follow the steps mentioned below:
1. Open your Google Drive account, hit the “Upload” button and upload all the files and documents which you want to pack into an archive file. Please note that you can upload an entire folder in Google Drive and convert it to a ZIP file in one shot (no need to upload each file one by one).

2. When you are finished uploading, go to the “All Documents” tab and select the files you had just uploaded. Click the “More actions” button and select “Export”
3. Next, select the documents that you want to download as a zipped archive. If there are large number of documents to be converted into zipped format, you can request Gmail to email you the link when the zipping process is complete. After that, you can download all the documents as zipped archive from the download link which will be sent as a new email message.

Now, you can forward this email message to anyone as all the documents will be attached as a zip attachment. (also read: how to open excel spreadsheets without Microsoft office)
Online Utilities to Zip Files Online
Gmail and Google Drive works great but there can be situations when you may not want to use your Gmail acount for zipping and archiving files. There may be situations where you would want to use an online tool to zip files online, rather than just using Gmail.
NippyZip: NippyZip is a free online compression utility using which you can zip up to 10 files. You can email the zipped file to any email address and it works best when you are using a public computer and do not want to open your email account to do the job.

Nippyzip can compress files of size 5024 KB and you do not need to create an account or register with the site. When the compression is complete, you get an email which points you to a URL where you can download the zipped file.
Similar services: Createzipfiles.com
-
How to Completely Back up Your Blog in WordPress and Blogger
Back up is an important job every blogger or webmaster is concerned about. In case of a disaster, only a backup can save you and reinstate your site. Learn how you can completely back up your blogs in WordPress and Blogger.
-
Rotate desktop backgrounds automatically in XP using Microsoft’s own tool
On my previous article I’ve already explained how to rotate desktop backgrounds automatically in Windows 7. And I hope you also know that there are many 3rd party softwares that can perform this job for XP too. But did you know that Microsoft has their own tool to do this in XP and Vista?? Lets see what it is & how it helps.
-
How to Install a Local WordPress Blog and Transfer it in Web Server
You can install a local WordPress blog in your computer for various testing purposes. Using the local blog you can create new themes, plugins and perform other experiments. Here is a detailed guide on how to transfer the local WordPress blog in your web server with the same preferences, posts, plugins and themes.
-
How to Encrypt and Decrypt Files in Windows With Password Protection
Encryption is the process of converting data into a format that cannot be read by others. You can use some cool tools to encrypt files in Windows so that others cannot access your sensitive data.
-
How to Sync Bookmarks between Firefox, Chrome and Other Browsers Automatically
Google chrome, Firefox, Safari, Opera, Internet explorer- These are some (if not all) of the browsers that we use nowadays. The problem with using multiple browsers is that you have to manually export the bookmarks of one browser in to the another, which becomes impossible after some time.
-
3 ways to Manage WordPress Comments from Desktop
If you get a large number of comments in your WordPress blog you would prefer using a desktop tool to moderate WordPress comments. Here are some tools that let you approve, deny and delete the comments of your WordPress blog from desktop, without requiring the browser.
-
How to Appear Invisible in Facebook Chat
If you want to appear invisible in Facebook and do not want to show your online status to everyone, here is an easy way to appear offline in Facebook.
Before you go ahead with the steps, here is something you should know. You can remain invisible in Facebook chat for all of your Facebook friends or you can choose to remain unavailable or offline to selected friends. If you choose to remain offline for a select group of friends, they won’t know whether you are offline, online or available for chat. However, they can still send you instant chat messages and you would receive them in your “Messages” folder (also known as your Facebook message inbox).
Completely Turn Off Facebook Chat For All Your Friends
Login to your Facebook account, click the “Settings” icon in the right side chat sidebar and choose “Turn off chat”.
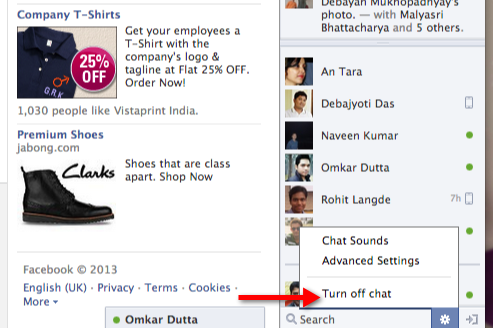
Once you turn off chat in Facebook, your Facebook friends will not see the little “green” icon against your name, whenever you login to your Facebook account. Precisely, your friends will have no clues whether you are online in Facebook or whether you are offline. However, if you are logged into your Facebook account from multiple devices, such as Android, iPhone, iPad – you must turn off Facebook chat from all your devices. For example, if you have turned off Facebook chat in iPhone and web but you have not turned off chat in Facebook’s Android application, your status will still be shown as “online”. Hence, in order to completely appear offline to all your Facebook friends, you must turn off Facebook chat on all devices where you have installed Facebook’s application.
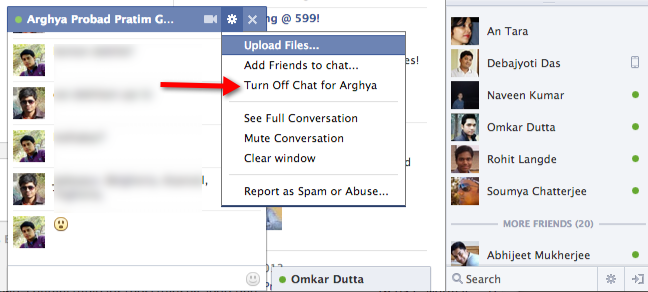
Disable Facebook Chat For Some Friends
Sometimes, you may want to appear invisible to some of your Facebook friends without having to disable chat completely. For example, you may want to block a specific friend from seeing your online status on Facebook and do not want him to know that you’re currently online and browsing Facebook. Here, it is a good idea to turn off Facebook chat for that specific friend and appear online for the rest.
To do this, select the friend from the chat sidebar and click the “Settings” icon in the chat window. Next, choose “Turn off chat” for the selected friend, an example is shown below:
Mute Conversations – Ignore Notifications For Facebook Chat Messages
Sometimes, you may want to turn off chat notifications instead of turning off chat for all or some of your Facebook friends. Facebook has a very interesting feature known as “Mute Conversation”, this allows you to stop push notifications for Facebook chat messages. When you mute a conversation, all chat notifications will be turned off for that conversation. You will continue to get messages from that specific friend but you won’t see any notification for that chat conversation in your mobile, Android, iPhone or in your Facebook account.
Here is how to mute a message or chat conversation in Facebook
When you are chatting with a friend or in a group, click the “Settings” icon from the chat window and select “Mute Conversation”. Here is an example:
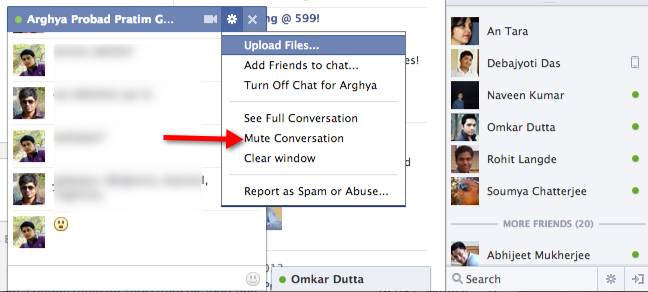 Muting will turn off push notifications on mobile and prevent chats from opening for this conversation.
Block Facebook Friends From Sending You Chat Messages
In your Facebook account, you can block specific friends and prevent them from sending you chat messages. You can block a seleted friend or an entire friend list, here is how:
1. Click the “Settings” icon in the chat window and choose “Advanced settings”
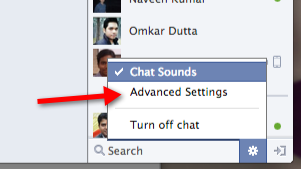
2. Select “Turn on chat for all friends except” and enter the name of the friend or friend list for whom you want to completely turn off chat.
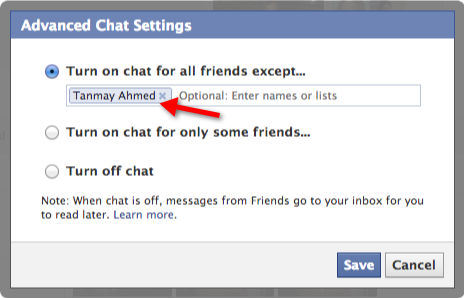
Done!
Please note that in order to appear invisible in Facebook, you must not be logged in to your Facebook account from a desktop chat client or from Skype
-
How to use Google Docs as a Blogging Tool and Post Blog Entries
Windows Live writer is by far the best blog editor but do you know that you can use Google docs as a blog editor and post blog entries directly from Google docs.
-
How to post long tweets that are more than 140 characters
Twitter being a place of large number of people we choose to talk a lot there. Making friends, or simply connections cannot suffice within just 140 characters that Twitter lets us to post as a tweet. Let us venture into the web for some nice tools that lets us break the barrier of text limitation & post long tweets with as many texts as we wish to.
-
An Interview with Raju of Technically Personal
Today we have with us Raju of Technically Personal. Technically Personal is a popular technology blog on web apps, online tools and useful software tips. With more than 3000 rss subscribers, TechPP has also been featured in CHIP magazine, a popular Technology magazine in India.
-
How to make a Deleted File Unrecoverable
What happens when we delete files from our computer using the Shift+Delete command ?? Well most of us think that the file is completely removed. But in actual case it is not. So what happens then ?? The files are allocated a space of memory in the physical hard drive every time we move it there.
And when we perform the most common permanent deletion that very allocated space is freed & gets ready for saving another file there. The deleted file remains recoverable until something else i.e. a new file replaces it. So how to permanently delete a file which makes it un-recoverable. In this post we will see to it.
-
5 Best Screen Capture Tools to Take and Share Screenshots
It is much easier to take a screenshot with the best screen capture tool than browse the entire internet for finding an appropriate image for your project. Whether you are working on a Windows operating system or a macOS, there are pre-defined shortcuts like –
- Pressing the PrtSc key on your Windows PC or laptop. This will take the screenshot and you can then paste the same into a word document or image editing application like Microsoft Paint.
- Pressing keyboard shortcuts on your macOS like [command]+[Shift]+[3] to capture the entire screen and [command]+[Shift]+[4] to capture a selected area and finding the image file on your desktop.
Yet, these methods do not give out concise results when it comes to creativity and editing, which is why online tools have been created to assist users in their creative endeavors. These tools work wonders for users as some of them not only have the capacity to capture images but also stills from videos as well!
So, here we are with 5 of the best Screen Capture tools to take and share screenshots that are available online for you to use.
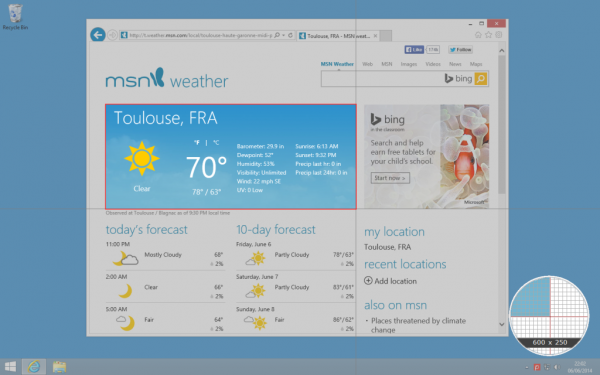
1. Lightshot
Lightshot is one of the best screen capture tools that is available for both Windows and Mac users. Users can download and install the application from the official website. Mac users can also download it from the Mac App Store. Here are the steps to install and use the tool –
Step 1: Install Lightshot from the official website.

Step 2: If you are on Windows, press the ‘PrtSrc Key’ on the keyboard and then left click on the screen that you want to capture and drag your mouse down. If you are on Mac, Use Command+Shift+4 shortcut to capture an area of the screen.
Step 3: After selecting the area that needs to be captured, you can adjust it as you want and click on the upload button around the margins of the selected area.

Step 4: Once the upload is complete, you will receive a link to the cloud where the image is saved to. You can save the link for future reference or choose to open it. Clicking on the link will open the screenshot in the cloud. You can even directly share the link on social media.

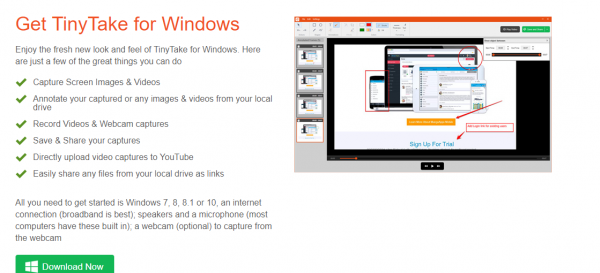
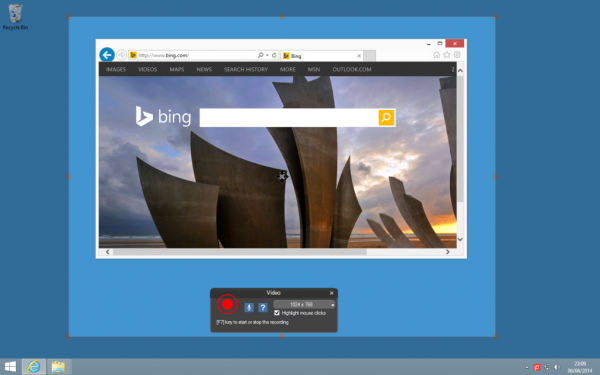
2. TinyTake
If you are looking for a screen capture tool to take and share screenshots without the risk of spyware, then TinyTake is another best screen capture tool. A product of MangoApps, this tool is compatible with both Windows and Mac PCs. The tool comes as a free version if intended for personal use.
Follow these steps to use the tool:
Step 1: Go to the official website and choose whether you want to download for Mac or Windows according to your PC.

Step 2: Once the download is complete, install the package into your system and launch it.
Step 3: After the launch, you will be asked for login credentials. Create a new Account accordingly.

Step 4: Once set up, the application keeps running in the background and can be used whenever required by utilizing the default hotkeys or by clicking on its icon on the home screen.
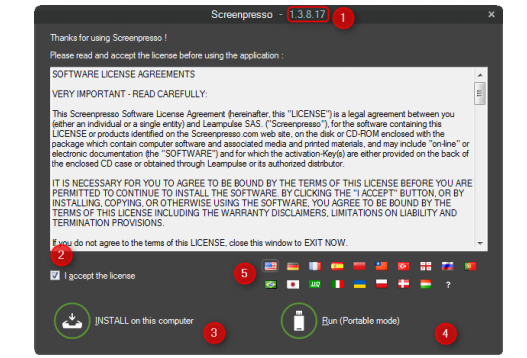
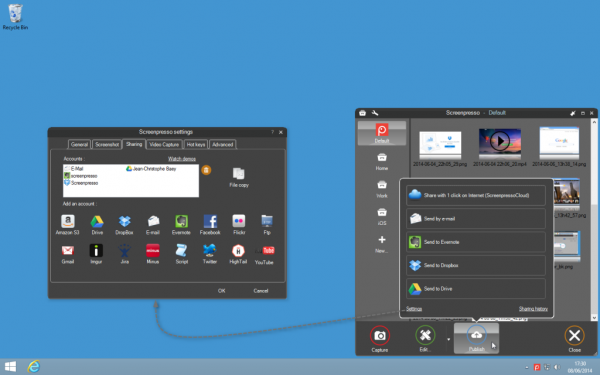
3. Screenpresso
Screenpresso is not just a capture tool. It also has the features of a built-in image editor. The tool is available for download for all versions of Windows only.
Step 1: Download Screenpresso from its official website.

Step 2: Run the downloaded software and choose the options suitable for your use.
Step 3: Once the tool is installed, it will magically assist you every time you press the Print screen key on Windows or Command+Shift+4 keys of Mac.
Step 4: The mouse will convert into a crosshair and you can choose the part of the screen that you want to capture with pixel-perfect accuracy.
Step 5: You can even choose to capture the screen as a Video for demonstration or presentation purposes.
Step 6: Once the image has been captured, you can also use the built-in image editor to make the necessary changes to the image.

Step 7: Once the final image is ready, it can now be easily shared online.
4. Jing
This best screen capture tool is a product of TechSmith and its special features that separate it from the rest is as follows –
- Sharing files with Jing is easy and fast
- Upon installing the screen capture tool, if you choose to create an account on Screencast.com, you can also set up the application to upload to their YouTube or Flickr account.
- You can remove any type of branding from your images and videos by upgrading to a premium account by just paying $15 annually.
Below are the steps to install and use Jing:
Step 1: Visit this link to download Jing for your Mac or Windows.

Step 2: You can also review what the system requirements are before you go ahead and download the file.
Step 3: Once downloaded, run the file. This will open a dialog box wherein you need to select the box which says “I accept the fine print” then select “Install”.
Step 4: After installation is complete, you will see a yellow semi-circle popping out from the corner of your screen. When you hover your mouse over it, you will be presented with three options. Select the Plus sign to get your desired screenshot.

Step 5: This will initiate a crosshair as shown below. Use this to select the screen area that you want to capture.

Step 6: Once selected, you will be able to see the image options.

Step 7: Click on Capture image to capture the screenshot. Alternatively, you can also capture a video.
Step 8: The image can also be annotated on the next screen that pops up using the tool options on the left.

Step 9: Once done, you can copy the image to the clipboard from where you can easily paste it into any required document.

5. Skitch
Skitch has been exclusively designed for Mac Pcs and can be downloaded from the Mac App Store. The main feature of this best screen capture tool is to help users to quickly edit and share screenshots. To install the Skitch tool and use it, follow the steps below-
Step 1: Download and install the Skitch tool from this link.

Step 2: Click finish and launch Skitch on your Mac.
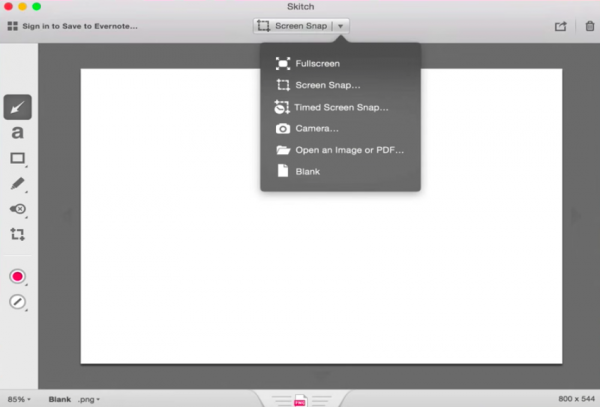
Step 3: The respective options can be used to take a fullscreen screenshot, a screen snap, or even a timed screen snap as required.
Step 4: The corresponding markup tools on the left-hand panel can then be used to edit the image accordingly.
Conclusion
With so many best screen capture tools at your disposal, there is no need to worry about using various software to edit your images. These 5 tools come with all the basic features that your image or video clip requires. If you have not used one yet, then it’s time that you give it a try. What are you waiting for?
-
An Interview With Kevin Muldoon From Blogging Tips
 Kevin Muldoon is the man behind Bloggingtips.com – a popular blog on blogging tips,news and resources for bloggers.Kevin has been blogging since 2000 and has an established company named System 0.Apart from Blogging at Bloggingtips.com he also runs a WordPress theme Website at Blogthemesclub,where he sells premium WordPress themes at an affordable price.
