How to Access BIOS in Older PCs

I believe, we have covered almost all the boot options we can work on using Windows 10 OS before. Now, as we have come so far, here is the brief detail on entering into the older PCs.
Before going further, we should know that the two choices are also available in Windows 8 and 8.1 options, that is, after Windows 7. I mean, UEFI and Legacy mode. And that’s why it is hard enough to see the key combination directing us to the BIOS settings, while the Fast startup is enabled. How fast? Well, the newer machines equipped with solid-state drive give you only 0.2 seconds (200 milliseconds) to enter the key combination at the time of starting the device. But, these are the cases with pre-installed Windows 8 or 8.1 with default UEFI settings. And if you have updated the OS yourself in your old computer, you don’t need to worry about the new system. These cases access the BIOS in the old conventional way.
Windows 8.1
In 8.1, the process of accessing the UEFI setup is almost the same as Windows 10, which we have explained here. In the case of the BIOS settings, we are not going to give another round of repetition, as it is the same as Windows 7.
- At first, navigate to the PC Settings from Start menu (Right side corner panel – click at the bottom to see it or click “Windows+C”).
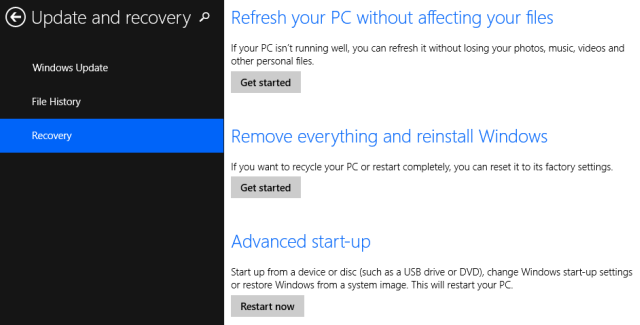
- Inside the “Settings” option, go to “Update and Recovery → Recovery → Advanced Startup → Restart Now”.
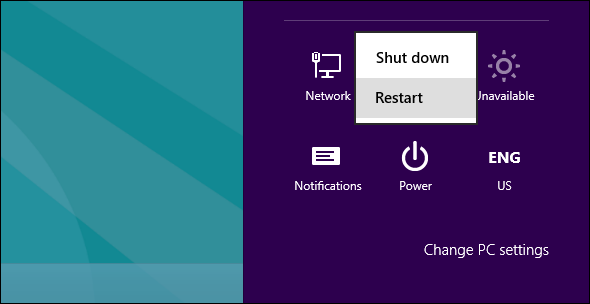
- Another way, you can hold on to the “Shift” key when you press the “Restart” button from the “Start” menu “Power” icon.
- This will take you to the boot option when the machine starts again.
- Here, you will see the UEFI mode as in Windows 10 before.
- The next part is the same as earlier.
- Navigate to “Troubleshoot → Advanced Options → UEFI Firmware Settings → Restart”. And, you are done. The booting process goes on automatically from now on.
Windows 8
Among all the ways you have already seen, we are going to select the simplest way to enter inside the BIOS setting in your Windows 8 machine. Let’s see how.
We are navigating through the PC settings here.
- At first, we need to press the key combination “Windows+C” from the keyboard to open the Charms Bar (Or you can click on the Right bottom corner of the PC as it was in Windows 8.1).
- Within it, hit the “Settings” option, and then choose “Change PC Settings” to make some alteration here.
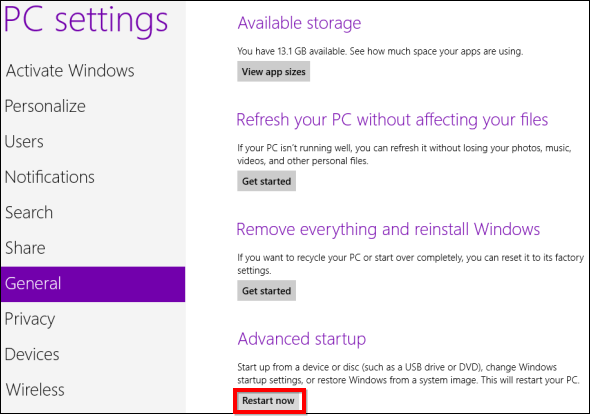
- Now, inside the PC settings, choose the “General” category, and then “Advanced Startup → Restart Now”.
- After the computer starts again, it will take you to the boot menu, where you can access the UEFI firmware settings, and make changes as needed.
- Again, the other option similar to Windows 8.1 is also available here. You can use the “Shift” key to hold on to, whenever you hit the “Restart” button from the “Power” mode in the Start menu.
- Another option available here is by using the command prompt. You just have to write down “shutdown.exe /r /o” in the command prompt window. After restarting the machine, it will take you to the boot option directly.
Windows 7 or Older
Finally, we have reached at Windows 7, where you don’t have to be confused between two options. No more talking, let’s deal with our old habit.
Right Moment to Enter the BIOS
Here, the moment is crucial. Because, if you can’t understand it, you can’t proceed any further.
- It’s between powering on the machine and the launching of the OS.
- If you see the logo of the specific OS, that means you have already missed the moment.
- In that case, you have to restart the machine again to reach there.
- The window may show you the message indicating the key for the BIOS setup.
- But, if you can’t see the message, the best option is to hold on to the exact key even before you turn on the machine, and until you can see the window for the BIOS settings.
- Here, the best way to know the definite key is by going through your user manual, or you can consult the manufacturer site. Because, the exact key varies based on the motherboard you have in your computer model.
- In older devices, it may not be one single key, instead of a key combination like Ctrl+Alt+Delete or, Ctrl+Alt+Esc.
- And lastly, are you sure that you are holding the right button, and still, it’s not working? Then, it is probably because some link is broken.
- If you are tired of trying, and no key seems to work in your PC, then it may have something to do with the keyboard. You can be sure on this, if you try with another keyboard or maybe another port. Because, when you have a PS/2 port, then in some cases, a PS/2 keyboard instead of a USB keyboard can solve your problem.
Inside the BIOS
Once you reach inside the BIOS settings, you may now boot the machine following the directions given, or you can make changes in the setup all you want.
Now, we have reached inside the BIOS. There is something we must know here. The firmware settings can be updated to newer versions too. And this can help you solve a lot of problems regarding the BIOS settings. So, we have shared some knowledge on that matter also, in our next topic. Let’s see if we can mitigate some BIOS fiasco in an updated version. Wanna try? Let’s go then.
Go to the next topic Upgrade BIOS in Windows PC.