Create, Organize and Label Groups of App Tiles in Windows 8 Metro Start Screen
What is the first thought that comes to you when you see Windows 8 Metro Start screen? Just a cool user interface, loaded with tiles of apps and programs you use frequently? There’s a little more to it.
Personally, Windows 8 metro start screen is really amazing with its graphical intelligence. Still there are some shortfalls and I often feel that it is a bit cluttered with dozens of app tiles pinned to it in a random manner. It’s tiring at times to locate a particular app.
That’s no wonder, no matter how useful Windows is, it’s always a little confusing and burdens you with a little extra step.
Are there workarounds to overcome this? Thankfully yes, here are some simple workarounds that will help you get the Metro Start working as it was intended to.
Create Groups for App Tiles In Windows 8 Metro Start Screen
Creating groups of similar apps can save that aforesaid time when you look for the required app tile on the start screen. Except that, I will suggest you to do this for one more reason. For giving it a personal touch and organize apps according to your requirements.
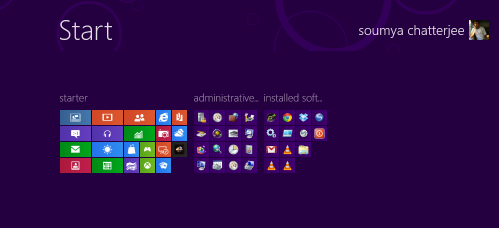
 It means this bar is actually separating two groups you are creating. Finish sorting according to your requirement and you are done with organizing the apps in separate panels.
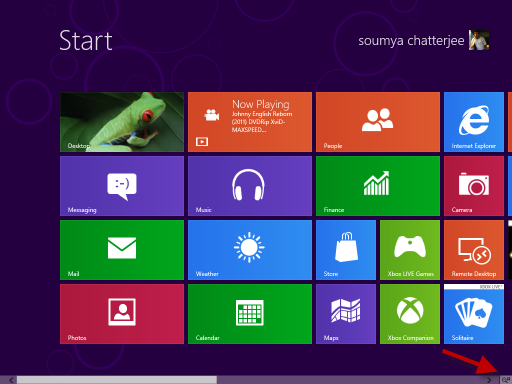 After clicking it you will get the following view.
Renaming App Tile Groups

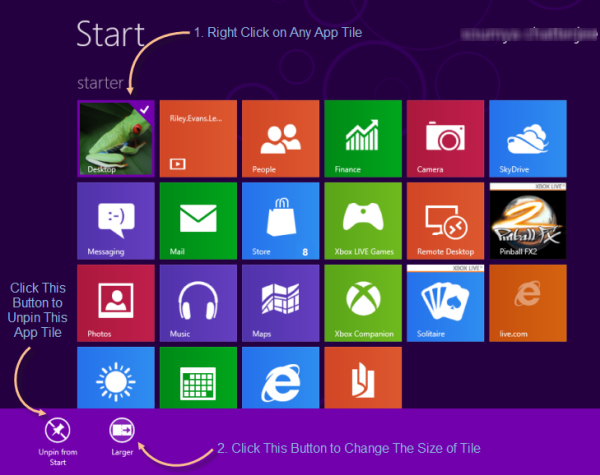
 You can always add or remove a particular app tile form any group depending on your choice and you can also swap the position of an entire group according for ease of access.
- Select the required tile you want to change size.
- Right click on it, taskbar will show up with the option Smaller or Bigger depending on the current size of that tile.
- Click the button to change the size of it.
Isn’t it real simple? If not, take help from the screenshot below:
- Go to Metro Start Screen and then tap or click on the Internet Explorer app tile.
- In the Address Bar type your favorite Web Address to go to that particular website.
- Click on the button showing pin icon on it and a window will pop up with an option to edit name of that tile.
- Choose a suitable name and hit Pin to Start next to it and your are done.

