How to Turn Off Windows Defender in Windows 10
Windows Defender is probably the best free anti spyware that is developed by Microsoft and available for only Windows users. Windows Defender was/is an in-built anti malware removal tool that can be turned on or off right from Control Panel. However, now, this has become quite difficult for a regular user to find out the options to turn on or turn off Windows Defender in Windows 10.
To install any other third party security shield aka antivirus, you must have to turn it off before starting the installation. Although, almost all antiviruses turn Windows Defender off and then install in your machine some antiviruses cannot do that. Therefore, you will encounter some problems if your Windows cannot detect your antivirus and doesn’t turn off Windows Defender.
Just for that reason, you should turn off Windows Defender manually in Windows 10 and the start the installation of any other third party antivirus. In previous versions of Windows, Windows Defender provided user-friendly options to turn it off. However, those options are removed from Windows 10.
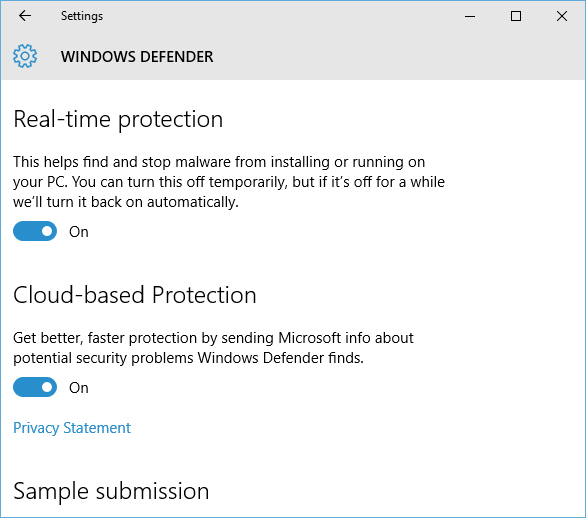
If you try to open the Windows Defender Settings in your Windows 10 PC, the brand new Settings Panel will be opened, from where you can turn off Real-time protection, cloud-based protection etc. But, you cannot disable Windows Defender totally. That means, you need to do something else to get things done.
Turn Off Windows Defender in Windows 10
You have two options to turn off Windows Defender in Windows 10. You can either use Group Policy Editor or Registry Editor to do so. Both options are available for free since those tools are already installed in your PC.
Turn Off Windows Defender in Windows 10 using Group Policy Editor
This is quite easy and user-friendly. The process is very simple. At first, open Group Policy Editor. To open that, just press Win + R, type gpedit.msc and hit enter. Following that, navigate through the following path,
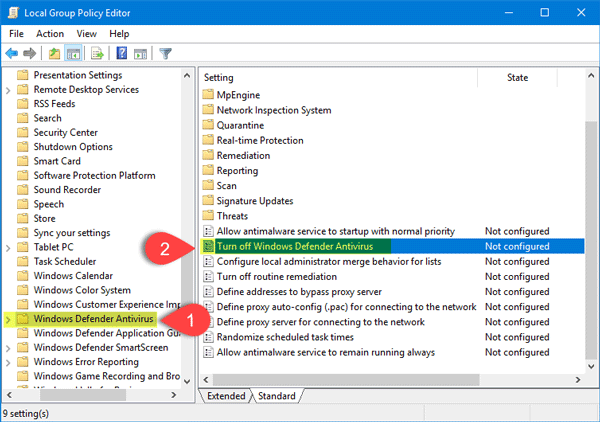
Computer Configuration >> Administrative Templates >> Windows Components >> Windows Defender Antivirus
On your right hand side, you will get an option called Turn off Windows Defender Antivirus.
Double-click on it to open the settings. Now, select Enabled and click on OK button.
That’s it! Your Windows Defender will be turned off immediately.
Turn Off Windows Defender in Windows 10 using Registry Editor
Although, this is also easy but we recommend you to use the Group Policy Editor to disable Windows Defender in Windows 10. However, before doing anything, make sure you have created a backup of your Registry files. In case anything goes wrong, you can use that backup.
At first, open Registry Editor. To do so, press Win + R, type regedit and hit enter. Now, click on YES on UAC. After that, navigate through the following path,
HKEY_LOCAL_MACHINE >> SOFTWARE >> Policies >> Microsoft >> Windows Defender
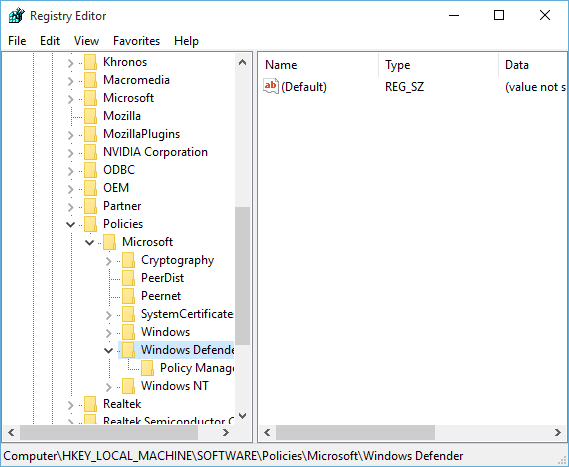
Now, you have to create a new DWORD (32-bit) Value. To create that, right click on empty space of your right hand side, select New and DWORD (32-bit) Value.
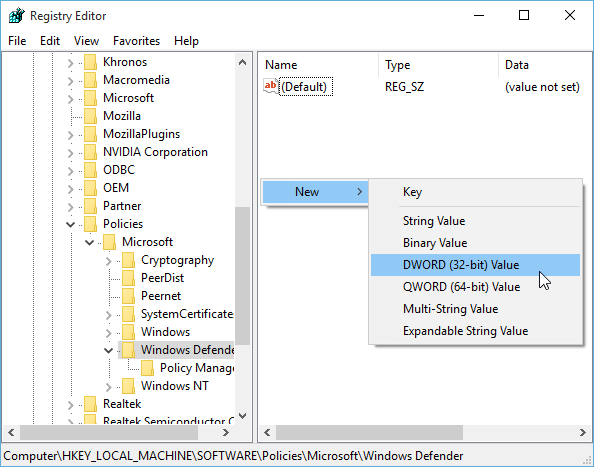
Now, name it DisableAntiSpyware.
There is no need to change the value of this key since by default, it should be 0.
That’s all! If you really need to disable Windows Defender, you can simply follow one of these two guides to do so.