Author: Sudip Majhi

  • What to Expect from Apple’s October 16 Event

    What to Expect from Apple’s October 16 Event

    It’s been more than a week since Apple has sent out invitations for their next event, which is going to be organized on October 16. Apple announced new iPhones and some new stuff for Apple lovers on September 9. On the other hand, they keep unveiling numerous new gadgets for consumers.

    Yet another event has been set on October 16. Obviously, there is a lot of expectations from this event. In all previous events, there was a difference between the expectations. However, almost all the people are presuming quite same stuffs to be announced. Here are some of them.

    iMac

    Expect from Apple’s October 16 Event

    27-inch iMac is available since past couple of years. That particular iMac is really a huge success for Apple. If you have been following Apple, you might have seen that Apple launched an entry-level 21.5-inch iMac in June 2014. It seems, we are going to be introduced to a brand new iMac for designers. According to some people, Apple can update their 27-inch iMac with some new specifications or improvements in display (most probably, Retina display) and performance.

    MacBook Air/Pro

    MacBook Air

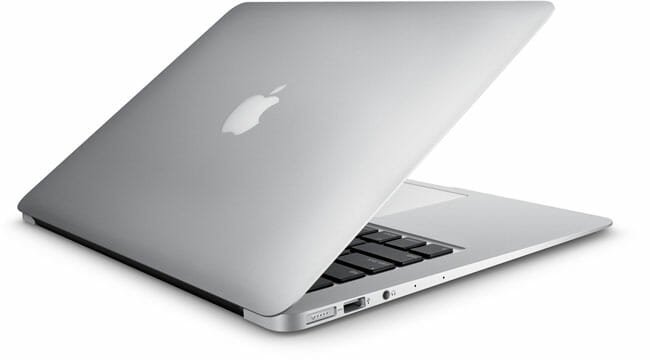
    Alike iMac, MacBook Air and Pro are available since past couple of years now. This good side of Apple is they update this MacBook series frequently. They have updated MacBook Pro with Retina display in July 2014. You can get 11-inch and 13-inch MacBook Air or 13-inch and 15-ich MacBook Pro. But, in this event, Apple can launch a 12-inch MacBook Air or Pro. On other hand, they can also update their total MacBook Pro line-up.

    Mac Mini

    Mac Mini

    Although, Mac Mini is not so good like MacBook or iMac but still it is much popular among those people who need Mac for any project or any part time work. But unfortunately, Apple has not updated this Mac Mini line-up since 2011. Their last update (July 2011) brought some new features in Mac Mini. Therefore, Apple can launch a new Mac Mini with some improvements to build another great market.

    iPad Mini

    iPad Mini

    Although, Apple often update their iPad Mini but they haven’t unveiled any major update since couple of months. So, there is a lot of expectation that Apple can unveil a new iPad Mini or iPad Mini 3. According to some people, Apple can bring Touch ID and other iPhone equipment in iPad Mini.

    Some Other Expected Announcements

    Apart from these aforementioned gadgets, there are more others expectations. You know that Apple introduced Handoff in one of their events in 2014. They only announced Handoff to get iOS notifications from Mac OS X Yosemite by that time. But, now they can launch it for consumers.

    On the other hand, OS X Yosemite is available as beta version. There is a chance to get it for everybody. Along with these stuffs, you can also get a new Apple TV and iPad Air with lot more enhancements.

    What do you expect from this event?

  • Mailbox is Now Available for Mac

    Mailbox is Now Available for Mac

    Mailbox, the best ever third party email app for iOS and Android is now available in beta version for Mac. Although, Mailbox is not listed in Mac App Store but you can get the set up image from the official website.

    You know that Mailbox is developed by Dropbox, which is yet another great cloud storage provider out there. When you are bored with using the Gmail app or native mail app on your iOS and Android device, Mailbox comes in. You can do a lot more things than in-built email application for both i.e. Android and iOS.

    Let’s take a deep look into Mailbox for Mac

    In August, Mailbox send out the beta release but that was just private among couple of developers. However, now, Mailbox is available at free of cost as the beta version for all the people around the world. You can install it on your Mac right away. You will get all the features on your Mac what iOS and Android version provide.

    Interface

    Mailbox for Mac User Interface

    The user interface is nothing but great. You can get a far better UI on Mac than the Android and iOS version. This UI is uncluttered. Actually, the color combination makes it even better. You will get black and white colors on the screen. On the other hand, all the features are organized nicely. In your left hand side, you will get all messages followed by some common options including Email ID(s), Lists, Archive Box, Spam folder and more others. In your right hand side, you can read your email. You cannot get much difference between web version of Gmail and Mailbox mail reader.

    Mailbox Setup

    After downloading, the first thing you will have to do is Sign In.

    Sign in to Mailbox

    Just sign in with your Dropbox log in credentials. After that, you can get the core Mailbox interface from where you can do anything.

    Mailbox Features

    As mentioned above, you will get all the features what Android and iOS versions provide. Anyway, here is a brief description.

    The first thing is swiping. You can swipe from left to right or vice versa in order to get some cool features. If you swipe from right to left, you can schedule any email. Just check the following image as a preference;

    Swiping Feautres in Mailbox for Mac

    Similarly, you will get those same options from top menu bar.

    Schedule Email in Mailbox

    If you want to move any email to “To Buy”, “To Watch” or any other list, just head over to the list icon that is located in the top menu bar and select any premade list.

    On the other hand, if you would like to archive any email or do something else, you can swipe more right to left and left to right.

    Mailbox Settings

    You will get couple of settings or options to run Mailbox according to your requirements.

    Accounts

    From this tab, you can sign out the current Email ID and use a different Dropbox ID in Mailbox. If you want to want to add multiple accounts, you will get the option in the same place.

    Mailbox for Mac account settings

    After adding more than one account, if you want to change the default email account, head over to the Default Address menu.

    Lists

    Mailbox for Mac List Settings

    By default, Mailbox has three different lists i.e. To Buy, To Watch and To Read. If you do not want to use them or want to add more list/label, just navigate to the Lists tab.

    Snoozes

    Mailbox Snooze Settings

    Mailbox has a great feature to schedule any email. You can be notified by Mailbox at predefined time. This tab will let you set up that schedule in a better way.

    Bottom Line

    There was no deficiency of email client for Mac but still it seems Mailbox has fulfilled everything. You can obviously use various email apps like AirMail, Apple Mail, Sparrow etc. But Mailbox can bear down all of them because of it’s features and minimalism. Hope you would like it.

  • Microsoft Launches Analog Keyboard for Android Wear Smartwatch

    Microsoft Launches Analog Keyboard for Android Wear Smartwatch

    If you are a wearable technology lover, I am sure that you have heard about Android Wear, which is a great platform for smartwatches. Android Wear is being developed by Google and as of now, Samsung Gear Live, LG G Watch and Moto 360 are launched with Android Wear. Actually, smartwatch is a great device you can own. It will let you notify for every call, SMS, email and so on. On the other hand, you can also use it like a stand-alone gadget.

    Android Wear keyboard by Microsoft

    Generally, Android Wear based smartwatch does anything using voice command. Whenever, you need to do something with your watch, you can give a command and your devoted gadget would do accordingly. But, you cannot use voice command all the time. For instance, you are in meeting and you must have to reply to an email. At such moment, you can use this latest application.

    To handle those types of situations, Microsoft has developed a third party analog keyboard that works by handwritten recognition. You can use this great handwriting keyboard to do anything i.e. reply to email, SMS, search on Google and more. Although, this is the first ever keyboard app for Android Wear based smartwatch but still it has some advantages as well as disadvantages.

    Microsoft Analog Keyboard Symbol Typing

    Pros and Cons of Microsoft’s Analog Keyboard

    Touch screen was introduced several years back and since then, it has been trending on almost all types of mobiles. But, there is a lot of changes in touch screen journey. Today’s touchscreen is either very small or comparatively bigger. For example, just check various smartwatch. You can find a 1.63-inch display in Samsung Gear Live. On the other hand, you will get 5.5-inch display in Apple iPhone 6 Plus. Therefore, developers can build a typing keyboard for iPhone 6 Plus (Example) but this is much difficult to do the same for Samsung Gear Live. Hence, Microsoft has launched this great app.

    Google Search using Microsoft analog Keyboard

    Advantages

    • Obviously, you can use your smartwatch even when you are in the meeting. Just start typing – forget voice command.
    • Some most common words like this, and will be auto-corrected. Microsoft wants bring word prediction. But this is not actually word prediction. It is auto-correction.

    As it comes with minimum features, the number of advantages is also pretty low.

    Disadvantages

    • It can recognize only lower case letters. You cannot write capital letters.
    • This is tested on Samsung Gear Live and Moto 360 only. Be aware, if you want to install it on LG G Watch.
    • The user interface may be melt down sometime because of the processor since most of smartwatches are using single core processor.

    There are also some other bugs in this keyboard application. Head over to this link to check everything. If you want to download this keyboard app for your smartwatch, check this link.

  • Ready Contact List – One of the Best Dialer Apps for Android

    Ready Contact List – One of the Best Dialer Apps for Android

    All mobiles have at least two common features. First, Call. Second, Message. You can send or receive messages on almost all mobiles and make or receive calls on the same mobile. No matter what kind of mobile or platform you are using, you will decisively get these two options. Therefore, we all have the knowledge about basic functions of call and message.

    Ready Contact List – One of the Best Dialer Apps for Android

    If you are using Android, you will certainly get these two features and corresponding applications i.e. Call and SMS. However, the problem is most of the people dislike the dialer pad and SMS interface. Although, Google has shown a beautiful visual design for Android L but older versions do not have that UI. That is where a third party dialer app comes in.

    Today, I am talking about Ready Contact List, which is a great free dialer app for Android. In sober fact, Ready Contact List is ready to deal with your contacts. You can consolidate your existing contacts as well as call logs using this great third party dialer application. To get started with this utility, you supposed to know that it is obtainable for Android 4.0 and later versions at free of cost.

    Let’s get started with Ready Contact List

    At first download Ready Contact List and install it in your mobile. The app starts working by creating an account. Yes! You should have an account in order to access this tool. Therefore, sign up to Ready Contact List using your Gmail ID. In fact, there is no other option to opt in with a different account.

    https://youtube.com/watch?v=6LOTsTYRtaI

    After signing up, you will get a little tutorial to start using it. You can skip it anyway. After that, it will show your call log. You can do variety of things using this screen. This is possible to save any number from this screen. To do so, just tap and hold on a number until you get a popup to go further.

    If you do the same with a saved number, you will get some options like TEXT, MEET etc. to send SMS and set a meeting. This is really a great feature of Ready Contact List. You can synchronize your existing calendar schedules with this app to set meeting.

    The next big thing is Dialer Pad. The dialer pad looks really awesome in terms of user interface. Actually, this is something like Android L’s dial pad.

    Ready Contact List Dialer pad

    To get your saved numbers, just swipe from right to left. You will get all your numbers sorted by name.

    Saved Numbers

    You know that Android offers two options when somebody calls you from an unknown number. Those options are Call back and Text. Although, Ready Contact List provides the same option but it shows a better interface.

    Options After Missing a Call

    You can also use those options for a saved mobile number. In addition, you will get Mail and Meet for a saved number.

    You can also get all entire call list of a specific number just swiping from bottom to top.

    Check Call List

    Bottom Line

    In a simple line, Ready Contact List can bear down many paid dialer apps for Android.  You must know that you will get all those aforementioned features at free of cost. This also has a paid version. You can purchase the premium version of Ready Contact List to get more options i.e. custom theme, custom notification etc.

    Image Credit: Flickr

  • Some Cool Tricks of Windows 10 Start Menu what You Do not Know

    Some Cool Tricks of Windows 10 Start Menu what You Do not Know

    If you are using Windows 10 Technical Preview, I am sure that you are contented with this latest Start Menu. Actually, Windows 10’s Start Menu can increase your productivity and workflow since this is an all-in-one Start Menu. This Start Menu can show live tiles, recently used files/folders, power options, library folders and more stuffs. In a simple line, Windows 10’s Start Menu is the best ever start menu what Microsoft has even made.

    Some Cool Tricks of Windows 10 Start Menu

    Today, I am going to introduce some cool tips and tricks what you can do with this Start Menu in order to get more out of it. You know that nothing is perfect and obviously there may perhaps tons of reasons why some people would not like it. Therefore, to make it one of the most lovable features of Windows 10, check these following tricks.

    Change Background Color of Start Menu

    By default, Windows 10 comes in Blue. You will Blue as Window border color, Start Menu background color and all the other places. However, you can easily change this color scheme within moments deprived of installing any third party software. Actually, if you change the color of Windows border, the Start Menu background color will be changed automatically. To change this color, just right click on the empty area of desktop and go to Personalize. Then, head over to Color menu and set a custom color.

    Change Background Color of Start Menu

    Don’t forget to save changes.

    Pin More Items in Start Menu

    By default, Windows 10’s Start Menu has pinned Documents, PC Settings, Pictures etc. If you have found it useless and would like to pin your own favorite programs, here you go. To change the pinned programs, at first right click on the Taskbar and click Properties. Then switch to Start Menu tab and expand the Customize menu.

    Pin More Items in Start Menu

    Now, you can use tick and untick to add or remove programs from the pinned list. If you get any problem, just hit the Use Default Settings button from the same window.

    Show/Hide Submenu on Hovering

    Expanded Folder in Start Menu

    Most of the apps show recently opened files or folders according to their function. For example, if you hover your mouse over Notepad, you will get all recently open Notepad files. Similarly, if you hover your mouse over File Explorer, you will get various folders including Desktop, System 32, Pictures etc. If you do not like to use this Start Menu function, here is a guide to disable submenu. To do so, right click on the Taskbar and select Properties. Switch to Start Menu tab and click on Customize button. Then untick the option that says Open submenus when I pause on them with the mouse pointer.

    Don’t forget to save your changes.

    Add Hibernate in Start Menu

    Add Hibernate in Start Menu

    By default, Windows 10’s Start Menu has Power button. This in-built Power button shows Sleep, Shut Down and Restart option. If you want to Hibernate in this power button, check the following steps. At first, press Win + X and go to Control Panel and Power Options respectively. Therefore, click on Choose what the power button does from your left pane. Now, you will get a link that says Change settings that are currently unavailable. After doing so, tick on Hibernate checkbox and save your changes.

    Add Default Programs in Start Menu

    By default, Windows 10’s Start Menu has only few couple of programs like Notepad etc. However, if you do not need then and want to add other programs like Wordpad or anything else, here is a trick. This is the simplest trick. Just open your Start Menu and search for that program. Then right click on a particular program and select Pin to Start.

    Pin Run in Start Menu

    That’s all!

    There are also some tricks what you can do with this brand new Start Menu. Stay tuned to get the second part.

    Image Credit: Flickr

  • Top 3 Password Manager Apps for Android

    Top 3 Password Manager Apps for Android

    If you are one of them, who often forget your so-called unique password, you should try a password manage service. Windows or Mac or Linux users can definitely use LastPass, Keepass, Sticky Password, 1Password and more other tools. However, the problem breaks out when someone wants to use a password manager for Android.

    This is the era of technology and certainly, technology has variety of glitches, security flaw etc. That is why you supposed to make your online account more secure. You can use two-step verification or something like that security layer to make your account secure. Otherwise, you have to make over all your online property to someone’s hand.

    Top 3 Password Manager Apps for Android

    The same thing happens with Android users as well. If you often forget your strong and unique passwords, obviously, you save them in your phone’s browser or applications. That is the biggest mistake. Whenever, someone will go to use your mobile, he/she can easily access your account since your log in details are already saved.

    However, if you use a password manager on your Android along with other devices, you can easily synchronize you r usernames and passwords within moments. The most important thing is you do not have to remember all your passwords one by one.

    Best password managers for Android

    Although, there are so many password manager applications available for Android, the following list contains only top three of them. You can use these apps on various platforms.

    Lastpass

    https://youtube.com/watch?v=RM0fzHxMASQ

    This is one of the best password manager apps for Android. This service is available for various platforms i.e. Android, Windows, browser extension, web etc. Lastpass works with almost all popular Android software and you can install the app on almost Android versions.

    Although, Lastpass is a free password management service but you have to lay out $12 per year to purchase the Android application after expiring the 14-days trial version. You can use your previously saved passwords, generate new strong password, create secure notes and perform a security check using this app. The user interface looks pretty good and not much cluttered.

    Important Note: Never ever save the Lastpass password in your app.

    Keeper

    It is yet another great password manage app for Android. The app is available not only for Android, but also you can get it on other platforms i.e. Windows, Mac, Linux, iOS, Windows Phone etc. The availability of this application makes it even more popular. Anyway, the Keep Android app is available for Android 2.3.3 and later versions.

    Generally, Keeper app is available at free of cost but you may have to purchase after using it for couple of days. By making use of this application, you can obviously manage your passwords along with create a secure file manager, auto-fill login and password, share password using private key encryption and more. This is also possible to setup a tw-factor authentication using Keeper app.

    mSecure

    https://youtube.com/watch?v=p7siAIz0DQA

    Alike other password managers, nSecure is also available for other platforms including iOS, Mac, Windows etc. Even though, mSecure for Mac and Windows is available as paid version but you can download it for Android at free of cost.

    mSecure can do numerous things like generate passwords, backup mSecure data to SD card automatically, destruct all data if someone attempts to unlock your data, lock apps automatically and so on. It comes with cloud synchronization as well. That means, all your data will be saved in selected cloud storage i.e. Dropbox.

    Final Word

    Wait! Wait! This is not the ultimate list of best password manager apps for Android. You can download some other good password managers like aWallet to remember your password.

    Hope at least you are using one of the all aforementioned password manager apps. What is your opinion?

  • Top 3 Third Party Keyboard for iOS 8

    Top 3 Third Party Keyboard for iOS 8

    iOS 8 brings a lot of improvements in visual design as well as performance. If your iPhone is capable to be upgraded to iOS 8, you are lucky to get some awesome new features including the keyboard. The in-built iOS 8 keyboard is far better than previous keyboards. According to Apple, you can type an entire sentence with couple of taps since iOS 8 keyboard predicts your next word faster and correctly.

    Top 3 Third Party Keyboard for iOS 8

    iOS 8 also supports third-party keyboards. This is the first time ever iOS lets you install third party keyboard app. Therefore, now you have couple of keyboards apart from in-built keyboard. If you are looking for any third party keyboard app for iOS 8, here you go.

    Best third party keyboards for iOS 8

    Although, there are couple of keyboards available for iOS 8 but the following list contains only useful apps.

    Swiftkey

    Swiftkey for iOS 8

    This is one of the best free keyboards available for iOS 8. Certainly, you can get tons of useful features those will aid you to type even faster. According to Swiftkey, you can write entire sentence without typing using this keyboard app. Swiftkey is available in variety of languages including English, Portuguese, French, German etc. This app can predict next word really faster, reduce keystrokes and so on. This is also possible to type by swiping and this is where it excels.

    You can sign up to cloud using Facebook or Google Plus. This will help you to teach Swiftkey your writing style. Hence, you will get better word prediction.

    Fleksy

    Fleksy for iOS 8

    This is yet another great keyboard app for iOS 8. You can use gesture like Swiftkey in Fleksy as well. On the other hand, you can use various themes and color combination in your keyboard using Fleksy. Alike most of the popular keyboard apps, it can also predict your next word while typing. The most interesting feature of Fleksy is you can resize the lay out of the keyboard. Suppose, you need little bit bigger screen to check something as well as typing. At such moment, you can make your keyboard size smaller. Fleksy is available in different languages including English, Arabic, Italian, Portuguese, Russian and more others.

    Swype

    Swype for iOS 8

    Alike Fleksy, Swype costs only $0.99 but the features worth more than that. You know that Swype is a popular keyboard app available for Android. Now, you can get this brilliant application for iOS 8 too. This keyboard has some great features like gesture typing, personal dictionary setup, custom dictionary behavior, next word prediction, auto correction, phrase correction and more. In terms of customization, this is also great. It comes with in-built awesome looking themes. You can choose any one of them right after installing it.

    Wrap Up

    Although, third party keyboard was a major development part of Android platform, now it has come in iOS as well. Most of the reputed developers have already launched their keyboard app for iOS 8. But still there are so many developers who have been building another brilliant keyboard.

    Anyway, which one is the best keyboard app for iOS 8? Do you use any third party keyboard?

  • What is New in Windows 10?

    What is New in Windows 10?

    Surprised? You should be surprised because Microsoft has just announced Windows 10 and skip over Windows 9 at their event on September 30. Windows 10 is going to be the ultimate destination for kids to IT Pros. According to Microsoft, Windows 10 is for gaming addicts, CEO’s , engineers, journalists and for everybody around the world.

    The field to grow up a platform is changed but still developers has less time to devote to develop yet another version of operating system for personal computer. Everybody is busy with his or her daily schedule and everyone must have a device to operate himself/herself. Tech gadgets are managing today’s people.

    Windows 10

    According to Microsoft and almost all the Windows lovers, this is the perfect time to launch yet another version of Windows that will be an innovative move. Microsoft has done the same what they should do in Windows 8 or at least Windows 8.1. Windows 10 is such a ground-breaking development that should be arrived in the place of Windows 8.

    As per Microsoft’s announcement, there will be only one store for one platform from one product family. As of now, Microsoft has not launched the tech preview version of Windows 10. However, it seems, today they will launch the tech preview at here. Before getting a brand new operating system for your personal computer, here is some most trending features list.

    New features of Windows 10

    http://www.youtube.com/watch?v=84NI5fjTfpQ

    Start Menu

    Windows 10 Start Menu

    The long awaited Start Menu is back again in Windows 10. Microsoft launched Windows 8 without any Start Menu. Hence, most of the Windows lovers were disappointed. After Windows 8, Microsoft launched Windows 8.1 but a Start Menu like button in the same place. That was even more frustrating. However, Windows 10 is coming soon with a dedicated Start Menu that will let you do even more that previous. By making use of this start menu, you can search for any app, document etc. On the other hand, Start Menu will show you live tile. In a single line, Windows 10’s Start Menu is going to be a compact version of Windows 8 and Windows 8.1’s Metro Screen or Start Screen.

    Metro Apps in Windows

    Windows 10 App Commands

    Numerous developers developed some third party software to resize the screen of Metro based applications. Those tools are going to be useless in Windows 10 since Windows 10 has the option to resize the metro based running applications. In Windows 10, you would be able to resize the window and run it as per your need.

    Snap Enhancement

    Previously, all Windows versions allowed users to snap only two windows on the screen. However, the brand new Windows 10 will allow users to have four apps snapped on a single screen. That means, you can divide your screen in four parts and each part will be able to contain an app window.

    Task-View Button

    Microsoft has developed this platform for different types of devices. Hence, they have added a brand new Task-View button in the taskbar to check what is going on currently. You will get an additional button in taskbar. By making use of this button, you can check running apps and switch from one app to any other. This is something like Android’s recent app list. On the other hand, it will eliminate Alt + Tab buttons as well.

    Virtual Desktop

    Windows 10 Virtual Desktop

    This is going to be the most exciting feature of Windows 10. Alike Ubuntu’s workplace, now you can manage your opened apps in different virtual desktop. A single click will help you to get another clean desktop and you can open as many desktops as you want.

    Final Word

    Now, you just have to wait for some time to get the experience of Windows 10. Do not forget to share your experience with Windows 10 technical preview. Stay tuned – we will provide more information about Windows 10.

  • Where to Get Royalty Free Images for Your Next Project?

    Where to Get Royalty Free Images for Your Next Project?

    If you often face problems to get images without any copyright issue, here are some most possible solutions. By making use of these royalty free images, you won’t get into trouble like copyright void etc.

    Generally, newbie bloggers face this problem and this is a common issue among bloggers. Most of the newcomers use regular Google Image Search to find relevant images to their blog post. If you have done this previously, this is recommended to stop doing this particular thing. This is nothing but piracy because you are voiding someone’s copyright.

    Where to Get Royalty Free Images for Your Next Project

    You cannot even download image from any other blog, remove the Exif data and then upload that to your blog. In this way, you are ignoring that primary blog’s copyright and that blog owner has the right to take legal step over you.

    So, how to find royalty free image to use in blog post or any offline project?

    This is a common question among some freelance writers as well. I have personally seen some people to use regular Flickr search to get attractive images. That is not actually correct. Not even all Flickr images are applicable to use in your blog or anywhere else.

    Some reliable sources to get free images

    Obviously, you can use various premium image production services like Shutterstock, iStockPhoto, GraphicStock and more others. However, they seem much expensive when you want to get image for a single project or blog post.

    Flickr Advanced Search

    You can use Flickr’s Advanced Search option to find copyright free images. Although, they are not on public domain but still you can use those images by giving a simple credit. But to use Flickr’s images, you will have to understand different Creative Commons Licenses. Flickr’s images are attributed by different CC licenses. For instance, CC 2.0 etc. protect some images. You can easily use CC 2.0 images by giving proper credit to the original source.

    Pixabay

    This is yet another great source to find awesome images. According to the Terms of Use of Pixabay, you can freely download and use their images. All of their images are bound to Creative Commons Deed CC0. That means, you can use Pixabay images without giving any credit. However, as per Pixabay, a little credit link would be nice.

    Nevertheless, you should note that, you could not use their image in any illegal purpose or any pornographic website.

     Google Image Search

    This is true that you cannot use all images from Google Image Search. But not all of their images are copyrighted. You can also find royalty free images using Google Image Search. You just have to do a small trick. At first, search an image using any keyword. Then click the Search Tools button and expand the Usage Rights link. You will get some rights i.e. Labeled for reuse with modification, labeled for reuse etc.

    Google Image Search Usage Rights

    Choose a particular right and download image to use them.

    Getty Images

    This is one of the most popular stock photo providers out there. However, Getty Images also provide some royalty free images for everyone. Anybody can use their images. However, they have only one restriction. You cannot edit their images and you have to use their native code to embed image on any webpage. To find royalty free images, go to Getty Images and search using any keyword. After that, filter the search by Royalty Free. You will get some image with an embed icon. Just click that button and copy the code to paste on your webpage.

    Freepik

    Actually, Freepik is for designers. But nowadays, everyone is using this website to down royal-free images. Not only photos but also you can get vectors, PSD and icons at Freepik. But you should remember that a credit link is must whenever you use Freepik.

    Bottom Line

    I hope that you will get tons of attractive images from these above-mentioned resources. Also, remember that never ever use copyrighted images using Print Screen. That is the nothing but an offense.

  • How to Add More Folders in This PC in Windows 8 and 8.1

    How to Add More Folders in This PC in Windows 8 and 8.1

    Microsoft has changed numerous things in Windows 8 as well as Windows 8.1. In the initial days, there was a My Computer. After that, it became Computer and now it is This PC. If you are a Windows 8 or Windows 8.1 users, I am sure that you are familiar with This PC that will let you do whatever My Computer did.

    This PC shows all your partitions, Removable Storage and some library folders (only in Windows 8.1). Actually, these folders and all other sections are pretty good and helpful to get anything quickly what you wish. But, what if you want to remove those Library folders and want to add your own favourite folder or shortcuts in the same place?

    If you wish to add your own folders and other app shortcuts in My Computer or This PC, here are two different solutions. By making use of any one of these following workaround, you can easily add any type of folder in This PC within moments.

    First Solution

    This is great and you do not have to install any third party software. You can do this using a command. Therefore, at first, open your command prompt by pressing Win + R and enter %appdata%. Then navigate to the following area;

    Add More Folders in This PC in Windows 8 and 8.1

    Microsoft >> Windows >> Network Shortcuts

    Alternatively, you can navigate to the following place;

    Username >> Appdata >> Roaming >> Microsoft >> Windows >> Network Shortcuts

    Note: By default, Appdata folder in hidden.

    Anyway, now you can add any folder or app shortcut inside Network Shortcuts folder.

    Second Solution

    If you think that this aforementioned process is much time consuming, here is the faster method. There is a software called This PC Tweaker. It is a free software available for Windows 7, 8 and 8.1. The most exciting thing is it is portable.

    At first, download and run this app on your PC. You will get a window something like the following picture;

    This PC Tweaker UI

    The interface looks uncluttered. On the other hand, This PC Tweaker is a very easy to use application. To add any folder in this PC, just click on Add Custom Folder and select that. You can also rename it according to your wish.

    Rename Folder before adding

    In Windows 8.1, you can remove library folders by making use of This PC Tweaker. To remove any library folder or any other folder, just select that and hit the Remove Selected button.

    Remove Folder from This PC

    It app can also add some other control panel features in This PC. You can add Action Center, All Tasks, Font Settings, Games, File History and all the other options in the same place. To add any control panel feature, click the Add Shell Location and select what you want to add.

    Add Shell Location

    If you think that, you have messed up with this tool, simply select Restore Defaults button. It will revert all the changes within seconds.

    Hope this tiny software would be helpful for you to customize This PC or My Computer of your Windows. Don’t forget to share your view with us.

  • Top Five Free Online Code Editors

    Top Five Free Online Code Editors

    These days, most of the people are learning programming to develop their own apps or/and to start online business. You know that programming is such a thing that connects you to your PC and internet. Programming is everywhere. Every gadget is running on correct programming. That is why it is a programming era.

    Top Five Free Online Code Editors

    People, who have much knowledge about programming languages, always do something more than regular folks. Anyway, to start programming, you should have a good code editor to be installed on your PC or Mac. Although, there are so many brilliant code editors like Notepad++, Sublime Text, TED Notepad etc. but all of them have their own drawback. For example, if you use Notepad++, you cannot edit or write your code when you don’t have a PC. Moreover, more problems those are similar to this come in when you are using offline code editors. That’s why today I am going to introduce some most popular online code editors for you. Online code editors are somehow better than offline editors are since you can edit your code anytime from anywhere. You just need an internet connection and that is all.

    Most popular online code editors

    Even though, there are so many online code editors but today I have chosen only few of them. You are always welcome to share your view.

    Codeanywhere

    This is one of the best online code editors for you if you have started coding few days back. This is free and less annoying. The tree view interface helps you to organize code files in a better way. You just have to sign up to get all it’s features within moments. You can divide your screen in multiple windows to write code faster.

    On the other hand, you can save your written codes in their website and manage them later. This is also possible to connect to remote servers via SSH, open multiple connections, and use it just like terminal window and lot more.

    The most interesting thing, is you can download Codeanywhere app for most of the major platforms including iOS, Android, Windows, Blackberry and so on.

    Collabedit

    The most destruction free online code editor that is available at free of cost. You do not have to create any account or pay a single cent to start writing your codes. You just have to enter your name and start writing your codes.

    Collabedit will help you to write most of the major programming languages like C, C++, C#, PHP, Ruby, JS, Java and so on. The interface will be changed according to the programming language. If you want to download your written code file, just click on Download link that is located at the top of your screen.

    JSFiddle

    This is yet another great online code editor for JavaScript lovers. JSFiddle is mainly for JS coding experts. The interface looks awesome and much eye catchy. You just have to create an account and start writing your codes. The most interesting thing is you can run your code inside your browser.

    You can write HTML, CSS and JavaScript and run them in your browser window. If you have made an account, you can also save your written code and manage them later, whenever you want.

    This is also possible to embed your live code in any webpage. On the other hand, you can share your file with anyone via n unique link.

    IDEOne

    IDEOne is one of the best online code editors for them want to get most out of an online editor. This is also a free online code editor or writer, where you can write C, C#, C++. Java, VB.NET, SQL, PHP, Lua, Perl and some other most popular programming languages.

    Although, it has an option to create account but I would not reckoned you to do so since you can all the things without having an account. This is also possible to share your code privately. On the other hand, you can run your code inside your browser and find it if there is any error or not.

    Pastebin

    PasteBin is one of my favorite online code editors. You can use Pastebin to share your codes, online review etc. However, I often use it to write codes.

    It has a plain text editor where you can write anything. The security of this editor is pretty good. You can make your codes private as well as public. You can write most useful programming languages including C, C#, PHP, Python, JavaScript, Java, Rails, HTML 5 and so on.

    Bottom Line

    I know there are also so many online code editors like GitHub Gist. However, I have mentioned only less annoying and free of cost online code editors.

    What is your favorite online code editor? Do share your view with us.

    Image Credit: Flickr

  • System Mechanic – All in One System Optimizer for Windows

    System Mechanic – All in One System Optimizer for Windows

    Windows recollects some odd temporary files whenever it performs anything. This is the actual reason why most of the Windows computers become comparatively slower than initial days. However, the solution is simple. You just need to cut off those temporary files so that Windows can on it’s way.

    Manage Computer Parts

    Generally, you can go to Temporary folder (%temp%) to delete some temporary files what Windows has stored previously. Nevertheless, that doesn’t look a good solution at all. Not only these temporary files but also your Windows PC has tons of Registry error what can create different types of issue.

    This is where a third party software i.e. System Mechanic comes in. If your PC has been suffering from different problems and you would like to revive it, System Mechanic supposed to be your solution. Actually, this is an all-in-one system optimization software and it can deal with numerous stuffs i.e. temporary files, PC security, recovery, performance enhancement and so on.

    Take a deep look into System Mechanic

    First thing needs to say at first. This is damn easy to use software available for Windows. Although, it costs $69.95 but you can use the trial version for thirty days.

    System Mechanic Features

    The feature list is quite long and impressive. Generally, most of the other software provides only one or two features at the same price but it offers more than ten useful features.

    Scan and Repair

    This is the basic and first option of System Mechanic. System Mechanic performs a quick or deep scan (as per request) to check whether you have registry error, startup issue, data conflicts, security vulnerabilities etc. However, the Deep scan does a lot of more things.

    After completing a scan, it show a result like the following picture;

    System Mechanic Problems

    You have two options. Either you can click the Repair All button to repair all problems or you can click the View Problems button to check your issues.

    If you click the View Problems button, you will get a window as follows;

    View Problems in System Mechanic

    From this window, you can select or deselect issues before repairing.

    Automated Tasks

    This is the most time saving option of System Mechanic. Certainly, you can manage your system manually. But System Mechanic can also do the same thing on your behalf. It can do all the following things automatically;

    • Repair security vulnerabilities
    • Backup registry entries
    • Scan for spyware and viruses
    • Clean up system clutter
    • Download and install updated Tune-Up definitions
    • Repair core data files
    • Repair registry problems and broken shortcuts
    • Repair hard drive errors
    • Analyze startup configuration
    • Optimize system drive
    • Recover unused memory
    • Defrag and compact memory

    All-in-One Tools

    This is the heart of System Mechanic because this part does many things using couple of options. This All-in-One section contains PC Accelerator, PC Repair, PC Cleanup, PC Security and Total Registry Revitalizer.

    System Mechanic All in one tool

    PC Accelerator can supercharge your PC by eliminating unwanted programs and running different enhancement tools.

    PC Repair can repair your PC in terms of registry files, broken internet connections etc.

    PC Cleanup can recover your unused hard drive memory (defragment), temporary files, registry error and more others.

    PC Security is usually used to remove all security flaws from your system.

    The most exciting feature of System Mechanic is you can anyone of those aforementioned tools in either bulk or one by one. For example, if you want to cleanup your registry editor, you can use only registry editor cleaner.

    Bottom Line

    Windows has tons of other software those comes under same category but System Mechanic is a compact version of all of those software. This is where it excels. On the other hand, the price is also not so high.

  • How to Get iOS 7 Like Control Center on Mac

    How to Get iOS 7 Like Control Center on Mac

    iOS 8 is launched. Still, iOS 7 is pretty different and much better than it’s lower versions. It comes with an awesome user interface. iOS 7 offers additional new functions as compared to other versions and “Control Center” is one of them.

    Control Center is such a great control panel that could help you to do something faster. Let’s assume, you want to turn off Wi-Fi or bluetooth, simply swipe from bottom to up and tap on corresponding button. That’s all you have to do. Besides Wi-Fi or bluetooth you can do so many things including access music player (iTunes), change brightness, access camera app and more others.

    Get iOS 7 Like Control Center on Mac

    Nevertheless, all those things were possible only on iOS 7 devices. However, if you want to get such a control center for Mac, here is the method to get so. There is an app called Control Center that will bring a control center just same as iOS 7. This is a premium software that costs only $7 but you can still try it for free as a trial version.

    Features of Control Center for Mac

    Although there are so many features included in this Control Center for Mac but I would like to mention only useful features in following lines.

    • Timer to turn off Mac
    • Toggle Wi-Fi
    • Toggle bluetooth
    • Adjust brightness
    • Access music player (iTunes and Spotify)
    • Check CPU usage
    • Download and Upload speed
    • Public and Local IP address
    • Options to hide desktop icons
    • show or hide hidden files
    • show or hide library folder
    • show or hide file extensions
    • show or hide Spotlight icon
    • Mission Control and lot more
    • Create quick note

    Get started with Control Center for Mac

    This is actually very easy to use and less annoying in terms of ease of access. After installing it on your Mac, you will get a screen something like the following picture:

    Control Center for Mac First Look

    Just go through the option to turn on Control Center on your Mac. After opening it, you will get an additional window in your left side and that is what you need.

    Control Center for Mac

    Right from this small window, you can control all aforementioned things easily.

    Control Center for Mac Settings

    After installing and opening it on your Mac, you will get an extra button in your menu bar. Just click on it to expand the settings.

    Control Center for Mac Settings Menu Bar

    This settings pane will let you personalize it according to your wish. For example, you can put the Control Center window from left to right or anywhere else. On the other hand, you can also change the panel color, text color, theme etc. from the second tab.

    Control Center for Mac Settings

    Bottom Line

    There is no doubt that this Control Center for Mac is good or bad. However, the only annoying thing is it shows the window on your screen continuously. Hence, it will be pretty difficult for you access the buttons or text that is under the Control Center window. Apart from that, this is just awesome.  Hope this review would help you a lot.

    Do you think that you need a control center for Mac? If yes, then why? If no, then why?

    Image Credit: Flickr

  • Top 5 Third Party Android Keyboard Apps

    Android is one of the best platforms out there. Everything you need is available on Android. By default, Android has several features, which is good but not up to the mark. Google should set about improvement as soon as possible. Some of those “can be improved” features are default Android keyboard, UI etc. Google should add some features like gesture typing or emoji etc.

    However, some third party keyboard apps have augmented the users’ expectation. Google Play Store is covered with tons of free and advanced keyboard apps those may be useful for you. In the following list, I am going to introduce some most popular third party keyboard apps for Android.

    Best third party keyboard apps for Android

    SwiftKey

    We have previously introduced SwiftKey, which is available for both Android phone and tablet. You know that SwiftKey is a gesture typing keyboard app that predicts the forthcoming word very quickly. SwiftKey is available at free of cost for Android 2.3. It adds not only a regular keyboard but also some emojis, themes etc. The autocorrect system of SwiftKey is far better than in-built on screen keyboard. The most interesting thing is, you can download and use various languages right from a single keyboard.

    Android L Keyboard

    Android L Keyboard Logo

    You might have already heard about Android L, the most recent version of Android. Although, Google has not launched any smartphone along with Android L, you can get the Android L keyboard on your any Android device. This brilliant keyboard app is developed by Short Stack and available at free of cost. This is the smallest keyboard app with a huge approach. The keyboard looks pretty good and uncluttered. Many Android developers have already told that most of the Android L’s UI would be flat and Android L keyboard app is the proof.

    Download Android L Keyboard from Google Play | XDA-Developers Forum

    GO Keyboard

    GO Keyboard - best android keyboard

    This is the most customizable keyboard app out there. You can use 10k+ themes after downloading them right from the app. By default, it doesn’t have any emoji. If you want to get some emoji, you can download the corresponding plugin too. The word correction system is better than even SwiftKey. The most interesting feature of GO Keyboard is you can use it is various layoutsi.e. QWERTY or QWERTZ etc. Google Play offers this app without any purchase but it requires in-app purchase if you want more features. Gesture typing is also available in this keyboard app.

    Fleksy

    Fleksy Keyboard App for Android

    Fleksy is available for Android for a long time now. Even they have developed the Fleksy app for iOS 8 as well. Anyway, Fleksy for Android is obtainable for Android 4.0+. This is as good as aforementioned keyboard applications. You will get incredible autocorrect system and gesture typing option through Fleksy. In this keyboard, you do not have to purchase or download any other plugin to get emojis since they are available by default. Fleksy supports plenty of languages e.g. English, Spanish, French, German and more others.

    TouchPal

    https://youtube.com/watch?v=jPr6kQeGjD4

    This is yet another third party keyboard app that comes with gesture typing. Alike other keyboard apps, it also has hundreds of emoji. You can save your settings and all word predictions to respective cloud storage so that you can use them even after reinstalling. TouchPal keyboard has some awesome looking themes as well and all these above-mentioned things come at free of cost. Just like GO Keyboard, you can use TouchPal in different layouts.

    Final Word

    Obviously, there are many other third party keyboard apps available for Android and most of them are different from one another. Just try and know which one works better on your phone.