How to change account type in Windows 10
Although few features of Windows 10 have been narrowed down yet, you can find few things easier than earlier. Windows 10 allows users to add different types of account. For example, there are a guest account, standard account as well as an administrator account. Obviously, each of them has a different kind of features. In other words, a Windows 10 user can give a particular type of account to someone to do a particular kind of job. However, if you have mistakenly added a wrong account to someone, here is how to change account type in Windows 10 without using any third party software.
Accounts simplified
As said before, there are three types of accounts i.e. guest account, standard account, and administrator account.
Guest Account – This kind of account has been discontinued. Nevertheless, this is possible to create a guest account in Windows 10 using a simple command. If someone has a guest account, he/she cannot do anything except browsing the computer. This is not possible to install/uninstall any software or do anything sensitive having a guest account.
Standard Account – You have a standard account on your machine. With the help of standard account, you can do almost all things except few. You can install/uninstall software, open different apps and do more.
Administrator Account – Administrator account holders of a PC can do everything. From removing a user account to changing their password – everything is possible having an Administrator account.
Change Account Type in Windows 10
Warning: This is imperative to understand the lines mentioned above. Otherwise, you will end up giving access to your sensitive files to someone by changing the account type in Windows 10 machine.
If you are okay with the T&C as mentioned above, you can go ahead and modify the account type using these following methods. There are four different ways to change account type in Windows.
Change User Account Type from Control Panel
Control Panel has the option to change user’s account type. If you follow this method, you can do the same on Windows 7 and later version of the machine. At first, open Control Panel. You can open Control Panel from Start Menu, Taskbar search box as well as Win + X menu. After opening Control Panel, go to “User Accounts”. Here, you can find “Manage another account” option.
On the next screen, you will get all the accounts that your machine current has. Click on the account that you want to change the type for. Following that, you will get an option called “Change the account type.”
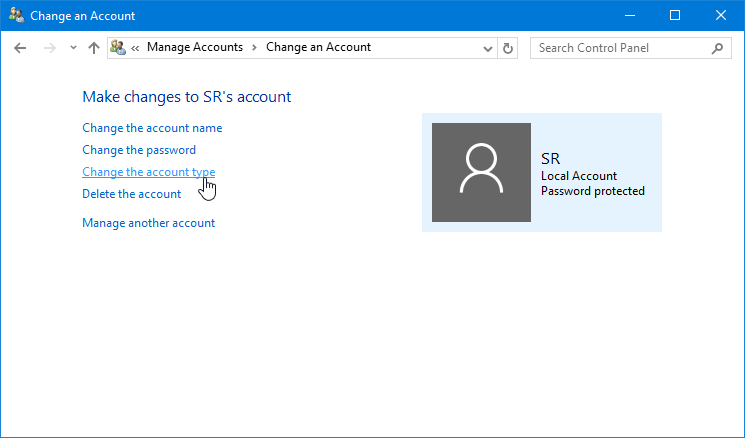
Now, you can choose between two options i.e. Standard and Administrator. Select one and hit the “Change Account Type” button.
This change will affect immediately.
Change Account Type in Windows 10 using Command Prompt
This is an entirely different method but it works without any issue. On the other hand, you just need to open a simple Command Prompt with Administrator privilege. Therefore, you can press Win + X and select “Command Prompt (Admin)”. Alternatively, you can search for Command Prompt (cmd) in the Taskbar search box, right click on that select “Run as administrator”.
Now, you have to find the username. However, if you do not know the account type of the user account, you can enter the following commands one by one to see the exact account.
net localgroup guests
net localgroup users
net localgroup administrators
Now, you have to add the account to a particular type and remove the same from the current one.
To change user’s account type to guest, enter the following command,
net localgroup guests “User_Name” /add
To change user’s account type to standard user, do enter the following command,
net localgroup users “User_Name” /add
To change user’s account type to Administrator, do enter the following command,
net localgroup administrators “User_Name” /add
Note: You do not have to enter all those commands. Just decide, what you want to do and enter the command respectively.
After entering any of the aforementioned commands, enter any of the following commands,
net localgroup guests “User_Name” /delete
net localgroup users “User_Name” /delete
net localgroup administrators “User_Name” /delete
The first command will remove the account from guest account list. The second command will remove the account from Standard users’ list. The last one will remove the account from administrator accounts’ list.
That’s it! Like said before, this is tricky, but it works.
Change User Account Type from Settings Panel
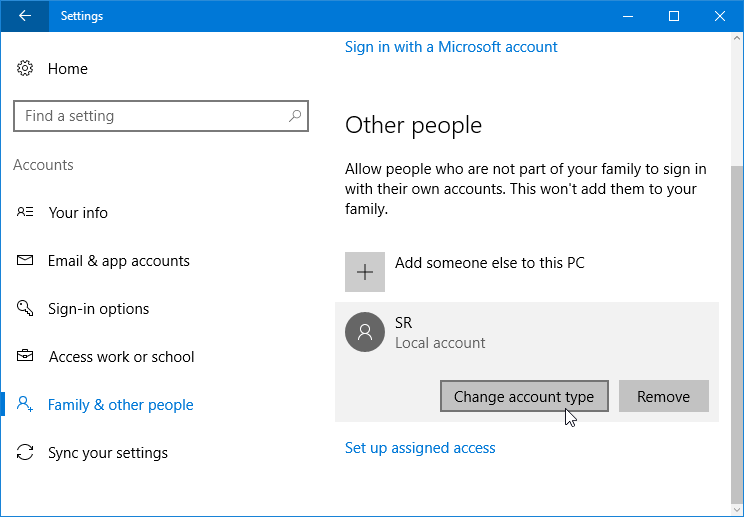
Windows 10 has included a new Settings panel, which has some sets to options to manage and customize the PC account to wish. From here, you can change user account type as well. At first, open Settings. To do so, just press Win + I. Now, navigate to Accounts > Family & Other people > Other people. Here, you can find all the accounts. Click on the account and select “Change account type”.
On the next popup screen, you can find a drop-down menu. Select one option and hit the “OK” button.
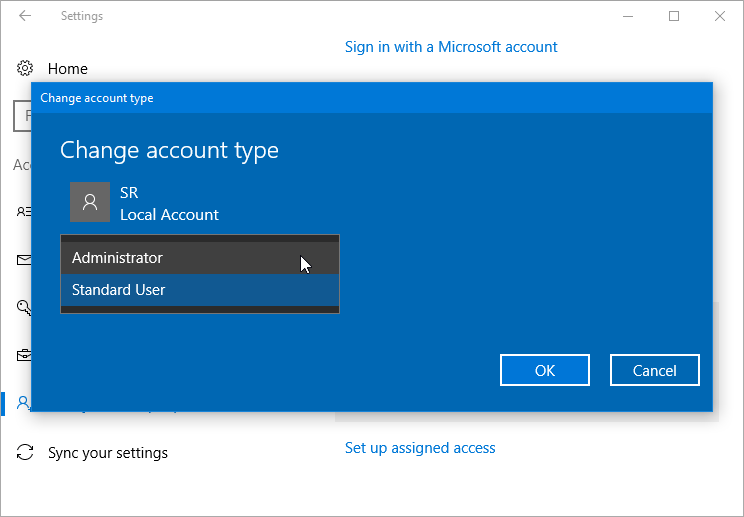
Alike the first method, it will affect right away.
Change Account Type in Windows 10 using netplwiz Command
This is yet another easy way to change account type in Windows 10. At first, open Run prompt (Win + R) and enter netplwiz. Now, select the account and hit “Properties” button.
Now, go to “Group Membership” tab and select one from the list.
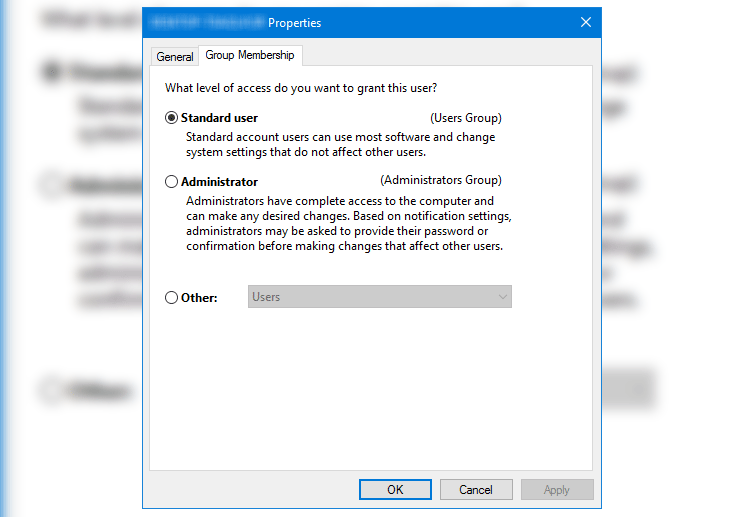
Don’t forget to hit the “OK” button after making the change.
That’s it! This is as simple as said.
If you get any problem to change account type in Windows 10, do contact us. However, before that, don’t forget to use these aforementioned methods.