How to Create Custom Email ID with Zoho Mail
Days are gone when you had Google Apps and Microsoft Outlook to create a custom email ID with your domain name. Being said that, if you are running an online business, this is far better to have a @domain.com email ID instead of @gmail.com or @outlook.com email ID. To create email ID with your domain name, you can certainly use the Google Apps, which is paid. If you do not have much budget for email ID and you want to get started with a free option, you should check out Zoho Mail, which will let you create custom email ID for free. You must have the domain, and you need to verify the domain in order to create the email ID.
Benefits of having a custom email ID
The primary reason why you should create a custom email ID is brand awareness. If you want to make your website a brand, a custom email ID plays a vital role. Instead of having a @outlook.com or @gmail.com email ID, you can opt for a custom email ID that looks like @your-domain.com. Also, it increases the professionalism. Whenever someone tries to contact you, he/she can get an idea about your brand.
You can get whatever email ID you want. It doesn’t matter whether you want to make hi@your-domain.com or name@your-domain.com or anything else. You can certainly create that with your domain.
The third reason is personalization. You can customize your email account as well as email ID as much as possible with the help of different tools.
Why should you opt for Zoho Mail?
There are several reasons why you should opt for Zoho Mail. However, the primary reason is pricing. If you are the only person, who is running a business with a very few amounts, you should look for something cheap. As Zoho Mail is free of cost, you can certainly opt for this one instead of Google Suite or something else. Obviously, Google’s version of custom email ID will provide better user experience, but that is paid.
If you sign up for Zoho Mail, you will get access to all the other apps like Zoho Docs, Creator, Projects, and so on.
Zoho Mail pricing
Generally, Zoho Mail has three paid account options. The LITE version costs $1/user/month. The STANDARD version costs $3/user/month, and the PROFESSIONAL version costs $6/user/month. However, as mentioned earlier, you can find a FREE version as well. It comes with 5GB/user storage and 25MB attachment limit, which is pretty decent.
How to create custom email ID with Zoho Mail?
This is quite easy and not much time consuming as well. However, you should have access to your domain control panel. Otherwise, you won’t be able to verify your domain, and that won’t help you create an email ID.
To get started, head over to this page and click the GET STARTED button under FREE PLAN.
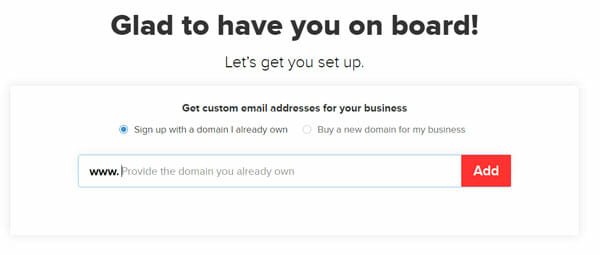
Now you have to enter a domain name. Make sure you already have the domain, and you have selected the Sign up with a domain I already own option. Therefore, you need to enter the domain name in the empty box.

In the next step, you need to enter your name, username, mobile number, password, and country. Please note that if you enter your name, the email ID will carry your name. Like that, if you enter your business name, your email ID will show your business name.
After clicking the PROCEED button, you will have to verify your domain. There are three different ways to verify your domain. If you have already installed a CMS like WordPress and you have access to the root directory of your domain, you can use the HTML method. However, if you haven’t installed any CMS, and you have only domain control panel, you can use either CNAME or TXT method. If you choose CNAME method, you have to enter CNAME in the domain control panel. Just like that, if you choose TXT method, you will have to enter TXT record in the domain control panel.
Also, you should know that the HTML method is the fastest method. On the other hand, the CNAME and TXT method can take up to 48 hours to verify your domain.
After the verification process is complete, you can add user and go through all the screen options to get your account.
At last, you need to add some MX records and TXT records so that you can send and receive email without any problem.
MX Records:
#1
Host: @/Blank
Address/ Mail Server/ MX Entries/ Value: mx.zoho.com
Priority: 10
#2
Host: @/Blank
Address/ Mail Server/ MX Entries/ Value: mx2.zoho.com
Priority: 20
#3
Host: @/Blank
Address/ Mail Server/ MX Entries/ Value: mx3.zoho.com
Priority: 50
TXT Record:
Host: @
TXT Value: v=spf1 include:zoho.com ~all
TTL: 12 hours
That’s all! Now, you can send and receive email to your custom email ID. However, this is wise to wait for a few minutes before testing so that everything can get propagated properly.
- How to Set up Zoho Mail on Android Manually
- Zoho Notebook: Best Alternative to Evernote for Android and iOS
- How to Setup Zoho Mail in Mail for Windows 10