Create OS X 10.8 Mountain Lion Recovery Disk on DVD or USB Drive
Previously we talked about how one can create a Windows 8 recovery disk on a DVD or USB drive. Here I will address the Apple users – how one can create a bootable recovery disk of the latest version of OS X – 10.8 Mountain Lion, on a USB drive or DVD.
Creating a recovery disk is very handy, especially in the case when your system crashes for some reason. Even to do reinstall, say if your computer is bloated up and is difficult to do a proper clean up of the machine, you can use the recovery disk to do a clean install of the operating system.
For Apple users, this process has become easier with the latest versions of the OS X operating system available online to download from the Apple App Store. To do a recovery is as easy as connecting one’s Mac system (Macbook Pro or iMac) to the internet and the system will take care of the rest.
But often we bump into situations where the Macbook pro crashes during travel and the internet connection at the place is either crappy or does not exist! It would make sense to create a backup of the operating system on some removable media that you can carry around and do the job of recovery or re-install. Here I will list down the process of making the copy on your own.
Requirements
The few things that are required are
- Copy of OS X – Whether it is OS X Lion (10.7) or Mountain Lion (10.8), you can download the copy from the App Store. Head to the App Store, go to Purchases Section. Next to your OS X copy you will find the option to download. The OS X copy will be downloaded to the Applications folder. Note that after download, it will prompt you to install the operating system. You can ignore that and close the setup (⌘-q).

- USB Drive (Not less than 8 GB of free space) or a blank DVD (Dual Layer)
- Apple Mac System (either Macbook Pro or iMac)
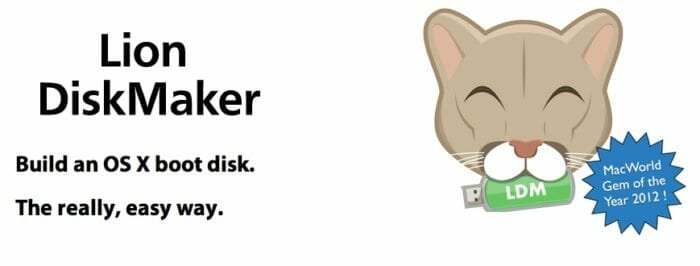
One method – Using Lion DiskMaker
Lion DiskMaker allows you to create a recovery disk automatically on a USB drive or DVD. It is basically an AppleScript that searches for the OS X copy in the Applications folder and burns the image on the removable media drive. It will override the contents of the USB disk if there is any. You can get the DiskMaker here.
Other Method – OS X Built-in Disk Utility
The OS X copy that you have downloaded to the Applications folder contains an image of the operating system. This is similar to a normal disk image found in DVDs. So all you have to do is burn the disc image to a blank DVD. This is done using the Disk Utility app.
Burning DVD
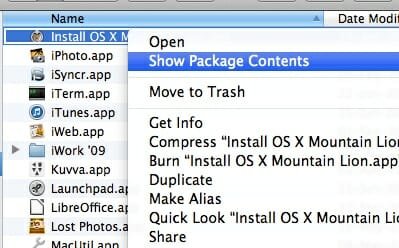
To burn to a DVD, open the Disk Utility app, that you can find under the Utilities in the Applications folder. Find the “InstallESD.dmg” image file by right clicking on the OS X copy in the Applications folder, select “Show Package Contents”, Contents -> SharedSupport folder.
Drag the image file to the left sidebar of the Disk Utility app. You should see the image file on the sidebar. Then insert the blank dual layer DVD drive and click on “Burn” with the image file focused.
Burning USB
However most of us, including me, don’t use DVDs nowadays. So you can burn the image file to a USB pendrive (make sure it has space of 8 GB or above) through following steps
- Format the USB drive – Insert the disc, open the Disk Utility app, select the USB drive, under the Partition tab select “1 Partition” from the dropdown below “Partition Layout”. Under the format type choose “Mac OS Extended (Journaled)”. To make the USB drive bootable, click on “Options” button and select “GUID Partition Table” from the list. Format the disk by clicking on “Apply”.

- Once formatted, go to Restore tab within the USB drive page in the Disk Utility app. Choose the image file “InstallESD.dmg” as the source file and USB drive as the destination and click “Restore” button. Now the USB drive becomes a bootable OS X Installation drive.
Using Bootable Recovery Drives
To use the bootable recovery disc either in the form of DVD or USB drive, restart your Mac. Insert the USB drive or DVD and hold the Option button as it boots up (when you hear the startup chime). There you can select your recovery drive.
Hope you find this post useful. Do let us know your doubts and suggestions through comments here.
Source: Lifehacker