How to Use Shared Album in iOS 12
Shared Album in iPhone helps you create a virtual place whether you and your family members or friends can upload photos, view images, and manage them. If you are new to iOS, and you want to know more about Shared Album in iOS 12, do check out this article. You can know how to add photos and videos to Shared Album, how to invite people, how to stop someone from adding photos and videos, how to delete a Shared Album and so on. Everything is possible even in iOS 11. However, this article is mainly for iOS 12 users.
What is Shared Album?
Shared Album is a virtual place where you can upload photos and videos and share those with other people having an iCloud account. This is like Facebook’s shared album, but in this case, there is no Facebook in the middle. You can directly share your images with friends or anybody else with the help of Shared Album of iOS. This is available for a long time now, and you can use it on iOS 12 as well. It doesn’t matter whether you are using an old iPhone 5S or iPhone XS Max, you can certainly get the benefit of Shared Album.
Whom can you share with?
As mentioned earlier, you can share the album with anybody else. The only requirement is that person must have an iCloud account. For that, you need an Apple ID.
Who can upload photos to Shared Album?
There are two options. First, only you can upload images and videos to any SHared Album. Second, you can allow other people to upload media files to your Shared album. For example, you and your friends went to a birthday party, and you want to share images. At such moments, you can allow all the invited people to upload images to your album.
Is the Shared Album public or private?
In different words, that depends on you. If you want to make it private, you can do that. If you want to make it public, you can do that as well. Here public means other people except for invited one.
How many people can you invite to?
You can invite as many people as you want. It doesn’t matter whether you have five friends or fifty, you can invite them all to check out a shared album you have created.
Set up and start using Shared Album in iOS
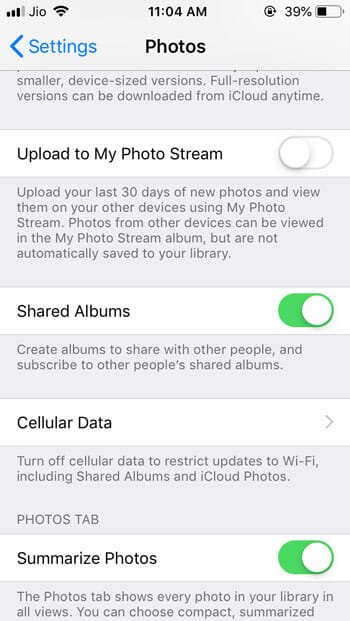
Settings up a shared album take hardly one minute. As this is an inbuilt functionality of iOS, you do not have to download any third-party app for this. To get started, you need to activate the Shared Album feature from Settings. Therefore, open up the Settings app and go to Photos. Here you can find an option called Shared Albums. Toggle the corresponding button to enable it on your iPhone.
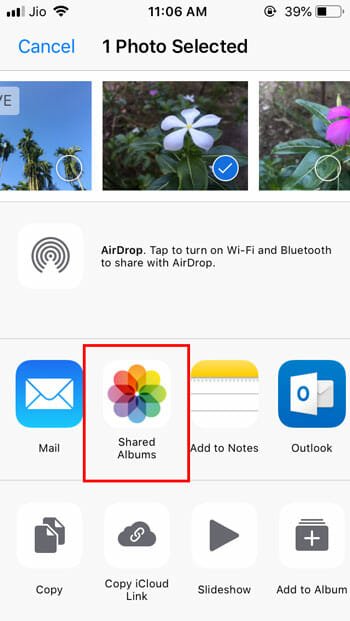
Therefore, open the Photos app on your mobile. This is the app that stores all the images and videos you have captured and recorded. Now, select a photo that you want to copy to a shared album. Then, tap the Share button and select Shared Albums.
Therefore, you can enter a small description and select an album. After doing all these, you need to tap on the Post button.
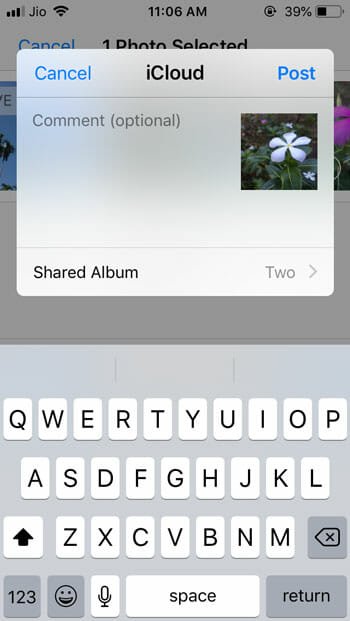
That’s all! You have successfully created a shared album with one image. Following that, you can send as many images as you want to the same shared album. To manage a shared album, open the Photos app and switch to Albums tab. Here you can find all the shared albums you have created.
How to invite people to your shared album?
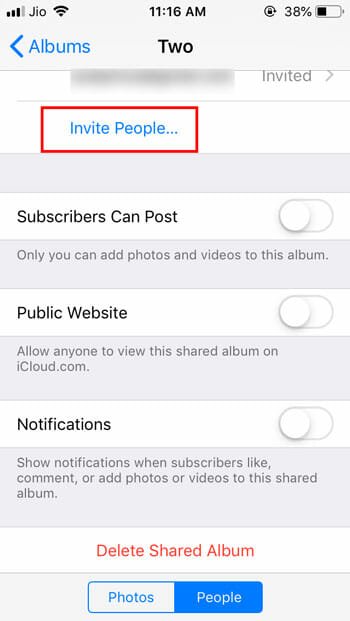
Let’s assume that you want to invite your friends to your shared album. For that, open the Album page and go to the People tab and click the Invite People button. Following that, you need to enter the name of the person you want to invite.
He/she will get an email regarding your invitation. Following that, he/she would be able to find your images and videos.
If you want to allow people to post images to your shared album, you need to follow these steps. At first, open the People tab. Here you can find an option called Subscribers Can Post. Just toggle the corresponding button to turn it on.
Also, there are two other options, i.e., Public Website and Notifications. If you want to make your album public, you can toggle the button that says Public Website. On the other hand, if you want to get all the notifications regarding your shared album, you can enable the option called Notifications.
How to delete a shared album?
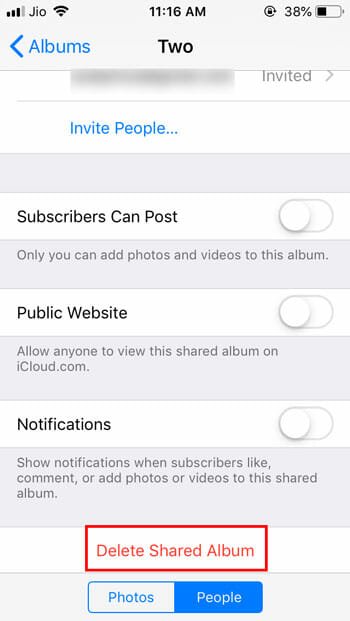
If you have mistakenly created a shared album or if any reason, you want to delete an album you have created, you need to head over to the People tab. Scroll down to the bottom until you get the Delete Shared Album option. Following that, you need to confirm the deletion.
How to remove someone from shared album?
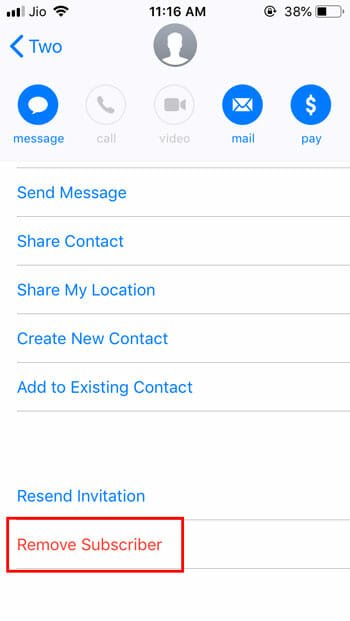
If you have mistakenly invited someone to your shared album and now you want to remove him/her, here is what you need to do. Open the People tab, and tap on the contact that you want to remove. You should find an option called Remove Subscriber. Use that option to delete that person from your shared album invitations list.
That’s all! Hope this simple functionality of iOS will help you a lot to shared images and videos with friends or anybody else.