How To Install A Program Using Compatibility Mode In Windows 7
One problem that Windows 7 users have run into in the past year is the use of legacy applications. There are handful of applications that have issues installing and running in a Windows 7 environment. Luckily, Microsoft includes a great set of compatibility tools for just these types of problems.
These tools are collectively known as the Windows Compatibility Mode. This feature of Windows 7 essentially tricks installers and applications into believe that they are running under a different version of Windows. It can usually be found in the compatibilities tab of the properties window for the application in question, or you can use the provided wizard. Here is how to get to both.
Installation Compatibility
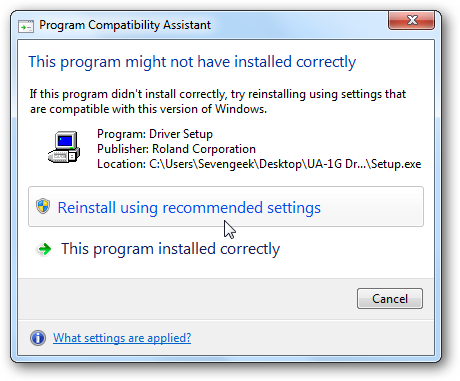
1. The most common way to work with compatibility mode is during an installation. During the installation process of some legacy applications you may receive an error similar to the one below. Simply click OK to move forward.

2. After closing the error, a new windows will open. Click Reinstall using recommended settings to start the Compatibility Assistant. This will reinstall the program and allow it to run in compatibility mode.
Troubleshooting Program Compatibility
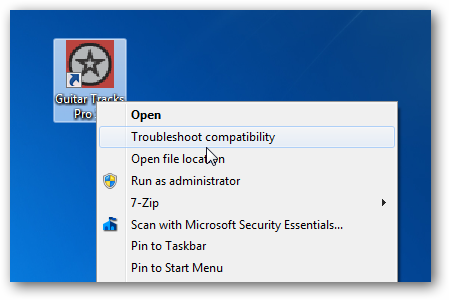
1. There may be times when the Compatibility Assistant does not work the way it should, or cannot find a solution to the problem. When this happens, you need to go through the Program Compatibility Troubleshooter. To begin, right-click on the program icon and select Troubleshoot Compatibility.
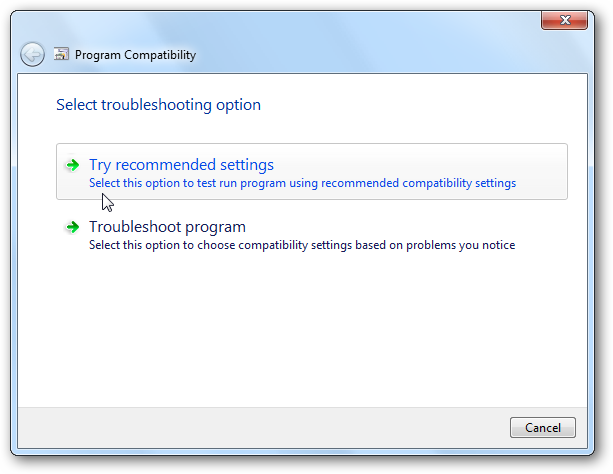
2. Windows will detect any issues and and you can try to run it with the recommended settings. To do this, click Try recommended settings.
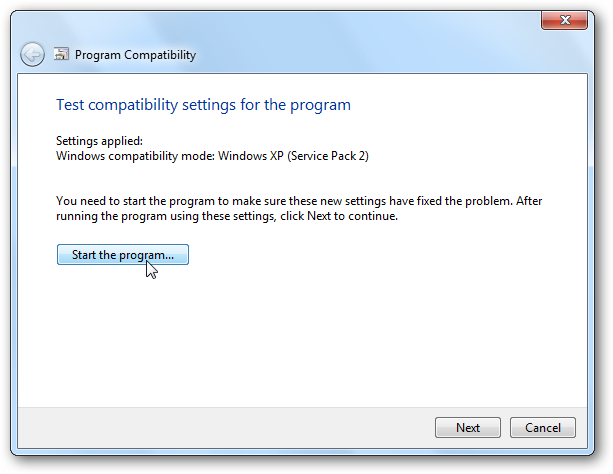
3. This option allows us to test the program to see if the new compatibility settings fix the problem. Select Start the program… to begin testing it out. After determining whether or not the settings work, click Next.
4. If the program is now running correctly, you can save the settings. If not, you can try different settings. To do this, select No, try again using different settings.
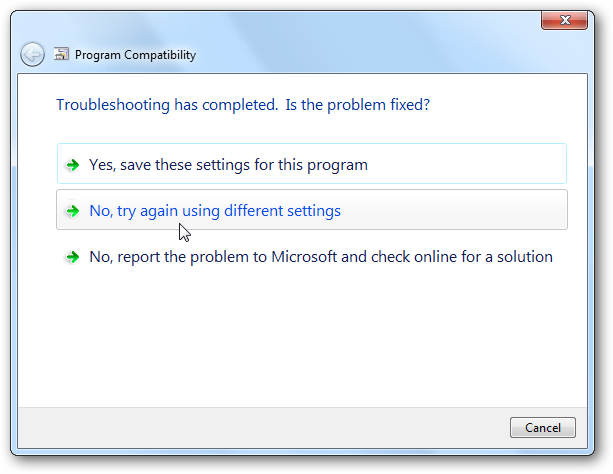
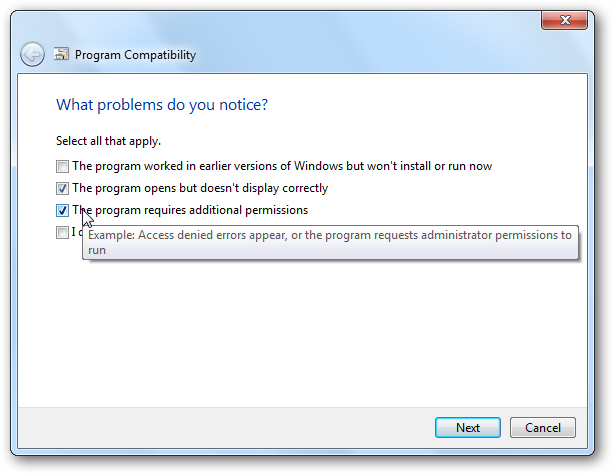
5. The next windows is the troubleshooter where you can specify the problems you are having with your program. Select the options that best apply to your situation. Depending upon your selections, you may be asked for additional information.
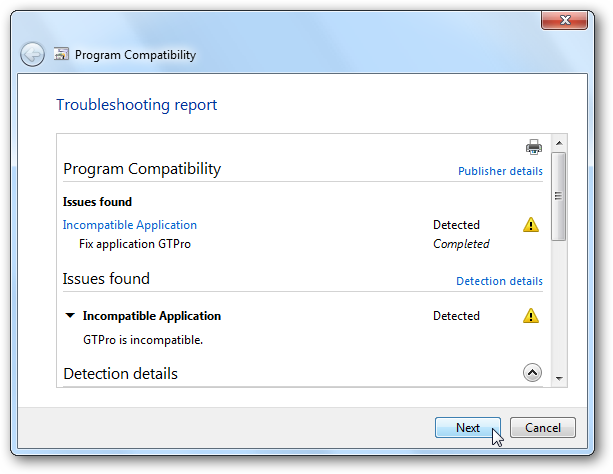
6. After the troubleshooter, a new set of settings will be applied to the program, and you can try running it again. If that does not work, you will be prompted to send a generated problem report to Microsoft.
Manual Compatibility Selection
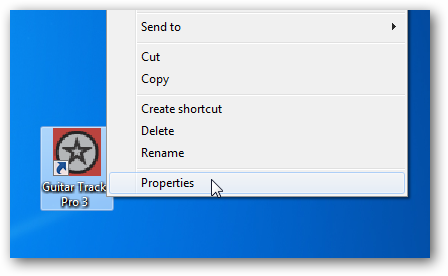
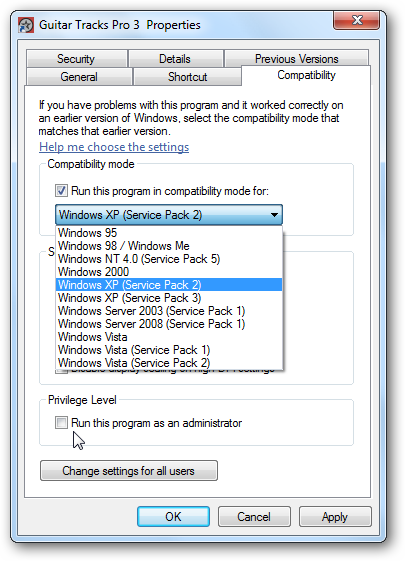
1. You can also access the compatibility settings manually by right-clicking on the program icon and selecting Properties.
2. In the Properties window, select the Compatibility tab, check Run this program in compatibility mode and then select the version of windows from the drop down list. Once applied, the program will always start with these compatibility settings.
Conclusion
Hopefully, by using the steps here, you will be able to run the programs you need in Windows 7. However, each program is different, so these steps will never be exactly the same. Most programs written for Vista should work in Windows 7, but not all of them. If you find that you cannot get a particular program running and have completed the Compatibility Troubleshooter, you should search for a new version of the program, or go to the developer for their assistance.