How to Install macOS Mojave 10.14 Public Beta
Apple has recently launched a new version of macOS, which is called macOS Mojave V10.14. This new version comes with a lot of new features those are awesome regarding usability and overall functionality. Some of the new features will certainly increase your productivity a lot even when you are using old MacBook. Some of the options will let you organize your computer better when some of them lets you use it for a longer time. Therefore, if you are interested in this new feature update, and you want to use it before release, do check out all these steps to install macOS Mojave 10.14 Public Beta on your Mac computer. Also, you can find some recently included features in this article.
Compatible Mac Computers:
Not all the Mac computers would be able to install this version of Mac. To be more specific, you should one Mac computer among these following:
- iMac, late 2012 or newer
- iMac Pro, late 2017 or newer
- MacBook, early 2015 or newer
- MacBook Air, mid-2012 or newer
- MacBook Pro, mid-2012 or newer
- Mac Mini, late 2012 or newer
- Mac Pro, late 2013 or newer; mid-2010 and mid-2012
If you do not know which MacBook, or iMac you are using, you can follow the following steps.
Step 1: Log into your computer and click the Apple logo visible top-left corner.
Step 2: Select About This Mac.
You should find all the information regarding your computer version, OS version and so on.
How to Install macOS Mojave 10.14 Public Beta
As Apple has already released the Public Beta, you should not have any problem installing this operating system or changing your stable version of OS to beta version. However, before installing, you need to back up your Mac with the help of Time Machine. After doing so, you need to download the macOS Public Beta Access Utility. The same can be found on the official website of Apple.
By installing, you are enrolling your Mac into the list of Beta testers. Following the installation, you can find the App Store opened with the update of macOS Mojave Beta.
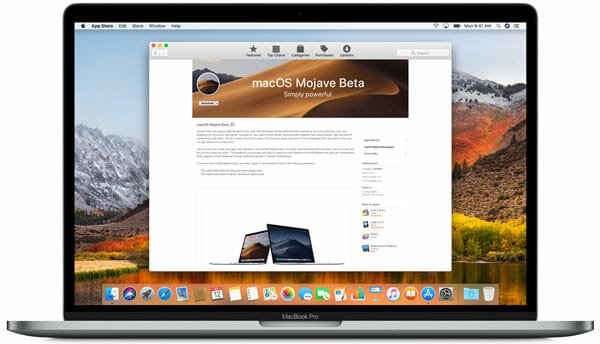
You can click the Download button to start the download. It may take a few minutes to download and complete the installation.
Important New Features of macOS Mojave
Apple has included some awesome new features in macOS Mojave, and they will improve your productivity. Some of the new features are mentioned below.
Continuity Camera
Continuity Camera feature will help you if you have an iOS device aka iPhone or iPad with iOS 12. Otherwise, this feature is not that helpful for Android and MacBook users. Coming back to the point, this option does exactly what it means. That implies you can continue using your camera from Mac to iOS and vice versa.
For example, you want to embed a photo from iOS into a document that you are editing on Mac. That thing is possible with the help of Continuity Camera feature. There are many times when we want to embed a bill or book pages or something like that into a document. If you follow the traditional method, you need to transfer the photograph from iOS to Mac, and then you can access that. However, this new feature will let you skip the transfer part.
Being said that, you need to open the document where you want to embed the photograph and then right-click on it to get the Take Photo option. Following that, you will get an option to capture photo with iOS device. Utilize that option and capture a photograph from iOS device.
Dark Mode
Dark Mode is something that you might like if you use your Mac a lot. The blue light is always a health destroyer and to get rid of that, you can enable dark mode in Mac. As you are using macOS Mojave, you do not need to install any third-party software for that since Apple has included a new option to get dark mode without any third-party tool. The best thing is a lot of apps including Safari, Apple News, and more others can integrate this Dark mode easily and without any lag.
To enable Dark mode in macOS Mojave, do follow the following steps.
Open Apple menu and select System Preferences > General.
Following that, select Dark from Appearance menu.
You will get the dark theme instantly.
Desktop Stacks
This is one of the best options when you have a cluttered Desktop, and you want to organize that quickly. Desktop is one of the best places where people keep various files to access them quickly. However, if you have a smaller Mac computer like MacBook Air or so, it gets cluttered quickly. Therefore, you can organize all the files with the help of Desktop Stacks.
This simple option has been included into your macOS Mojave OS. To utilize this option, right-click on the desktop and select Use Stacks.
Alternatively, you can go to View > Use Stacks.
All the files and folders will be organized instantly.
Dynamic Desktop
When you are working whole day with a lot of pressure in front of your Mac, this is very difficult to track the time. Dynamic Desktop can let you know when this is afternoon or evening or night by changing the desktop wallpaper. As of now, such a thing is very limited on macOS Mojave, and however, Apple will enhance this feature very soon.
To use the Dynamic Desktop wallpaper, open System Preferences > Desktop & Screen Saver. You can find a different icon on the wallpaper thumbnail. If you select that wallpaper, you will get Dynamic Desktop.
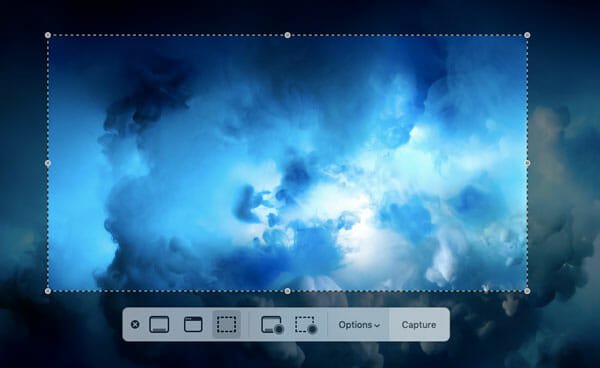
New Screenshot Tool
Like iOS, Apple has included a brand-new editing interface for screenshots. Now you can capture a screenshot with native hotkeys and follow that; you would be able to edit that as per your requirements.
This editing interface can help you add text, shape, freehand drawing and more others.
That’s all. These are some of the best features of macOS Mojave. Apple has already included more than one Public Beta for testers. If you are willing to install, you can follow these steps.