How to install Android P Developer preview on Google Pixel devices
Google released the Android P developer preview to the Google Pixel devices earlier this month and it is the first developer preview of the upcoming version of Android.
While currently not a lot of new features are introduced to this developer preview and it is not stable enough to be used on a daily basis, if you are Google Pixel user, you can try installing this developer preview on your device to test out the new features and get your hands on the latest version of Android.
But before proceeding to install Android P developer preview on your device, you should keep in mind that this build might have a lot of bugs and performance issues. Also, you need to have an unlocked bootloader for this method.
You May Like: How to get the screenshot editing tool in Android P on Any Android phone
If your device’s bootloader is unlocked then well and fine, if not you have to take a complete backup of your device before proceeding as this process will reset your device. If you are fine with all these things, then follow the below steps to install Android P developer preview on your Google Pixel device.
How to install Android P Developer preview on Google Pixel devices
Download the necessary things
Step 1:
Begin by downloading the Android P developer preview system image for your device from the official Google download page here. The developer preview is currently available for download only for the Google Pixel, Pixel 2, Pixel XL and the Pixel 2 XL devices.
Step 2:
Now download and install the ADB and fastboot tools for your Windows PC from this link.
Step 3:
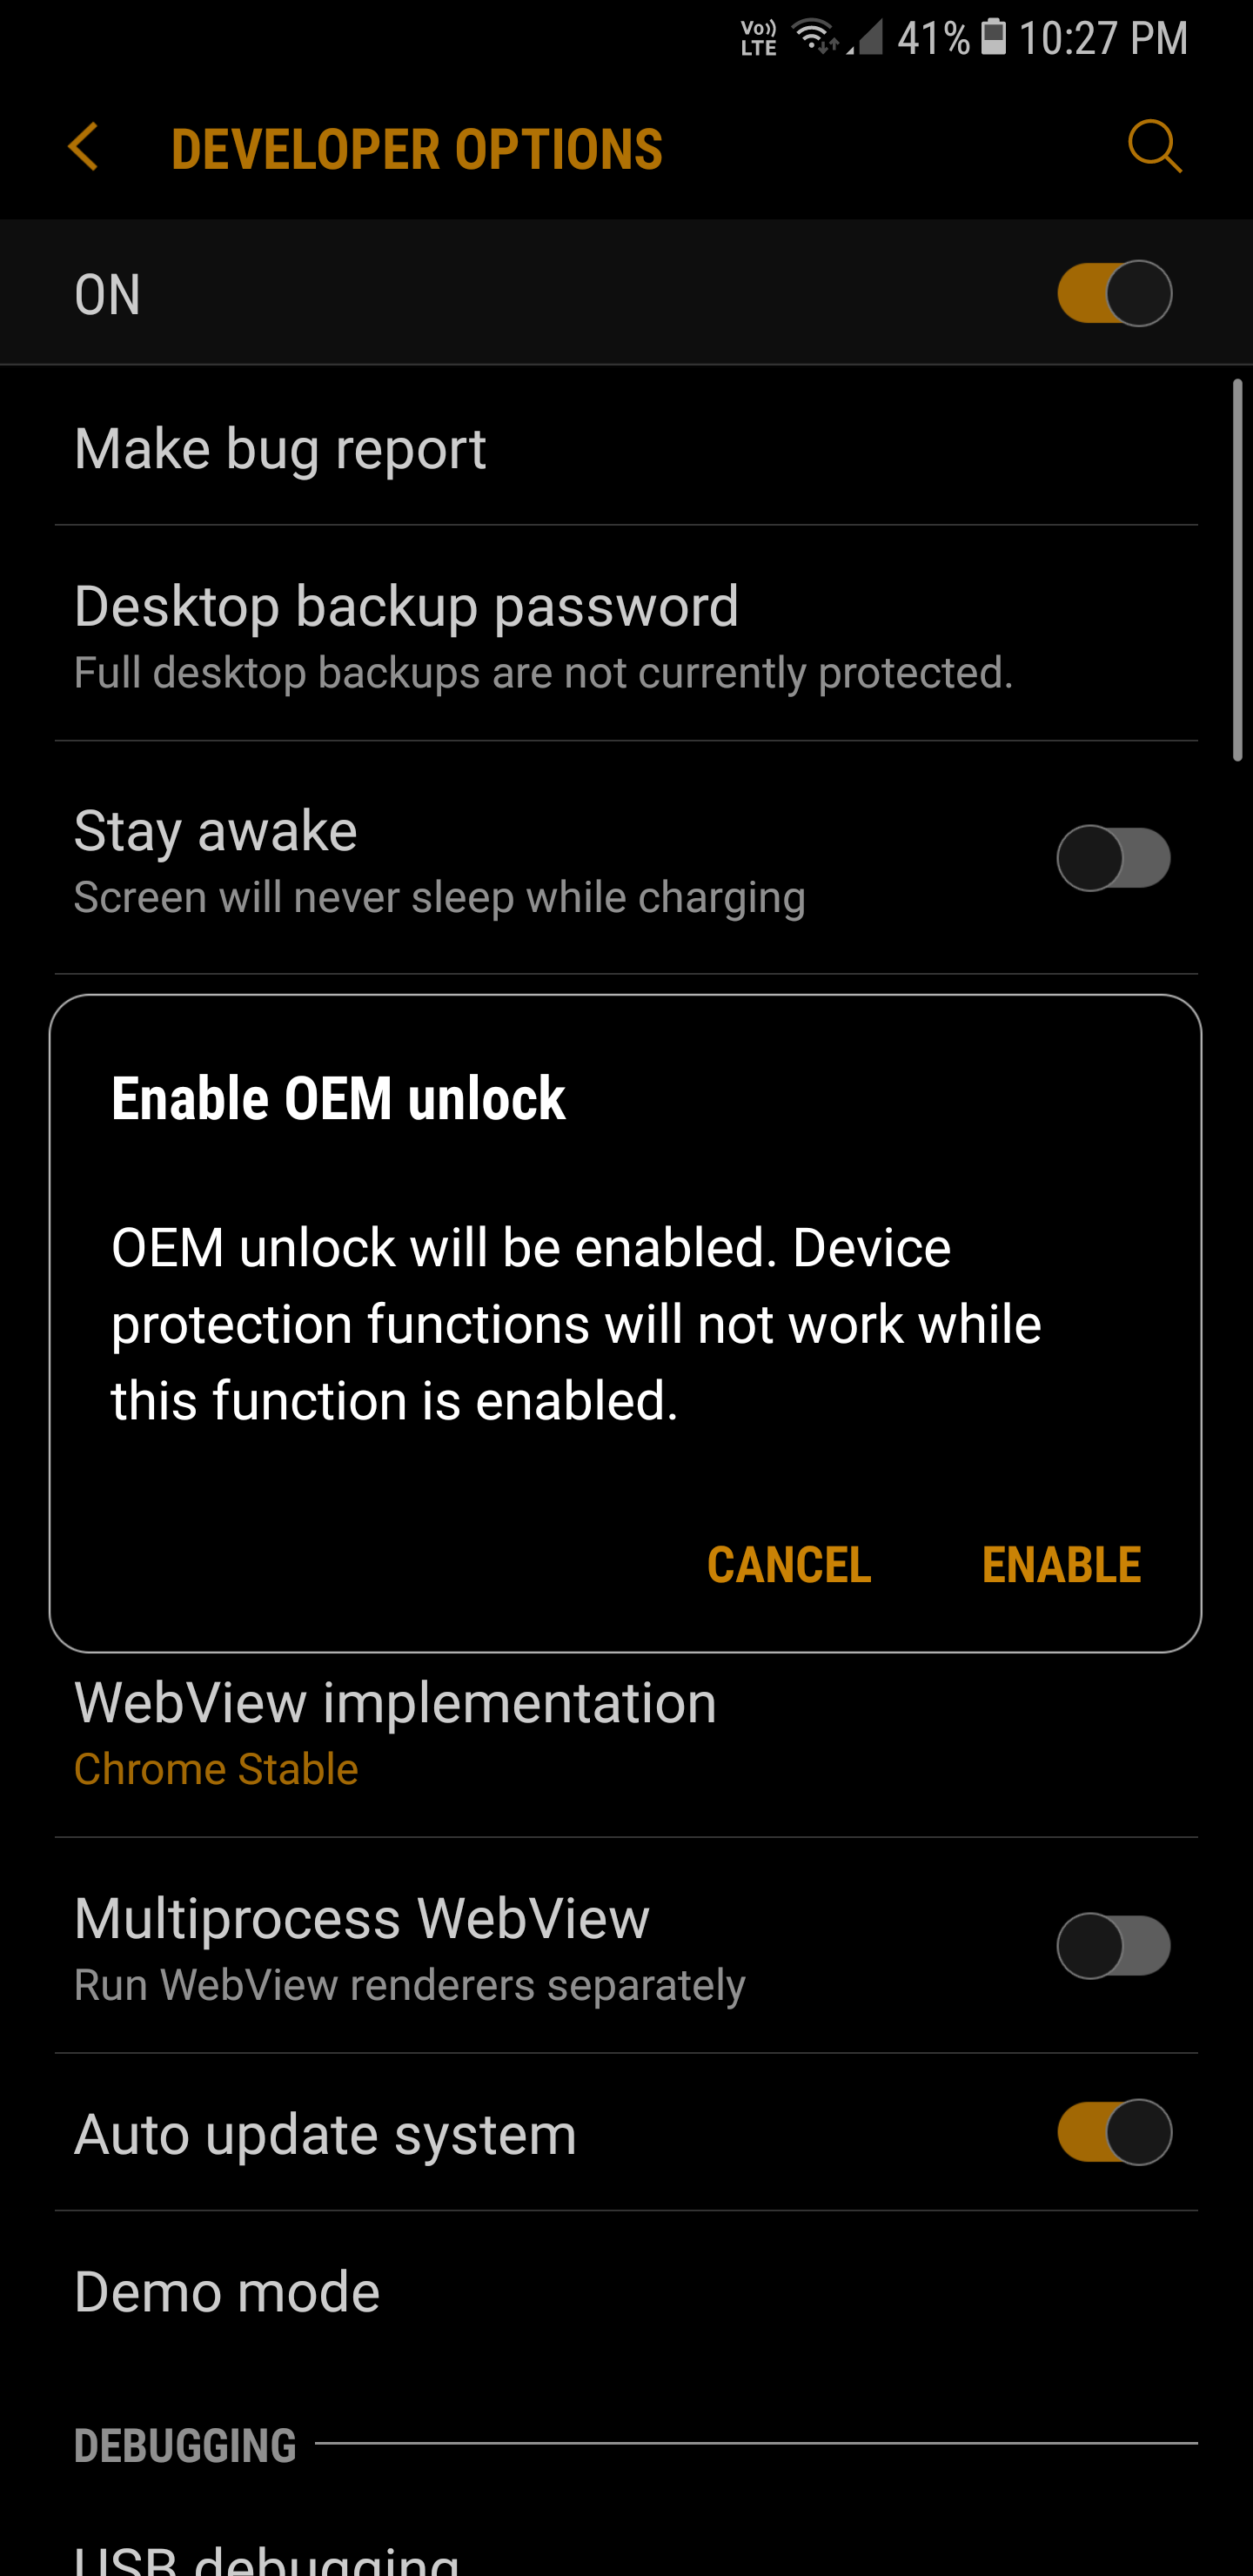
Once you have installed the tools, you have to enable USB debugging and OEM unlock option on your Google Pixel device.
Proceed by enabling the developer options first by going to Settings->About Phone->Build number and tapping it repeatedly till it says ‘you are now a developer’.
You May Like: Top 10 new features and updates coming to Android P
Now go back to the main settings page and then open the developer options settings. Here, enable the USB debugging and the OEM unlock options.


Unlock the bootloader
If your device’s bootloader is already unlocked you can skip this part.
Step 4:
First connect your Pixel device to your PC using the USB cable and then open the folder where you have installed the ADB and fastboot tools.
You May Like: Top 5 best offline shooting games for Android 2018
Now hold shift and then right click here and select the open command window here option from the pop up menu.
Step 5:
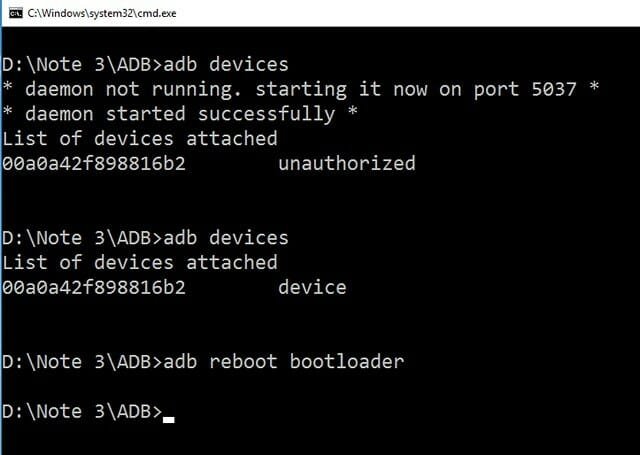
Type ‘adb devices’ in the command window to check whether everything is setup properly. If you get your device’s serial number displayed on the command window then it means everything is working as intended and you are good to go.
Check your device for a prompt to allow USB debugging, just click on ok to continue.
Step 6:
Now enter the following command to reboot your device to the bootloader.
adb reboot bootloader
Step 7:
Once your device has entered into the bootloader mode, just enter one of the below commands based on the device you own.
You May Like: How to screenshot Instagram story without the user knowing
Pixel or Pixel XL: fastboot oem unlock
Pixel 2: fastboot flashing unlock
Pixel 2 XL: fastboot flashing unlock_critical
Step 8:
The bootloader unlocking process will begin now and you might asked for some prompt to proceed. Accept it and wait for the process to complete.
Install Android P developer preview
Step 9:
Once you have unlocked the bootloader on your device, you can proceed to install Android P developer preview.
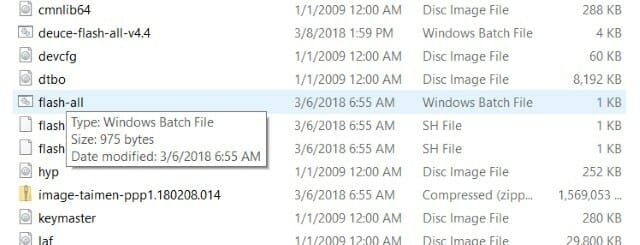
Move the downloaded Android P system image file to the ADB and fastboot tools folder and then extract it. You will find one more zip file after extracting. Extract that file also.
Step 10:
You will find a file named ‘flash-all.bat‘ inside the extracted folder. Open the file and a command prompt will be launched now and it will automatically begin executing all the commands necessary for the installation of Android P on your device.
That’s it once the process in done, reboot your device and will now boot into the Android P developer preview. If this method doesn’t work well for you, you can try flashing the files individually by entering the following commands one by one.
You May Like: Top 10 Must Have Android Apps For 2018
fastboot flash bootloader <bootloader file name here>.img
fastboot reboot-bootloader
fastboot flash radio <radio file name here>.img
fastboot reboot-bootloader
fastboot flash -w update <image file name here>.zip
fastboot reboot
If you have any doubts regarding this process or stuck at some step, feel free to post your questions in the comments section below and we will be happy to help. Also, don’t forget to let us know about your favourite feature in the latest developer preview of Android P and how well this build works for you.