How To Install And Use OpenSSH In Windows 10
It doesn’t matter what you want to do or what you are; you can certainly use Windows 10 if you need a stable operating system on your computer. Irrespective of your profession or work experience, you can get started with Windows 10. If you need to connect to a Linux server, the most efficient way is SSH. It lets you connect to any Linux server and execute various commands to perform different tasks. The most popular SSH client for Windows is Putty. However, if you do not want to use a third-party app to connect to a Linux server, you can install and use OpenSSH in Windows 10.
What is OpenSSH?
There are two components related to OpenSSH that you should know about and they are OpenSSH Client and OpenSSH Server. If you are using an older version than Windows 10 v1809, you need to install the ‘client.’ However, if you are using Windows 10 v1809 or later version, you do not have to install the client since it is already installed. On the other hand, you need to install the OpenSSH Server in order to connect to build and connect to a Linux server.
How To Install OpenSSH Client And Server In Windows 10?
It is pretty easy and not much time consuming as well. The best part is you do not have to download any third-party software to get it done since the package is already there in your Windows 10 machine. However, you should have to get the latest version of Windows 10 so that everything goes smoothly. You do not need an internet connection to install it in your machine.
To get started, you need to open the Windows 10 Settings panel. For that, you can press Win + I. After that, go to Apps > Apps & features. On the Apps & features section, you should get an option called “Manage option features.” You need to click this button.

In the next window, you should see another option called Add a feature. Click this button. After that, you can find some packages that are not installed yet. From the list, find out OpenSSH Client/Server and click the Install button.
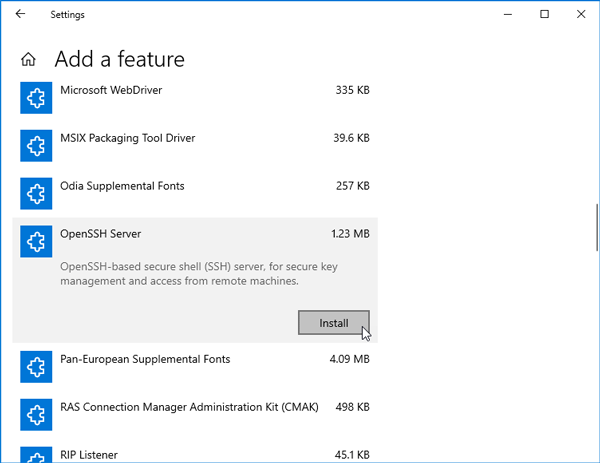
Following that, you can go back to the previous window where you can check the installation progress. After the installation is complete, you can use the OpenSSH client to connect to a Linux server.
How To Connect To A Server Using OpenSSH In Windows 10?
If you have used Terminal on Mac or Linux, you do not have to face anything. Otherwise, you should check out these steps.
To connect to a server, you need three things, and they are Windows PowerShell, server username, and server’s IP address. If you do not have either of them, you cannot use this method. Therefore, make sure you can access all of them, and then go ahead to follow these steps.
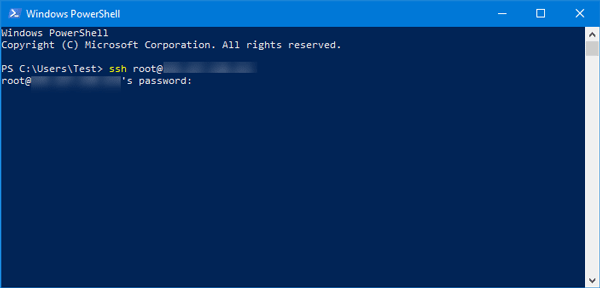
At first, open Windows PowerShell. For that, you can search for Windows PowerShell in the Taskbar search box and open the corresponding result. On the other hand, you can press Win + X, and select Windows PowerShell.
After that, enter this command-
ssh username@server-IP
It should show a message like this-
The authenticity of host ‘server name (ip-address)’ can’t be established.
ECDSA key fingerprint is SHA256:(<a large string>).
Are you sure you want to continue connecting (yes/no)?
You need to type “yes” and hit the Enter button.
After that, you have to enter the password against that username. Once you are done with that, you can execute various commands accordingly.
Best Alternatives To OpenSSH For Windows 10
There are tons of SSH clients for Windows 10. However, not all of them are as good as your expectation. Therefore, you should check out this list, where you can find some of the best SSH clients for Windows 10/8/7.
1] Putty
It doesn’t matter how many windows you want to open or how many servers you want to connect to, you can certainly do that with the help of Putty. Putty is available for free and you do not have to go through a lot of steps to use it. You can simply download Putty from the official website and start using it. Download
2] Solar Putty
If you need a very simplified user interface with all of the features of Putty, you should install Solar Putty, which is available for free for Windows 10. You can connect to SCP, FTP, SFTP, and so on. You can get a tabbed window so that you can manage all the opened servers from one place. No matter whether it is SFTP or FTP, you can open multiple tabs at a time and execute different commands. You can save your credentials (not recommended) so that you can connect to the server quickly. There is only one drawback. You need to enter a lot of personal details to download this software. Download
If you are using Windows 10, you do not need an SSH client to connect to a server. There are several free and paid SSH clients those are helpful when you need to connect to build an SSH connection. However, Windows 10 users do not need such tools since Microsoft has already included a similar functionality.