How to Remove Noise from Audio for Free?
Are you looking for the best noise removal app? Don’t worry! I have got your back.
Isn’t it annoying to hear your audio recording with disturbing noises? I know how exactly you feel. Though there are tons of audio editors available online, not all the free solutions work well when it comes to removing background noise from audio recording.
That’s why I have come up with this post to help you remove noise from audio without spending even a single penny. So, are you up for it? Here you!
How to Remove Noise from Audio?
The background noise removal software we are going to use here is Audacity. You might have heard this name before, right?
You can’t find a perfect free alternative to Audacity. I tried a lot and failed.
Without further ado, let’s get straight into the action.
Step 1: The very first step is downloading the software. As I said earlier, you don’t have to spend anything for it. The software is available for free. Use the following link to download this amazing background noise removal app for Windows.
You can download it for Windows, Linux or Mac OS.
Step 2: Once you finish the downloading, don’t hesitate to proceed to the installation. You can do like you installed any other software.
Step 3: In order to remove noise from audio, you have to make the soundtrack ready. If it is a recording, I recommend you keep it silent for the first few seconds. It will make the noise detection easier.
Step 4: Now, open Audacity. Most probably, you will have a desktop icon right after the installation.
Hit Ctrl+ O or go to File >> Open. What you should do here is browsing to the audio file you want to remove the noise from.
Also Read:- Mute The Browser Tab Which Is Making Noise
You can do it by navigating to the correct location and double-clicking on the file. The duration of the importing process depends solely upon the size of the file.
Step 5: After opening the file, you have to select an area of pure noise inside the audio graph. The beginning of the graph is the best. In case you don’t have any noise in the beginning, you can select from any portion from start to the end.

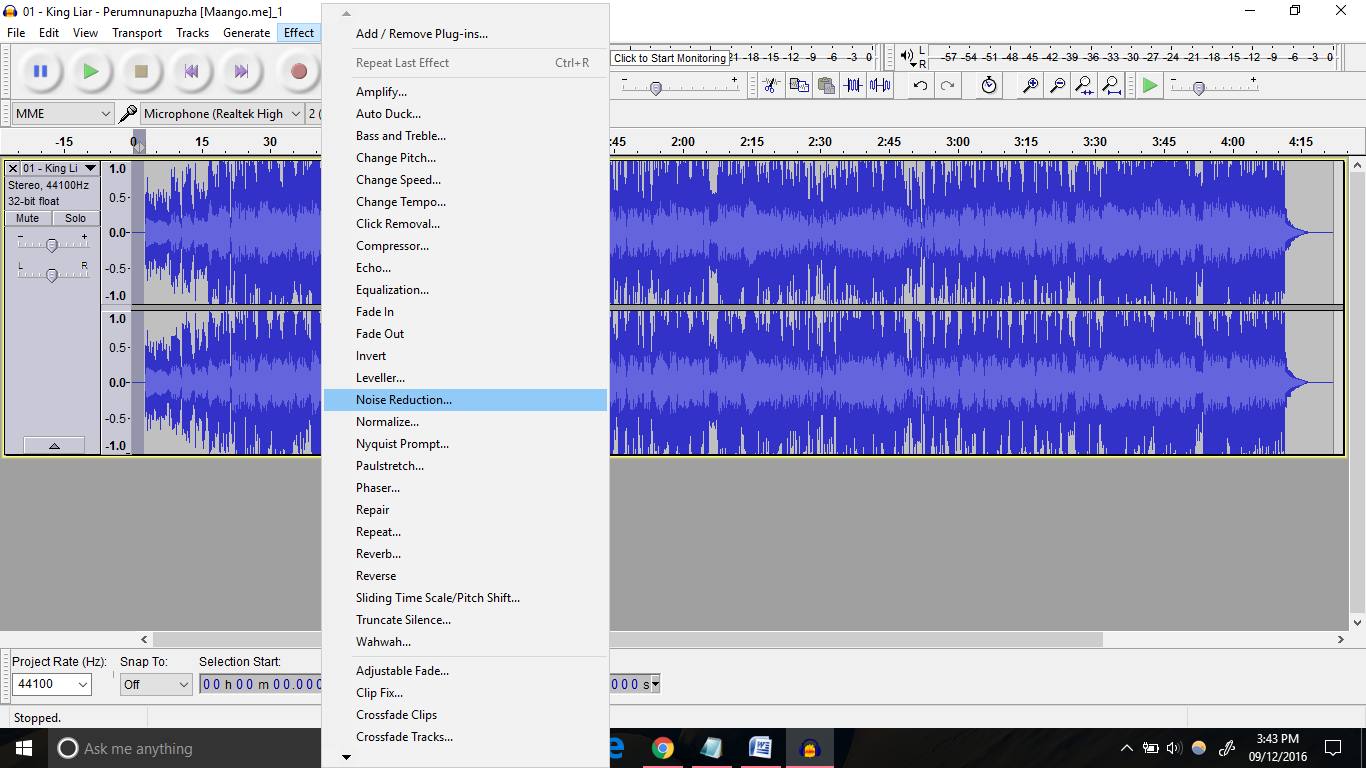
Step 6: Once you select the noise inside the graph, you have to follow Effects >> Noise reduction. Don’t look out for Noise removal because there isn’t any such option.
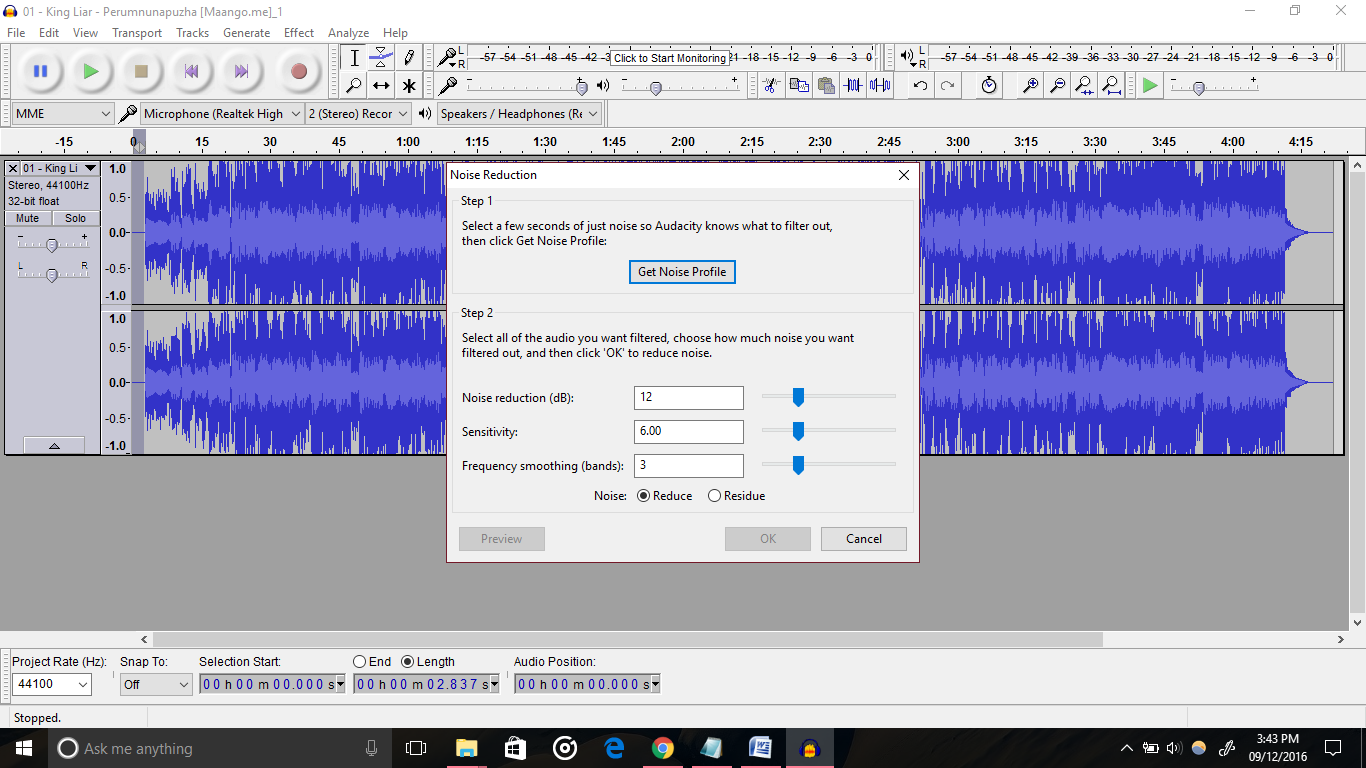
Step 7: You will get a new dialogue box. Can you see a button labeled Get noise profile? That’s the key to Audacity noise removal. Just click on it without any hesitation.
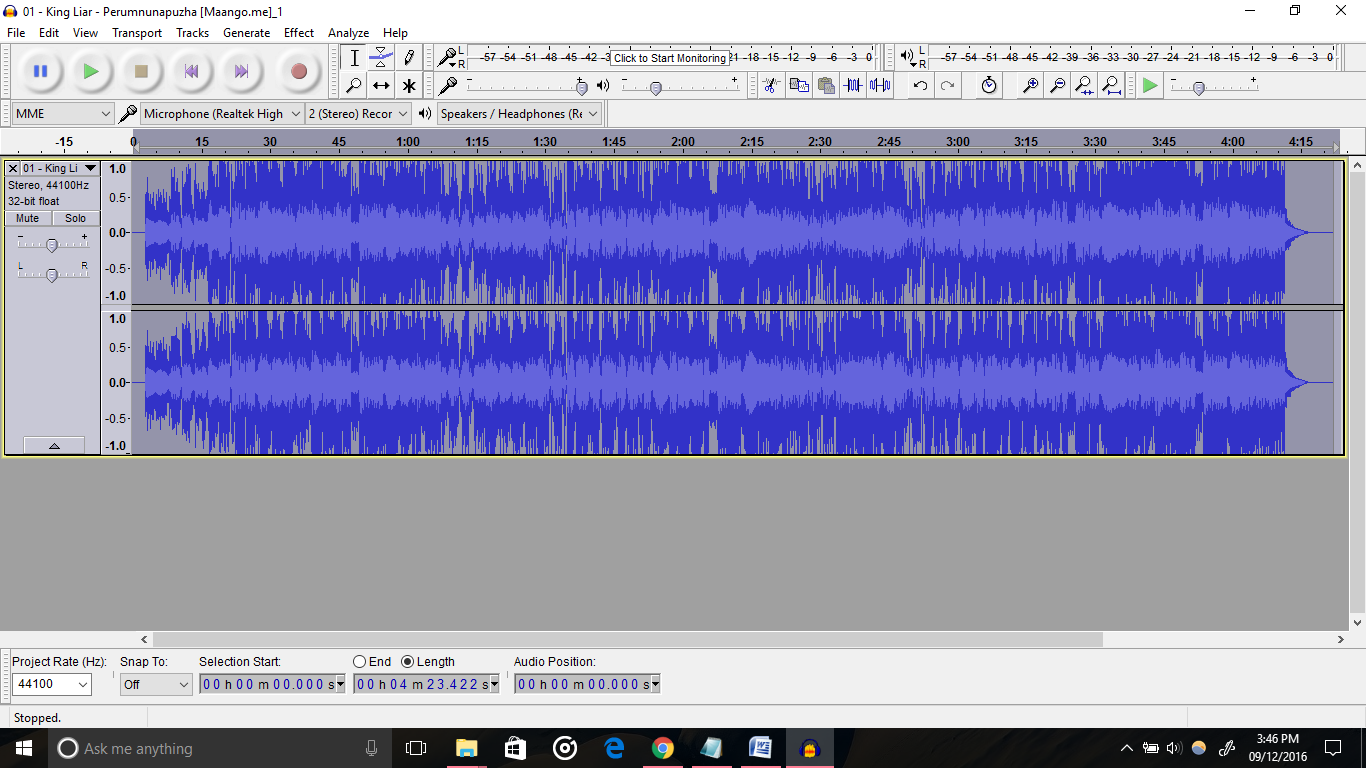
Step 8: Now, you have to select the entire audio graph. Go back to the Noise reduction dialogue box again (follow Effects >> Noise reduction).
Step 9: Hit Ok. There you go. You can now see a progress bar depicting the elapsed and remaining time for the complete noise removal.
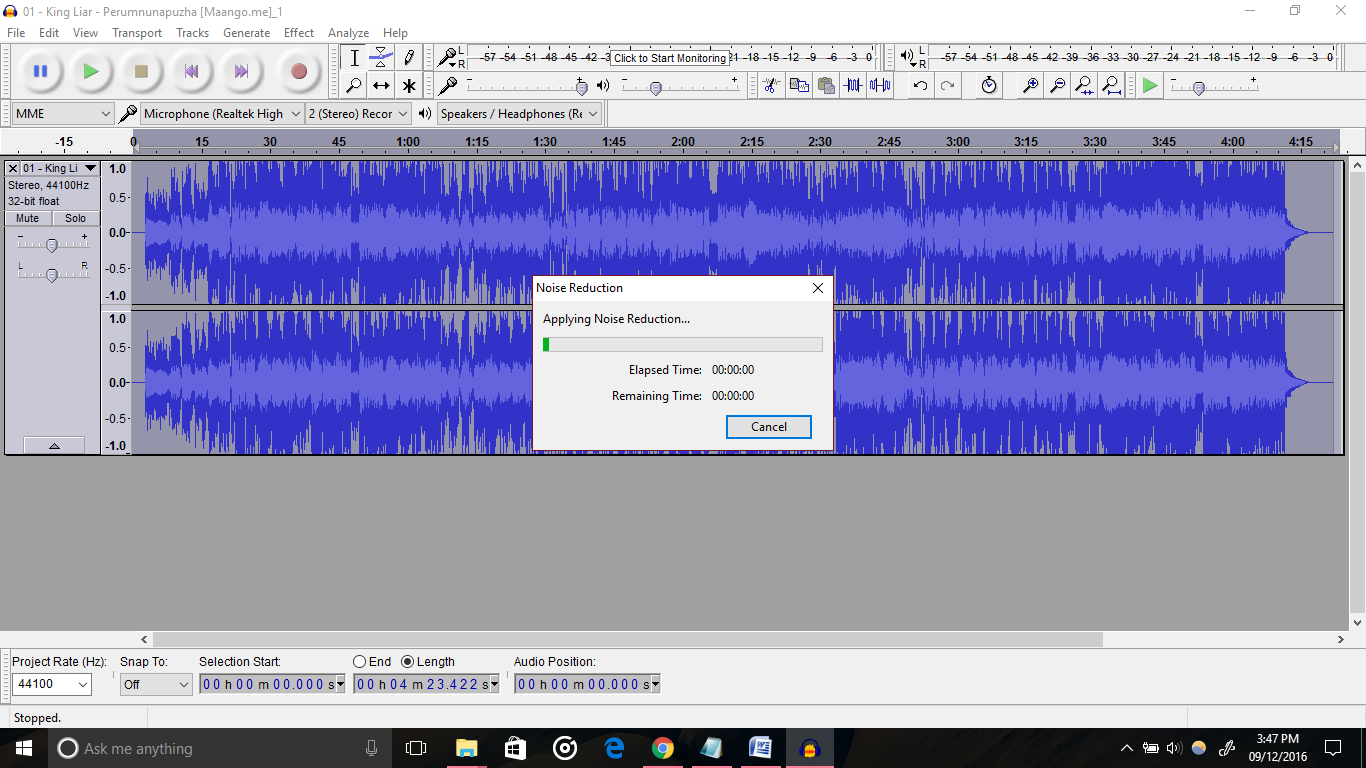
As I said earlier, the duration depends on the size and length of the audio.
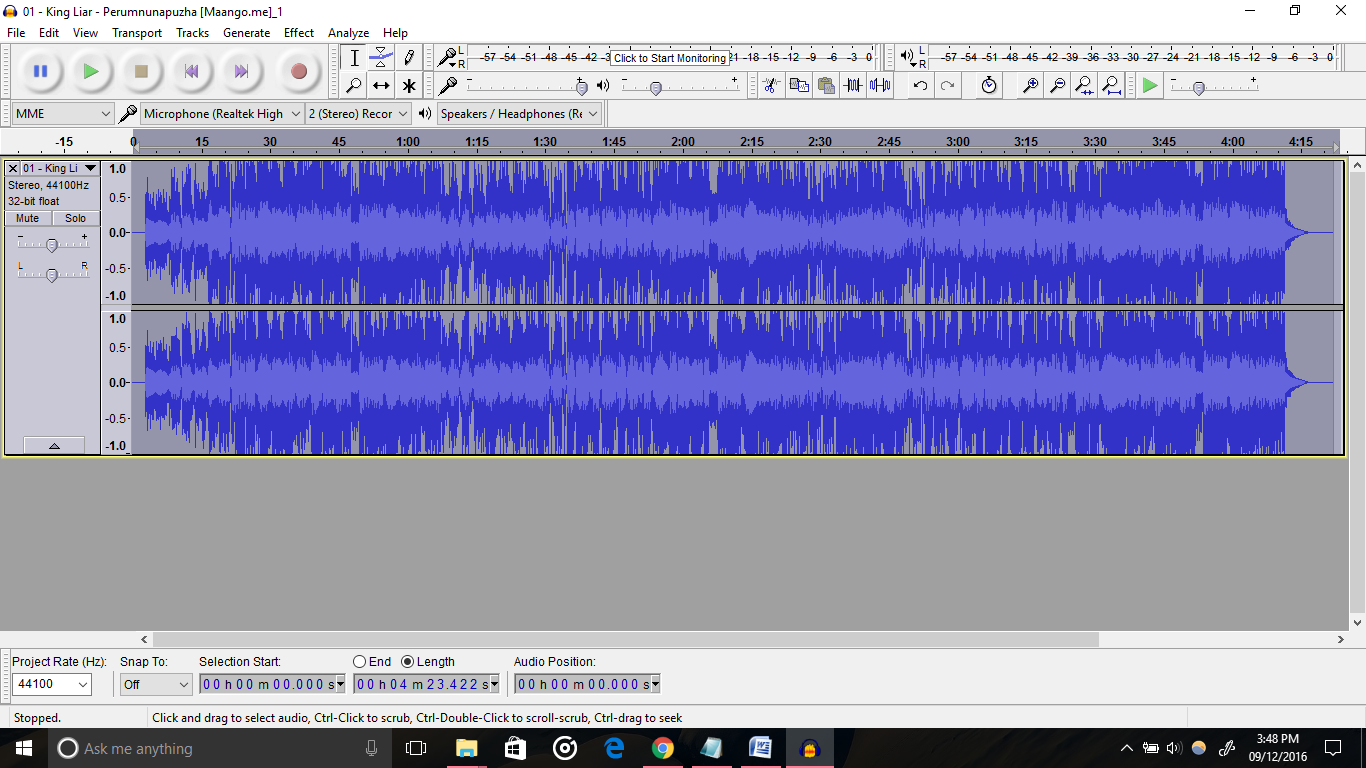
Once the process finishes, you will have the best-in-class audio with minimal noise.
Wrapping Up
You know how to remove noise from audio now, don’t you?
I just showed one way of using Audacity. Actually, it is a full-fledged audio editor that you can use for anything to do with audio files (only MP3 and Wav supported).
In case you realize, noise hasn’t gone to a negligible level after applying the effect, you can repeat the process.
If you have any doubt regarding this, don’t forget to drop a comment below. And, I appreciate a social share.