Top 5 Online Tools to Add Effects to Pictures
Gone are the days when there were hardly any options to enhance the features of a picture. Today, the scenario is quite different. With time, many technological innovations have surfaced with the help of which we can easily add effects to pictures.
Here the top 10 online tools that you can try out if you require image editing assistance.
Lunapic
This Website is very easy to use and does not require a user account to start off. It is simple to use and gives users many editing tools at its disposal. Below are the steps describing how Lunapic can be used to edit pictures.
Step 1: Go to official website of Lunapic.

Step 2: Click on the browse button to upload an image from your computer. You may even choose to upload an image from the internet by entering the image URL, and also via Facebook, Instagram, Chrome, or by using the “More upload options as seen in the second image below.


Step 3: After the image is uploaded, you will be directed to the editing page where you can make enhancements using the provided tools on the left-hand corner. Here you can add text, draw, crop, add borders, add filters, add captions, and do a lot more to your image.

Step 4: After you have finished editing the image, you can either choose to save it to your computer or share it online on your social networking site.
2. Canva
Canva is a well-known, online image editing application that requires no introduction. In the present time, this online image editing tool is considered the best and gives users a host of options even in the free version. To use the application, users must register themselves on the website. Here are the steps for using this popular online tool.
Step 1: Open Canva on your browser. You will be directed to the landing page which asks you for your registration details. You can choose to register via your Social accounts or by using your email.

Step 2: Choose one of the options out of Education, Small Business, Large Company, Nonprofit Charity, or Personal to proceed ahead.
Step 3: After registration, users will receive a confirmation email from Canva. Verify your account through this link.
Step 4: After the registration is complete, you will be navigated to a page where you have the option to choose your designs from pre-designed templates or make a design of your own. Pre-designed templates have some fixed standard dimensions required for images which are used for social sites, eBooks, posters etc. To create a design of your own you can choose the option on the extreme top-right corner named “Use Custom dimensions”.


Step 5: Upon choosing the dimension or design, you will land on the editing page as seen below. The editing page consists of a white and empty canvas where you can edit any free image chosen from Canva’s library or upload an image of your own. Canva gives you editing tools on the extreme left corner where from you choose text, background color, shapes, frames, borders and much more.

Step 6: Upon completion of your design, click on the text on the Canva header “Untitled design” and name your file. Go to the “File” option on the left and save your file. Now you can choose either to share the file or download and save it to your system in the following formats- JPG, PNG, or PDF.


3. Fotoram
Here is one more simple online tool to add effects to your photos. It features editing tools, textures, frames, fancy texts and clip art. Here is how to use it:
Step 1: Visit Fotoram’s official website.
Step 2: You can begin by clicking on any of the Editing tools, as per your requirements.

Step 3: Upon clicking on the “Photo Effects” button you will be taken to the editing page where you can upload an image or choose one from your Facebook account.

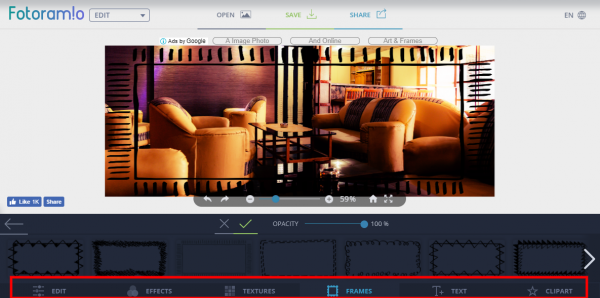
Step 4: When the image is uploaded, you will see a number of editing tools at the bottom of the page to add effects, textures, frames, text, and clipart to the chosen image. Choose the desired edits that you want to make.
Step 5: Once done, you can share the image on Twitter, Tumblr, or Facebook or save it to your computer as a JPG or PNG image file.


Editing Images on FotoRam via Editing Tools
We will also be talking about editing images with the editing tools by Fotoram. The process is the same as detailed above. The only difference is that you can specifically choose one editing tool from the ones listed on the website and carry out the desired edit individually. For instance, let us take the example of the “Collage” Button.
Step 1: Click on the collage button and you will be taken to a new page that explains how the edit works.

Step 2: Click on the “Create Collage” button on the page. You will be taken to the editing page as seen below, where you can create a collage of your choicest images. To add an image inside the collage click on the “+” button.

Step 3: After the edits are done, save or share the image as you please.
4. Fotojet
Fotojet is a one-stop destination for all your image designing needs. stands out from the rest due to the availability of many tools and a customizable effects palette. It is a self-learning tool that offers rich templates and resources, making it effortless and time-saving. Here are the steps to use it.
Step 1: Go to the Fotojet website where you will be presented with the options to Create a Design, Make a Collage or Edit a Photo.

Step 2: You can begin creating your own design by choosing the “Create a Design” option. You can also choose from a list of pre-designed templates. It’s a good idea to sign up so that you can save your projects.

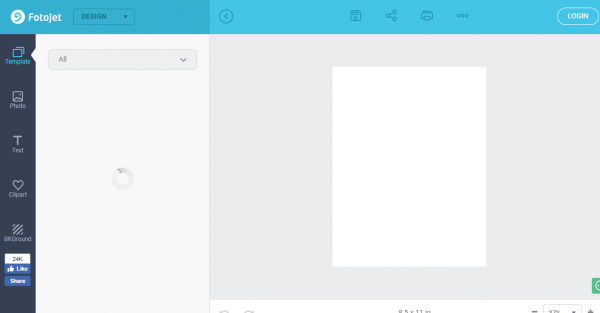
Step 3: After choosing a custom size or a template, you can begin editing through the blank canvas on the next page. The editing tools are on the left hand of the page.
Step 4: After edits are done, click on the save icon symbol to save your design.

You can even share our design on social media or print it using the print icon option.
5. Pine Tools
Pinetool is one of the simplest yet efficient online tools to add effects to pictures. You can see the effects applied to our images within seconds. It free to use and offers various formats to choose from.
Step 1: Go to PineTools
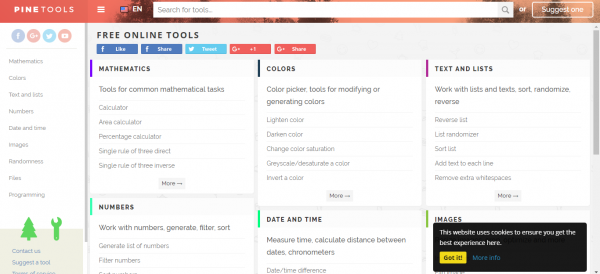
Step 2: Click on Images in the left-hand pane as shown in the below screen to upload and enhance the features of the picture using the different options.
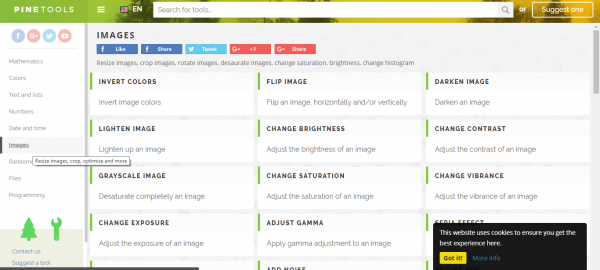
Step 3: Scroll down and click on the option of Vignette effect on the pane.
Step 4: Choose the file to upload the picture

Step 5: Now click on the apply button at the bottom. You can now save the image in the required format.
Final Takeaway
These are the top online tools. Although this list is not exhaustive, these are the ones that stand out from the crowd with their features and performance. Which is your favorite online editing tool? Tell us in the comments section below.