How To Use iPhone As MacBook Trackpad And Keyboard
MacBook has a very responsive trackpad and clicky keyboard, which lets you type faster than other laptops. No matter whether you need to write three pages or thirty, you can use a MacBook and the keyboard to get a stress free user experience. However, let’s assume that the keyboard or trackpad is having some issues and you are not able to do your work smoothly. Many users face this problem because of dust, moisture, etc. At such moments, you can use your iPhone or iPad as a trackpad or keyboard for MacBook. This is very easy, and it doesn’t consume a lot of time to set things up.
People love the MacBook keyboard very much. No matter whether you are a student, who need to finish a big project or office employee, who needs to finish his/her presentation or report, you can certainly use this device to get things done. If the trackpad or keypad is not working correctly, and it is interrupting your work, there is only one thing you should do. You should go to an authorized service center and get it fixed. However, if you need to do some urgent work and there is no time to visit the Apple Store for service, you can follow this tutorial to learn how to use iPhone or iPad as MacBook’s trackpad and keypad.
How To Use iPhone As MacBook Trackpad And Keyboard
As usual, you need to take the help of a third-party app. It is called Remote Mouse, and you can download it for free. Although some of the features are not available in the free version, it comes with almost all the essential features so that you can do your job quickly.
Remote Mouse is available for iPhone as well as iPad. You just need iOS 11.0 or later version. As you need a client on your MacBook, you need to download the Remote Mouse app on your MacBook as well. It is compatible with macOS 10.9 or later version. Being said that, you can download almost all the updated MacBook you have.
Another very important thing is you need to connect your iOS device and Mac to the same Wi-Fi network. Otherwise, it won’t work as expected.
To get started, you need to download it on your iPhone and Mac. You can download Remote Mouse for iPhone and iPad from here and for Mac from here.
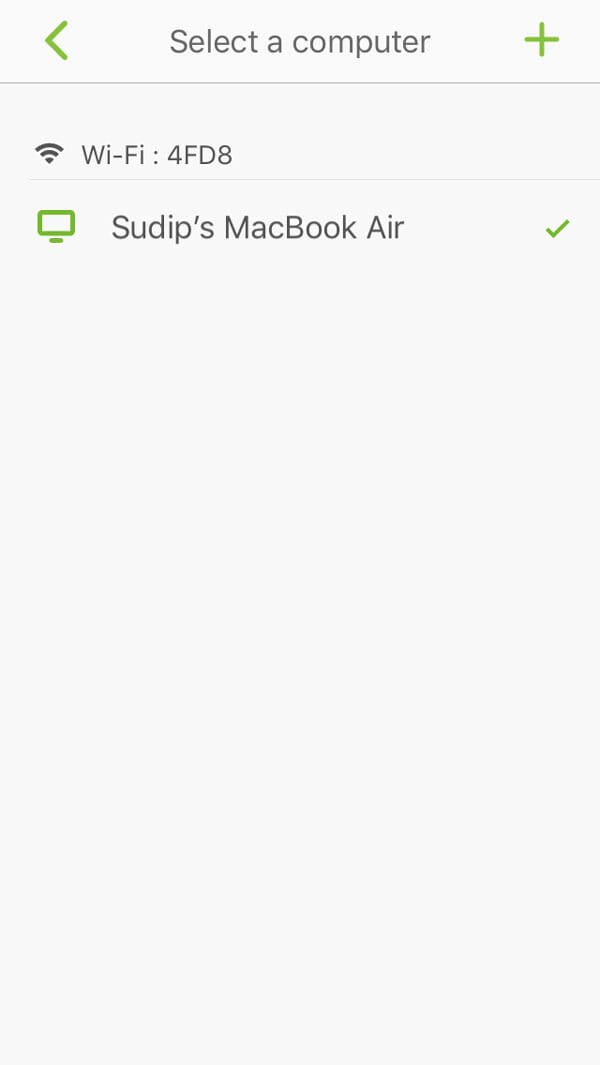
After download or installing, open the app on your iPhone or iPad. You should get a screen like this-

If your computer is connected to the same Wi-Fi network, you should find your MacBook name on the list or on the screen. However, if you are not getting it, there are two reasons. First, you haven’t opened the app on your MacBook. Second, you need to connect them manually. Therefore, open the app on your MacBook first. You might not get any app window even after opening it from the Launcher or somewhere. You should get an icon in the menu bar or status bar. Click that icon and select either Show IP address or Show QR code option.

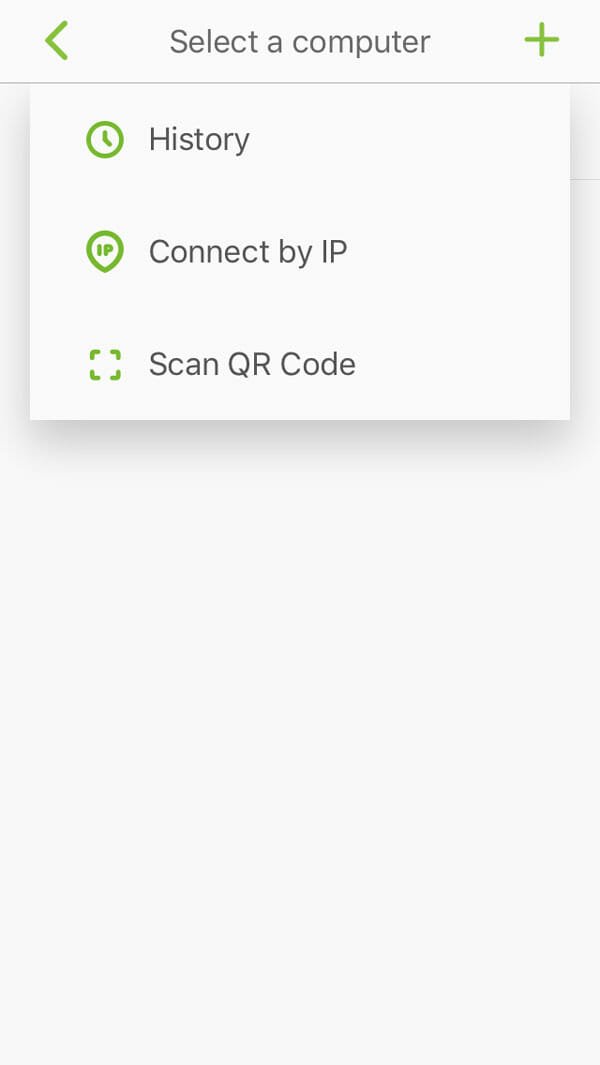
Either way, you will get something on your screen. After that, open the app on your iPhone or iPad, and click the plus icon visible on the top-right corner. Here you can find two options i.e., Connect by IP and Scan QR Code.

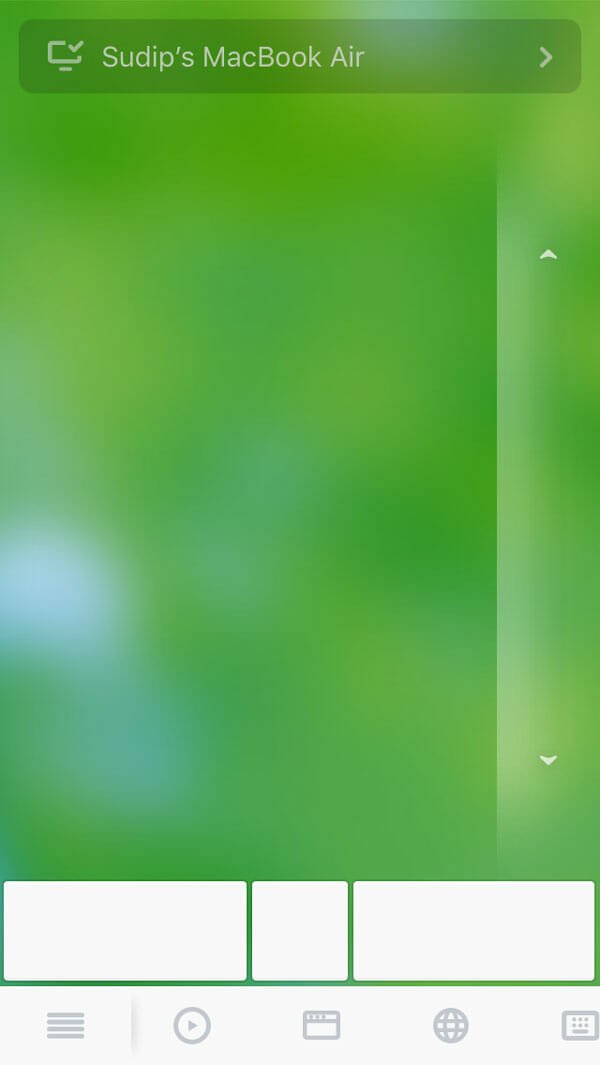
Select an option accordingly. After connecting successfully, the following screen will appear.

You can use the green area as a trackpad. The right-side arrows represent the scroll bar. Apart from that, you can use the bottom icons to perform various jobs. You can open different websites, launch apps, use keypad, and so on. This app comes with some settings so that you can set it up according to your requirements. In Settings, you can find these options-
- Volume button remote
- Gyro Mouse Button – it will let you utilize the gyroscope to use your iPhone as a mouse.
- Left Handed – It will flip the functions and positions of the screen so that you can use it as a lefty.
- Tracking speed management
- Scrolling speed management
- Wallpaper
And more others.
Considering everything, it works pretty smooth, and you should not find any issue if you can set it up correctly.