How to Change ‘Update’ Setting in Windows 10 Tech Preview
‘Windows 10 Technical Preview’ users are not allowed to change Windows update configuration setting while its default value is set to “Install Updates Automatically (recommended)”. Though, this copy of Windows 10 is an evaluation copy, yet, this policy of Microsoft is not fair enough and it might create a cause of worry specially for those users who are forced to use the limited bandwidth internet connection. Hope, Microsoft would be caring enough to reconfigure Windows 10’s update setting just like previous Windows versions, so that, the system administrator can change the Windows update setting whatever he/she likes.
Generally there should be four possible options to choose from. The options are as follows:
- Never check for updates (not recommended)
- Check for updates but let me choose whether to download and install them
- Download updates but let me choose whether to install them
- Install updates automatically (recommended)
Thankfully, the behavior of Windows 10 can be changed to anything else from the “Install updates automatically (recommended)” setting with the help of some special Windows registry tweaks.
In previous versions of Windows, update settings consist of three to four different options in a drop-down menu formation just like the below picture.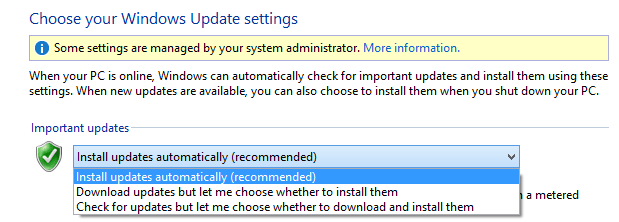
But, in Windows 10 release preview build in 9926, the option “Automatically Update” is the only available version and rest of the version is unavailable.
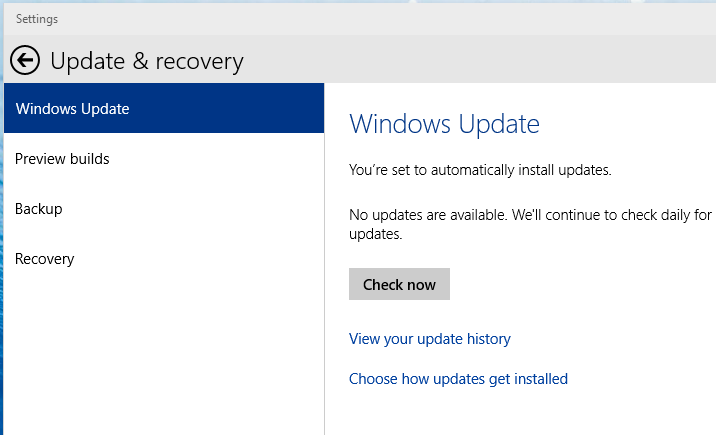
When you head over to Update setting of Windows 10, you should see the window just like the below image.

If you look for ‘Advanced option’ you can find the window which I show you with this pictorial representation.
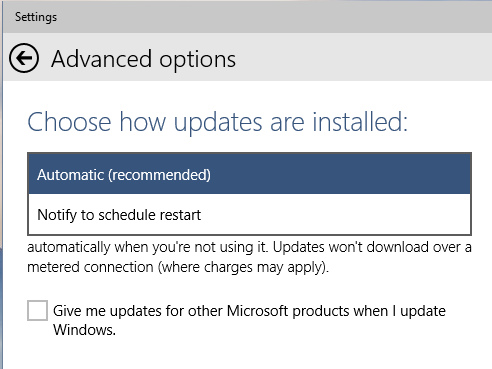
As you see, the image describes here that the update applet of Windows is no more in Windows 10 build in 9926 version.
Just follow the below steps to get back update applet.
Tip: Sign in To User Accounts Automatically At Windows 10 Startup
How to Bring Back Update Applet in Windows 10 Technical Preview
- Back up registry file.
- Copy the below code and paste it to notepad file.
Windows Registry Editor Version 5.00
[HKEY_LOCAL_MACHINE\SOFTWARE\Microsoft\WindowsUpdate\UX]
“IsConvergedUpdateStackEnabled”=dword:00000000
[HKEY_LOCAL_MACHINE\SOFTWARE\Microsoft\WindowsUpdate\UX\Settings]
“UxOption”=dword:00000000
- Save it as update.reg to your pc.
- Double click the registry file and install the registry values.
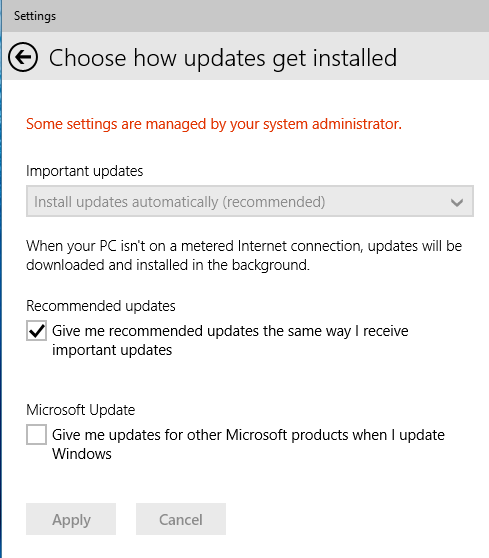
That’s it. Now restart your PC. Now, you will get update setting page like that:
When you click on “choose how updates get installed” you can find a Window where Important updates option is set to the value “Install updates automatically (recommended)”.
Now, with a simple registry tweak you can change the “Important updates” option.
How to Change Update Option in Windows 10
At first, navigate to the following path:
HKEY_LOCAL_MACHINE \SOFTWARE\Microsoft\Windows\CurrentVersion\WindowsUpdate\Auto Update\AUOptions
Here, just change the Dword value of ‘AUoptions’ to bring your desired setting back.
Now, see the list below minutely to know hexadecimal numeric value details.
1 : Never check for updates
2 : Check for updates but let me choose whether to download and install them
3 : Download updates but let me choose whether to install them
4 : Install updates automatically
From the below image you can get a better idea about where to change the value.

For example, if you change the DWORD(32-bit) value of AUOptions to ‘1’, the default install updates value of Windows 10 will be changed from “Install updates automatically” to “Never check for updates”.

Change Windows 10 Update Setting Using Group and Policy Editor
Using Group-policy editor, a Windows 10 system administrator can enable Windows update configuration in such a that a Windows user can change Windows update setting manually direct from Control Panel\System and Security\Windows Update\Change settings.
For this, press Windows+R and it will open ‘run’ dialogue box.
Write gpedit.msc and press enter.
Navigate to Computer Configuration -> Administrative Templates -> Windows Components -> Windows Update.
Now, double click on “Configure Automatic Updates” option.
Choose ‘Enable’ option and then choose “Allow local admin to choose setting”.
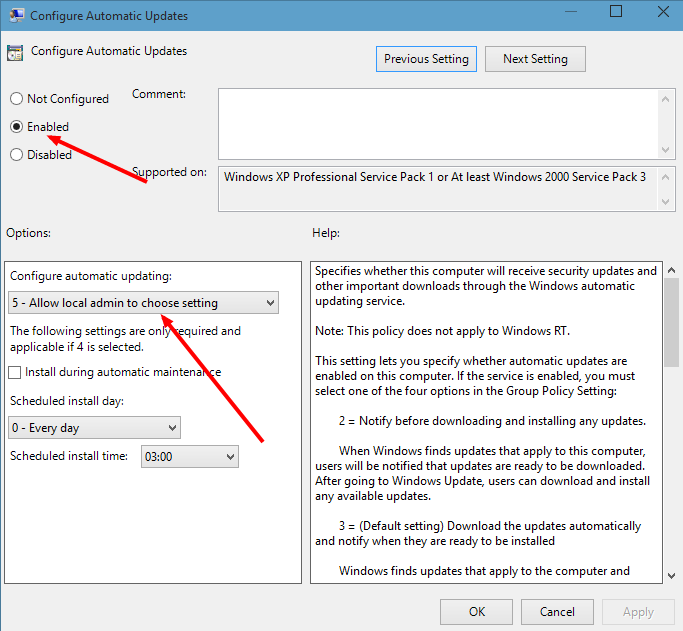
That’s it.
Now navigate to ‘Control Panel\System and Security\Windows Update\Change settings’ and you will see “Choose your Windows update setting” option there.

From the drop-down menu, you can choose Windows update setting in Windows 10 Technical preview anytime.

I cannot update my phone to windows 10 how else is this possible please
Both method not working for me registry change and Group-policy editor change. Nothing change in windows update that always looks the same in the windows 10, and only allows automatic update. in addition, can not find: AUOptions.
Thanks
Jack