How to Enable Parental Control in iOS Device
Parental Control plays an important role for those who have an obstreperous kid in their home. You’ll be able to enable parental control in nearly all devices including Windows PC, MAC, Android as well as in iOS. Alike, Android, Apple itself comes with an option to enable restrictions aka parental control in your iOS device.

That is definitely pretty interesting yet not efficient. This is the reason today I am about to write down a step by step guide that will assist you to enable parental control in iOS device so that you can keep away from others from looking at your discreet data i.e. image, video, files, social accounts etc.
Now, here is a software that will help you to accomplish everything in just couple of seconds. It is called BioProtect and you will get it at BigBoss app library. That simply signifies that BioProtect can be obtained only on Jailbroken iOS device and you absolutely need Touch ID in your iOS device.
Read Also: How to Unlock Mac using Touch ID
Although, you can download some apps for initiating parental control in your iOS device from iOS App Store, but this tool is really economical and very useful for almost everyone. This is because you ought to be concerned with security of your iPhone or any other iOS device. Anyway, let’s check out the workflow of BioProtect.
BioProtect is a simple yet effective Jailbreak tweak that is available for only $2.99. You can protect your installed apps, files, folders or even settings. This is where BioProtect stands out from the crowd and this is where official method cannot compete since Apple doesn’t provide so many option that BioProtect does.
You will have to spend a little time to set it up as per your wish. It you have already been using Touch ID on your iPhone 5S, 6 or 6 Plus, iPad Air 2 or iPad Mini 3, you may not have to spend much time as compared to them who don’t. Moreover, it has only few couple of things to be set up.
At first, you will have to set up Touch ID in your iPhone or any other iOS device. Therefore, open the BioProtect app and enable it.
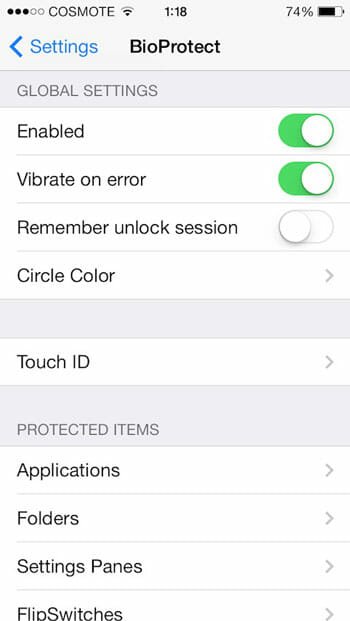
If, you don’t do it, you will have get any settings or security layer. However, after enabling it from BioProtect app, you can also enable/disable vibrate on error or remember or skip unlock session and change the circle color that appears when someone tries to unlock any locked app or settings.
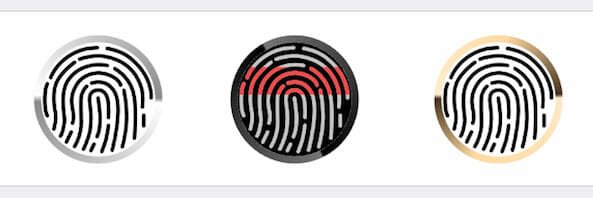
BioProtect has three different circle colors i.e. White, Black and Golden. You can select as per your iPhone color. To choose a circle color, just open the BioProtect app and go to Circle Color section. After that, you can select according to your wish.
The last and one of the most important thing is app or settings selection. Without this step, BioProtect is nothing. Anyway, you can select any installed app from the list after tapping the Applications button. Similarly, you can select any file, folder and particular settings too.
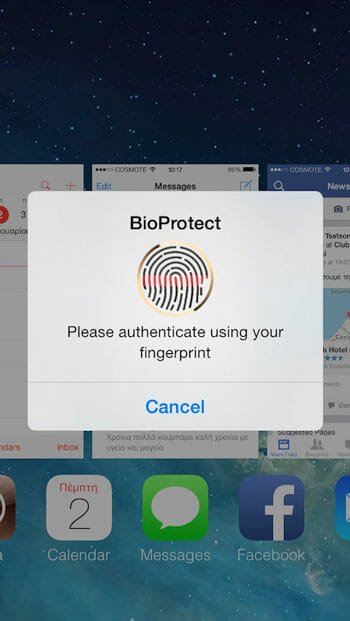
After setting up everything, you will get a screen something like the following picture, whenever you will try to unlock any app;
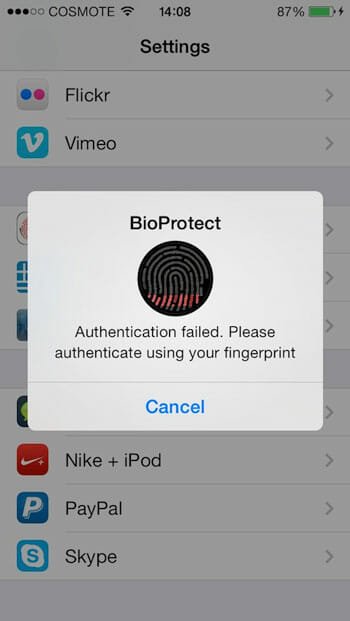
If your authentication goes wrong, you will be greeted with a screen that looks as follows;
Editor’s Note
BioProtect costs $2.99 but its settings are priceless. You cannot get such a brilliant app to protect your device at such a reasonable price.