Everything You Need to Know about Windows Timeline
Microsoft released Windows 10 v1803 few days back, and it came with tons of new functionalities. For example, the Windows Timeline. Windows Timeline is one of the best features of Windows 10, which is available for Windows 10 v1803 only, as of now. Basically, this is an upgraded version of Windows Task view feature, which was available in the previous version of Windows 10. The Windows Timeline button is placed at the same position where you could have got the Windows Task View button. However, if you have recently upgraded your Windows 10 computer to the latest version, here is everything you need to know about Windows Timeline.
What is Windows Timeline? What does it do?
Windows Timeline is nothing but a new functionality of Windows 10 v1803. It helps you resume any app that you have previously opened. For example, if you have opened Calendar app and you did some work but closed it mistakenly, you can open that app from Timeline and resume working from that previous position.
It works with almost all the apps you can have on your computer except games. As of now, Microsoft doesn’t have support to resume games from Timeline. However, if you have any browser like Microsoft Edge, Google Chrome or any other app like Notepad, Camera, Cortana, WordPad or anything else, you can make use of that from this Timeline.
How to Enable Timeline in Windows 10?
You do not need any third-party software since this is an inbuilt feature of Windows 10. All you need is Windows 10 v1803. As of now, this feature is available for April Update but it should be available in the later version as well.
Also, you do not need to do anything to enable Timeline in Windows 10 as this is activated, by default. In case, you have some issues, and it is not turned on, you can follow this method to enable Timeline in Windows 10.
The second thing you need to is to add a Microsoft email account in Windows 10. Otherwise, this is not possible to fully activate Timeline in Windows 10 April Update.
If you have already added a Microsoft account, open Windows Settings. For that, press Win + I button to open Windows Settings. Following that, go to Privacy and navigate to Activity history.
On your right-hand side, you can find an option called Show activities from account (these are your account on this PC. Turn them off to hide your activities from your Timeline.)
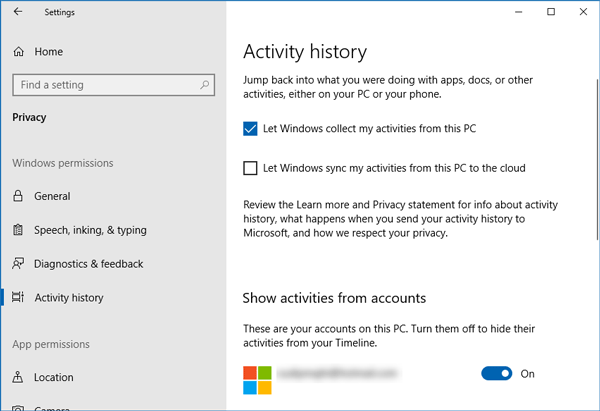
Here you can find your email account on this page with a toggle button. If this toggle button is OFF, you need to click on it to enable it.
Tips and Tricks to Use Timeline in Windows 10
As Timeline is a new feature, you need to be familiarized to get started with it. Therefore, here are some tips and tricks to begin using this Timeline feature.
How to open Timeline?
There is a small button in Taskbar that opens up the Timeline in Windows 10. You can check the image as mentioned above for more info. After clicking, you can find all the paused or running apps in your system. If you scroll down, you can see more other previously closed apps.
Snap left or right
Let’s assume that you have paused an app in your system and now you want to start it again from a particular side (left or right). For that, there are two different options called Snap left and Snap right. If you right-click on an app in Timeline and select “Snap left,” it will be placed on your left-hand side and vice versa.
Move app to another desktop
Although you have got Timeline, the Task View option is still there and accessible. Therefore, you can create New Desktop without any problem. Being said that, you can move a particular app from one Desktop to another desktop as well. For that, right-click on any app or window in Timeline and select Move to > desktop name. You can find all the desktop names here on the list. If you choose New desktop, it will create a new desktop and move the app to that new desktop.
Show one app on all desktops
If you have opened an app and you want to open that in all the desktops you have opened in your Windows 10 computer, here is what you can do. You can get an option in Timeline that will let you show one app on all desktops. For that, right-click on an app or app window and select Show this window on all desktops.
There is another option called Show windows from this app on all desktops. The first option will show one particular window on all desktops. However, this option will show all windows of a particular app on all desktops.
Close any app in Timeline
Let’s assume that you do not want to have an app in Timeline and therefore, you want to close it accordingly. For that, there is an option called Close in the right-click menu.
How to Disable Suggestions in Timeline?
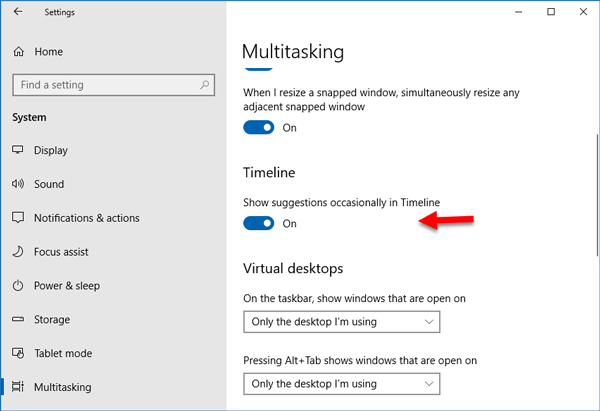
Timeline occasionally shows suggestions for the first-time users. It shows suggestions so that you can explore more functionalities in Timeline. However, if you do not want to get them in Timeline, you can follow this guide.
At first, open Windows Settings by pressing Win + I button together. After that, go to System > Multitasking. On your right-hand side, you can find a label called Timeline. By default, the Show suggestions occasionally in Timeline option is turned on. You can toggle the button to turn it off.
That’s all! Hope these simple tips and tricks would be helpful for you to get started with Timeline in Windows 10.