Everything You Need to Know About Android Clarity Keyboard
Over the last few years, Android has been developed by endorsed authority in addition to third party developers. You will find an abundance of renowned developers, who always shell out their time on Android development. SwiftKey is such a group of Android developers, who constantly come up with a more rewarding Android to ensure that users may go through what official release doesn’t provide.
SwiftKey is a widespread and possibly the first keyboard app for Android, which sported Gesture typing. Despite the fact that, Google has incorporated this fascinating and intensely beneficial feature in consequential developments, yet, Swiftkey keyboard app was the first one, which included gesture typing that makes much easier to type long paragraphs.

Having said that, these days, a new term is trending. That is Clarity Keyboard. Here, in this article, you are going to find out all sorts of things what a first time user should become aware of it. Without doubt, the gesture typing is very helpful and popular as well. Concurrently, irrespective of, whether you use any third party keyboard app or in-built Google keyboard, you will definitely get the auto-correction.
If you notice the formula/tactic/process or workflow of this auto-correction feature of Android, you can find that it tends to make a static correction of the last typed word. That indicates, if you have written something wrong like
This is my pens
It is quite difficult to say whether the in-built auto-correction system will replace pens with pen or not. This is because default auto-correction looks for the last word and here, pens is a correct word. Let’s look at this example,
These is my pens.
In this example, it should be These are my pens. The in-built auto-correction will not make any change in this line either because of the same reason. This is certainly a problem for them, who wish to compose long email or anything. Conversely, someone will get complications, when he or she doesn’t have much time to proofread the paragraph.
Android Clarity Keyboard – The New Era of Auto-Correction
To solve the aforementioned problem, Android Clarity Keyboard comes in. Clarity Keyboard is not being developed by the Google. Instead, this is a product of the most popular third party keyboard maker, Swiftkey. Currently, Android Clarity Keyboard is available in beta version and this is available on Swiftkey Greenhouse and Google Play Store. However, it can ditch the ‘beta’ tag anytime and leave Greenhouse to be a stable application.
The beta version of Android Clarity Keyboard app is now available for Android 4.4 and later version. As this is still under development, it may come with some bugs.
How does Android Clarity Keyboard work?
Clarity Keyboard is nothing but a new era of auto-correction. Sometime, auto-correction create various problems while typing. This keyboard will solve all those issues along with the problem, what is mentioned above. Clarity Keyboard will check the entire sentence and then, make corrections.
Example:
Let’s take the previous example to illustrate the Clarity Keyboard’s workflow. Suppose, you have written the following line,
These is my pens
Obviously, this is not correct. It should be These are my pens and this correction is not possible with in-built auto-correction feature. Nevertheless, the Clarity Keyboard will check the entire sentence after getting a full stop(.) and then, make all the corrections within moments.
That implies, you will get This are my pens if you use this new keyboard app on your mobile.
You can use this keyboard app anywhere – just like Google Keyboard.
How to enable Android Clarity Keyboard?
This is quite easy and the procedure is as same as other third party keyboard apps. At first, download the Clarity Keyboard app from Google Play for your Android 4.4+ device. After installing and opening the app on your mobile, you will get the following screen;
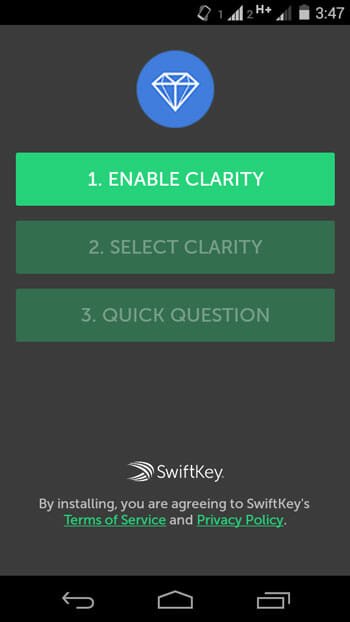
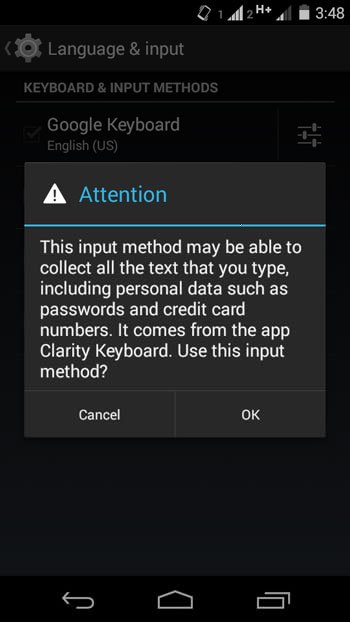
Just tap on ENABLE CLARITY. After that, tap on SELECT CLARITY. Now, you will get be redirected to your keyboard settings page. Just select Clarity keyboard and hit OK in the popup.
That’s it. Your Clarity Keyboard has been set up and ready to use.

Pros of Using Clarity Keyboard
There are several benefits of using this Clarity keyboard app over Google keyboard.
- It does multi-word correction
- It checks entire sentence to make any change
- Design is good and better than Google keyboard
- Use this as a standalone keyboard app – no need to install Swiftkey keyboard
Cons of Using Clarity Keyboard
The app is still in beta version and the development is going on. Though, this is not the right time to mention the disadvantages of this app, yet, here are something, what you won’t get in this app.
- No prediction bar or related word list
- No gesture typing
- No emoji
- No voice input
- No button to toggle keyboard
- Not available for any other language except English(US)
- It can take 1.5-2 second to load before typing.
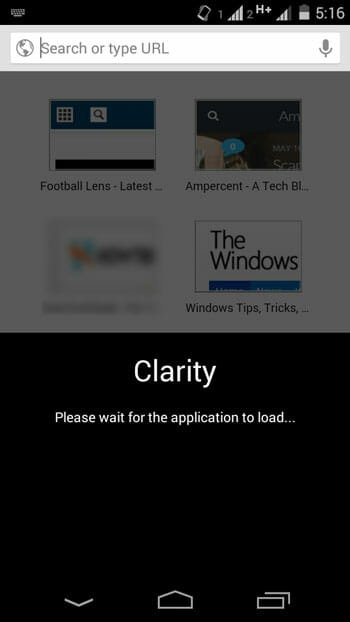
Developers have made this keyboard using Clojure, which is a programming language like Java. This particular language is not so familiar with Android platform and developers are experiencing countless errors while developing and trying this out. Therefore, according to the Clarity Keyboard app developers, it may consume 1.5-2 seconds to load. However, they are working on this particular thing to reduce the load time from the very first day and hope, they will figure it out.
As of now, this app has been downloaded more than 50k times but still it is carrying 3.1 star out of 5. Again, this is still under development and users may encounter with bugs. This is probably a reason, why users are giving 1 star to this app.