Author: Sudip Majhi

  • Microsoft Stopped Selling Windows 7 – Here’s How to get it Legally

    Microsoft Stopped Selling Windows 7 – Here’s How to get it Legally

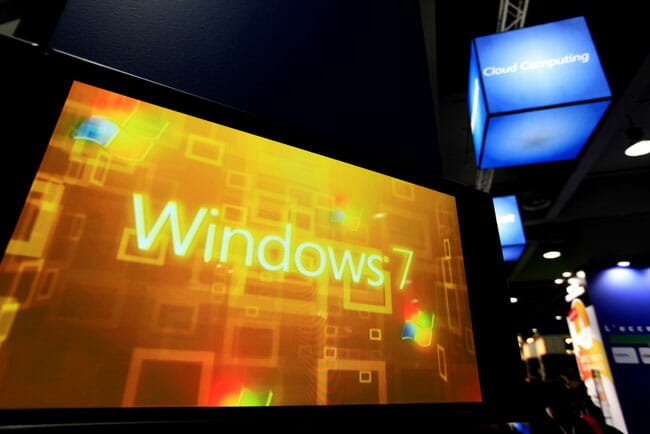
    If someone is enlisting best Microsoft products, Windows 7 must be in his/her list since this is one of the best Windows versions out there. Still most of the PCs are running on Windows 7 in many developing countries like India. But, unfortunately, Microsoft has stopped selling Windows 7 from October 31 2014, as per the pre-announced plan.

    Windows 7 Selling

    However, if you have Windows 7 and want to continue using it, you can do so because Microsoft has not stopped providing support to the users. They have only stopped selling it. Anyway, if you would like to get a new copy of Windows 7 for your new PC, you might be in trouble because Microsoft has already made the change. According to their policy, they are no longer able to sell Windows 7, which includes Home Premium, Professional and Ultimate.

    According to Microsoft, users should upgrade their PC to Windows 8.1 or Windows 10 so that they can experience the best ever Windows OS. If you are fine with those aforementioned Windows versions, stop reading this. But, if you really need Windows 7’s copy, read on.

    How to get Windows 7’s copy now?

    There is couple of methods to get that for your computer.

    Microsoft Dreamspark

    This is a great solution but it is not available for everyone. You supposed to be either a student or teacher or anybody else of any university, which has Microsoft Dreamspark subscription. Those, who have this subscription, can get any Microsoft product at very low cost or even at free of cost. So, ask for a copy of Windows 7 to the corresponding department of your institution now.

    Ecommerce Website

    Some widely popular ecommerce websites like Amazon is selling Windows 7 OEM version for you. You can grab your Windows 7 Home Premium, Professional or Ultimate from there. You should check the seller information and review before purchasing because a fraud seller can deliver wrong copy.

    These two methods are the most preferable. However, there are many other ways too.

    Buy Pre-Installed Windows 7 PC

    Even if, Microsoft has launched Windows 10 Technical Preview but still several laptops and desktop computers come with pre-installed Windows 7. So, if you are lucky enough, you can get a Windows 7 PC with comprehensive configuration.

    Move Existing Windows 7 Installation

    Move Existing Windows 7 Installation

    If you have a new PC and you would like to use Windows 7 on it, you can simply move your existing Windows 7 installation from old PC to new one. You can either use manual method or ask a software for doing this. PC Mover is a good solution and you can get it for just $39.95.

    Conclusion

    This is always recommended to latest version of every platform to avoid various security flaws. However, sometime, an older version is better than latest version. Windows 7 is the same. Windows 7 is much better than any other Windows versions.   Hope, these above mentioned methods would help you a lot to get your Windows 7 copy even after October 31.

  • The Secret List of Must have Apps for Writers [#3 is the Best]

    The Secret List of Must have Apps for Writers [#3 is the Best]

    Writers are everywhere. You supposed to have a good writing skill to be passed in exam, get a job so on. However, most of the people think that they cannot write because they cannot explain a difficult thing in simple words. Everything has the ability to start writing. Everyone has a different style of writing. Anyway, that is a different story.

    The Secret List of Must have Apps for Writers

    There is nothing to say about blog post writers or eBook writers. In fact, most of the writers including novel writer, poem writer etc. use computer and tablet instead of pen and diary to write down their thoughts. Nevertheless, you must have to choose right application and software for your mobile and PC respectively so that you can get things done faster. Let’s check out this following list.

    Slick Write

    7 out of 10 people have blog and they do blog too share random thoughts. This is where you have to be as simple as possible. Otherwise, your readers would not understand the inner meaning or even actual meaning. You can use simple words and short paragraph to sustain the simplicity. There is yet another solution, which is called Slick Write. Slick Write can proofread grammatical basic grammatical errors, spelling mistakes. You can also replace difficult words with simple words, improve punctuation and do lot more.

    HemingWay

    This is one of my favorite web apps. I have been using Hemingway since past couple of months. Only the web version of Hemingway had been available for writers but now you can purchase the Desktop version (for Mac and Windows) at $6.99. It can aid you to check readability, split hard to read sentences, change passive voice with active voice and more others. The web version of Hemingway is accessible for free.

    Idiom Dictionary

    Idioms are awesome to improve your piece of writing. Idiom makes your article even simpler. On the other hand, you can express something difficult in simple words (as Idiom is a set of words that refers a meaning.). This Idiom dictionary is really great and available at free of cost. Just head over to the web app and make a search. You will get brief details about that that particular word and all the technique to make use of that particular idiom.

    Mindly

    Mindly for iOS

    Mindly is a great iOS app for brainstorming, thought structuring and gathering all the ideas. This free application is available for free on iOS 7.0+ gadgets. This app is not yet optimized for iPhone 6 and iPhone 6 Plus. The interface of Mindly is great and it comes with minimum options. Hence, you can jot down all the random thoughts in a better way before writing.

    Microsoft Office

    Office for Android

    Microsoft changed a lot for Office for Mobile earlier. However, they have made it free to use for iOS as well as Android. That means, you do not have to be an Office 365 user to utilize MS Office for mobile. All your data will be saved via Microsoft’s own cloud storage, OneDrive. You can access all the documents, spreadsheets, presentations across multiple devices. All you need to do is sign in to Office for Mobile using same account.

    Evernote

    Evernote

    This is one of the best cross-platform note taking apps. The most useful thing of Evernote is you can make use of this to write on the go. No matter where you are but you can easily resume your copy on your mobile, laptop and PC. All the data will be saved in Evernote itself. You can explore them anytime you wish. This is very time saving tool for everyone including writers.

    The Action Machine

    Although, it doesn’t help you directly in writing but you can use The Action Machine to get helped indirectly. Most of the newbies make a mistake. They start copywriting without setting any time limit. Although a good piece of writing comes after ceaseless editing but still you should set a time limit to write one paragraph faster. After finishing, you can start editing. This is where The Action Machine comes in. This premium application is available on Windows and mac and it costs $47. For not only writing but also you can use it for any other things.

    Google Drive

    You can use Google Drive to collect all the Docs, Spreadsheets, Forms etc. those are saved. On the other hand, you can download and edit any file and edit that simultaneously. Google Drive is available on almost all major platforms including Windows, Android, iOS etc. This is also possible to replace it with Dropbox but Dropbox has no native document editor.

    Bottom Line

    There are more other apps for writers. But, there are most essential and must have for every type of writers.

    Are you a writer? What is your favorite app?

  • Why is Your Android Phone Running Slow?

    Each system gets to be slower after using that for some days. It happens with Android, Windows and very nearly all other platforms. This slowness indicates that this is the time to do something. If you have an old Android phone, you might have confronted it many times.

    Speedometer

    When you buy an Android device, it looks and runs fast. However, most of the entry-level Android smartphones become comparatively slower over time. At this time, you should remove some apps and do something better than that in order to make it fast again. In any case, what most of the people do is Factory Reset. Factory Reset makes an Android phone quite faster yet that is not an ultimate solution. This slowness is a typical issue among new phone users as well.

    Today, I am going to write down something, which you should follow to get a faster Android phone. Regardless, if your phone is new or old but you should do the following things to get a better improvement in speed as well as performance.

    Best practices to speed up your Android phone

    Processor, RAM and other hardware play a vital role to make any mobile or PC faster. If you have 512MB of RAM, certainly you will get slower execution than a mobile, which has 2GB of RAM. The same thing happens with chipsets and other hardware.

    Animations

    There are three sorts of Animations in every Android phone. You will get Window Animation Scale, Transition Animation Scale and Animator duration scale. You can get all of them in Developer Options that is located in Settings. Just navigate to the exact place and turn off each animation.

    Disable Android Animation

    These animations give a better look to your phone but these are battery killers as well. You will get pretty slower experience by turning on those animations.

    Recommended: 8 Reasons why Your Android’s Battery is Draining

    Launcher

    There are many considerable free and paid launchers i.e. Nova Launcher, GO Launcher etc. those are available for Android phones. You can simply use them to give a prodigious look to your phone. Millions of people are using them to get a different flavor. At the same time, the fact of the matter is it makes your phone slower.

    Generally, the vast majority of the launchers utilize more RAM than any other applications because they act upon the system files. In spite of the fact that, those launcher developers do not mention the required RAM usage, but it is affirmed that it creates problem to mobiles those have minimum RAM.

    Hence, it is not proposed to use any launcher on older Android phones because most of the old mobiles have less RAM.

    Stop unwanted Apps

    An app keeps running in background even after closing it. If you have five apps, more than five programs persistently run in background. Actually, those running programs provide better experience when you will open an app for the second time. But they make your phone slower. If you can stop them completely, you can get a faster performance. To prevent those running programs from running in background, you can use Du Speed Booster. Du Speed Booster not only cleans up your unnecessary apps but also it can erase temporary files.

    Move Apps to SD Card

    Move Android Apps to SD Card

    Actually, you have to free up your internal memory. To do so, you can move apps data from internal storage to microSD card. This is one of the best practices to speed up your Android phone. Du Speed Booster can detect all those apps what need to be transferred to SD card.

    Bottom Line

    There are numerous different things you can do to make your old Android phone faster. You can also root your phone to delete unnecessary system apps. This is also a good solution because system apps generally take more space.

    Is your phone slower? What do you do to make your smartphone faster?

  • How to Turn Any Android Phone into an Android Lollipop Phone

    Android is a widely popular mobile platform that is being developed by Google. Their latest update aka Android L or Android Lollipop is a progressive update that Google have ever made. Tons of new features and improvements are incorporated in Android Lollipop. But unfortunately, not all the devices would be able to get Android Lollipop update officially. Obviously, you can try Android L ROM to get the taste but here is yet another way to turn your any lover version Android device into an Android lollipop mobile.

    Android Lollipop Statue

    The solution is exceptionally simple and there is no trick. All you need is Lollipop Launcher. Lollipop Launcher is a free Android launcher, which is available on Android 4.0.3 and later versions. Even if, you can download various launchers i.e. Go Launcher, Nova Launcher, Apex Launcher and others but this particular Lollipop Launcher is much lighter than all of them. It requires less RAM and memory usage and hence it provides faster and smoother performance.

    Features of Lollipop Launcher

    Lollipop Launcher is covered with tons of features and options. However, the first thing is, Lollipop Launcher will change the icon pack from A to Z. by saying icon pack, I mean you will get new icon only on Homescreen and App Drawer. No matter, what Android version you have been using on your device but it will show Android Lollipop icons instead of them. Now, here is a drawback of this launcher. It won’t change anything inside Dialer, Settings and so forth.

    Lollipop Launcher

    As Lollipop Launcher can integrate into Google Now, you will obviously get a better looks and options to get things done via Ok Google. Actually, this launcher is developed on the Google Now launcher concept and this is why it is very easy to use and much configurable.

    Set up Lollipop Launcher

    Although, it doesn’t come with Android Lollipop wallpaper or any other features what belong to Android 5.0 but still you will get some options to run it according to your wish. Some of the most significant options are enlisted below.

    Unlike other apps, all of its options are organized in six different categories. You can explore them to know more. Also, all the categories contain only couple of options those can be read within 5 minutes.

    General Settings

    Lollipop Launcher General Settings

    It has four options i.e. Screen Orientation, Enable/Disable OK Google, Keep data in memory and Set default launcher. All the options do what they say.

    Desktop Settings

    Lollipop Launcher Desktop Settings

    If you do not like the 4 X 4 grid style, you can simply change the number of row and column from Desktop Settings. On the other hand, this is also possible to change Horizontal Margin, Vertical Margin, Transition Effect, Enable/Disable Infinite Scrolling, Elastic Scrolling, Wallpaper Scrolling, Show/Hide indicator, Search bar, Status bar. This page will let you create a new screen, delete a screen and more others.

    Drawer Settings

    Lollipop Launcher Drawer Settings

    You can customize the App Drawer layout from this section. That means, you can change the number of row and column, change Horizontal and Vertical Margin, Transition Effect, enable/disable Infinite Scrolling, Elastic Scrolling, Background Transparency and so on.

    Dock Settings

    Lollipop Launcher Dock Settings

    Dock is a great place on Android’s Home screen that gives you the option to pin your favorite apps. If you do not like to use this Dock, you can simply turn it off from Dock Settings. However, if you would like to use it, you can manage everything of this Dock. You can change number of icon to be shown in the Dock, change Horizontal and Vertical Margin, enable/disable Infinite and Elastic Scrolling and some others.

    Appearance Settings

    Lollipop Launcher Appearance Settings

    This is where it excels. Although, today’s most of the Android Launchers have the ability to carry third party icon pack but Lollipop Launcher is pretty different in terms of this. You can simply choose default icon pack or use any other icon pack right from this menu. On the other hand, you can also change the icon size, text size and icon font from Appearance Settings.

    Gestures & Keys

    Lollipop Launcher Gestures and Keys

    This is another great setting you have. You can select Home Key Action, Enable/Disable Home Key to Default Screen etc.

    Conclusion

    Obviously, you can use third party Android launchers but in most of the cases, this has been proved that they take more memory and make your mobile comparatively slower. Therefore, considering all the features of Lollipop Launcher, I would recommend you to give it a try. But before installing it, make sure you have Android 4.0.3 or later version.

  • Two new Features of Gmail 5.0 you do not know about

    Two new Features of Gmail 5.0 you do not know about

    Without any doubt, Gmail is one of the best email services. It is being developed by Google, the web giant. Even after being a free email service, Gmail is standing out from this competitive e-world. You know that this is an era of mobile. To gather ever more customers, clients, traffic etc. most of the ambitious people behind any company offer mobile application. With the help of the corresponding app, users can easily keep using their favorite online stuffs on the go.

    New Features of Gmail 5.0

    If you are a Gmail user, you may know that Android, iOS etc. phone users can download Gmail app and access Gmail account from anywhere.  Nevertheless, the most interesting part is Google has teased users with a video that contains updated Gmail app. Although, previously, it was nothing but a rumor but now Google has announced about this new Gmail update officially.

    Unfortunately, the new updated Gmail application is still not available on Google Play Store for Android users. In this meantime, you can check what is going to include in Gmail 5.0.

    Quick Compose Button

    Who will use an email client if he/she needs to press four or five buttons to just compose an email? Nobody. Keeping this mind, Google has introduced a brand new Quick Compose button in this new Gmail update. The button will be on your screen when you explore various folders of your email account. Just one tap will let you compose and send a new email to the recipient.

    New Quick Compose button

    This button looks something as if the Inbox’s compose button and works as same as that. Therefore, you might think that Gmail has received an Inbox touch. But no, the Gmail is still amplifying their user base with distinct visual design.

    Other Email Support

    The Gmail client has become versatile. Although, this Google owned email client has been dealing with only Gmail but it will be able to manage other email services such as Yahoo, Outlook, AOL etc. After getting this unprecedented update, users would have the option to add their favorite email accounts i.e. Yahoo, AOL etc.

    Access Other Email Account in Gmail

    Tons of email clients are available for Android out there. On the other hand, there are many email services as well. Therefore, users want to use such a client that could handle various email accounts. Mailbox, SolMail, myMail etc. those can aid you to access different email services. Obviously, there was a huge gap between other email clients and Gmail app. However, now, Android users can uninstall all those third party email clients because Gmail will do all the things.

    Final Thought

    The new Gmail client is much improved in terms of visual design. The new app would be Android Lollipop ready. Hence, you will get Flat user interface. It has a new icon pack as well.

    Just wait for couple of days. Google has announced that the update will be rolling out for Android 4.0+ users within one or two days.

  • How to Open Multiple Apps with One Click in Windows

    How to Open Multiple Apps with One Click in Windows

    There are numerous tasks what are not possible utilizing one product. For example, if you design a logo, you may use CorelDRAW and Adobe Illustrator. Furthermore, on the other hand, if you want to do basic video editing, you may need Camtasia alongside Adobe Photoshop.

    How to Open Multiple Apps with One Click in Windows

    This is fine if you think you have much time to open all those programs one by one. But, if a single second worth for you, you will start doing something to save that couple of seconds. Here is a trick to open more than one software with just one click. This trick works great and this is for novice Windows users. You can basically select a group of programs to be opened with just one click. In fact, you do not have to get any third party software to do this. I have tried this trick on Windows 7, Windows 8 and Windows 10 Technical Preview and have got success in everytime. You can try it on other Windows versions i.e. Windows 8.1, XP, Vista etc. too.

    How to open multiple apps with one click?

    This is however very easy. All you need to do is create a .bat file that will contain couple of lines of code in order to open apps. This is simple and straightforward.

    So, at first, create an app shortcut on your desktop. You can go to Program Files of your System Drive (C drive) to do so.

    Create shortcut on desktop

    After that, open your Notepad and paste the following lines of code.

    @echo off
    cd “C:\Program Files\LongTailPro\LongTailPro.exe”
    start LongTailPro.exe
    cd “C:\Program Files\VMware\VMware Workstation\vmware.exe”
    start vmware.exe
    exit

    (The interpretation of this code is written below.)

    Write Lines of Code in Notepad

    Now, save this code in .bat format. To save it is that format, just click on File >> Save As.

    Save file in BAT

    After that, change Text Documents to All Files and write a name e.g. ampercent.bat or launch.bat etc. to identify faster. Now, right click on the shortcut that you have created in the first step and go to Properties. Then, write down the .bat file path in the Target box.

    Add BAT file shortcut

    If you have saved .bat file on Desktop, you can enter

    C:\Users\USERNAME\Desktop\filename.bat

    Press Apply and OK. You have done with this. To open those selected apps with one click, just try to open the Shortcut. (That you have made in the first step and made a change in the last step)

    Important Note: Do not delete the .bat file. Otherwise, the shortcut cannot execute functions.

    Code Explained

    This is the simplest code ever.

    @echo off

    When you click on the shortcut to open your apps, a command prompt will be opened and then your apps will come in. This line will help you to hide the remaining lines of code from being shown on that command prompt.

    cd “C:\Program Files\LongTailPro\LongTailPro.exe”

    It just changes the directory to the app directory. Here Long Tail Pro is the app.

    start LongTailPro.exe

    After changing the directory, this line will help you to start the program.

    exit

    It does what it says.

    Here, I have written this code for two apps but you can do the same thing for more than two apps. Just make sure that you have entered correct directory and .exe file.


  • How To Add Or Remove Programs From System Startup In Windows 10

    How To Add Or Remove Programs From System Startup In Windows 10

    It’s been a month since Microsoft has launched Windows 10 Technical Preview for consumers. You can simply create a bootable USB of Windows 10 Technical Preview and install it within few minutes. Anyway, that is a different story from the core topic.

    Let’s assume, you always use a web browser for browsing internet as well as listen to your favourite music. Also, you always open Firefox and Windows Media Player right after signing in to Windows. Therefore, to get those programs after system boots up, you must have to navigate to the corresponding folder and do whatever is mentioned above. For instance, you have to open a drive to open your music and do the same to open other programs.

    Microsoft Windows 10

    If you have a habit to do so, you can change it at any time you want. You can autostart programs after rebooting without having any trouble. This is as same as Mac OS X autostart feature.

    Read Also: Managing Startup Programs For A Faster Windows 8 Startup

    You know that if you add a huge number of programs at system start up, you will get quite slower boot compared with previous. On the other hand, if you add programs at start up, you can save some time and get rid of the headache to open those programs everytime manually. Therefore, considering all the problems, this is recommended to add only two or three programs those do not have any impact on system boot time.

    How To Autostart Programs After System Boots Up In Windows 10

    This is however very easy to autostart programs after system reboot in Windows 10. To get started, at first turn on Show hidden files, folders and drives. Open your Control Panel and click on Folder Options. After that, switch to View tab and enable Show hidden files, folders and drives.

    Then, navigate to the following place;

    C:\Users\<USERNAME>\AppData\Roaming\Microsoft\Windows\Start Menu\Programs\Startup

    (By default, AppData folder is hidden. That is why you have to show hidden folders to do rest of the steps.)

    After going to that place, right click on empty area and select New >> Shortcut. Then add the shortcut of any program in the empty box.

    Create App Shortcut

    You can either use the Browse option or paste app shortcut directly. After adding the shortcut successfully, you will get corresponding app icon. That’s all!

    Now, how to check whether an app has high impact on start up time or not? To check that, Right click on Taskbar and open Task Manager. After that, switch to Startup tab. Now, you can find the Startup impact on your screen. Check the following image to know more.

    Check App Impact on System Boot Time

    Hope this tutorial will help you to save your valuable time by opening programs automatically.

    Disadvantage Of Opening Programs At System Startup

    There are several disadvantages of opening multiple programs at system startup. Some important points are mentioned below.

    If you add one or two programs, it won’r affect a lot. However, if you include a lot of apps at system boot up, your computer would get a slow startup time. Your computer requires more time to start the system and those apps simultaneously. The overall process would make your computer slower and you would get a different user experience from your normal PC.

    If you do not want to get such experience, here is what you can do.

    How To Remove Programs From Windows 10 Startup

    This is very easy to remove programs from Windows 10 startup since you do not need any third-party apps to get it done. Users can utilize Task Manager to exclude unnecessary programs from startup. Here is what you can do.

    At first, open Task Manager on your computer. You can follow any method to do that. After that, switch to Startup section.

    Now select each program and click the Disable button.

    That’s all! Hope this trick would be helpful for you.

  • How to Use Inbox by Gmail without Invitation

    How to Use Inbox by Gmail without Invitation

    Whenever you open Facebook, Twitter, Google Plus, Reddit etc. you will get at least one of your friends, who is looking for Inbox invitation. Isn’t it? If you were offline, here is a short description of Inbox.

    Inbox is a brand new Google owned email client that is powered by Gmail. You can use your Gmail account in this application. However, the problem is Inbox is an invitation-only app or service. What does that mean? That means, if you have invitation, you can access Inbox on your Android, iOS or web browser. Otherwise, you can’t.

    Email

    You can get an invitation from official Gmail team or you can ask your friends for an invitation, who has the Inbox access. Here is another problem. You must have to wait for at least 5-6 days to get invitation from Gmail team. On the other hand, your friend should be in US, UK, Canada etc. to send you an invitation. This feature is not available in all the countries.

    That is just one type of problems. There is another problem, what Inbox users are facing. Actually, Inbox is a great application in terms of usability. Therefore, most of the people want to use their secondary email ID in Inbox because this is very easy to manage your emails and get a clutter free inbox. To get second invitation, you will have to wait for more couple of days.

    If you are lucky enough, you will get invitation after all these barriers. But, if you do want to wait for four or five days to be an Inbox user, here is a technique. By making use of this trick, you can get Inbox access instantly without having any invitation.

    Read also: Five Tips and Tricks You Should Know about Inbox by Gmail

    Important Note: You must have a Gmail ID for using Inbox.

    How to Access Inbox without Invitation?

    Before getting started, you must know that this is possible only when at least one of your friends has Inbox access. Or, one of your email IDs must has Inbox access. Why? Read on to get the answer.

    Generally, you have to download the dedicated Inbox app on your Android or iPhone after receiving the invitation. That is the only way to activate your account. Just do that if you have one invitation. After that, open the Inbox app and tap on MENU. Alternatively, you can swipe from left to right. After that, tap on the arrow to close the drop-down menu.

    Swipe from Left to Right in Inbox

    Then, select Add account option and add your account.

    Add Account in Inbox

    After adding your account successfully, you will get your secondary account just like this way.

    Primary and Secondary account in Inbox

    Tap on the email ID to check mail and everything using Inbox app. You can also use web version of Inbox using that secondary account.

    If you want to remove primary account and would like to use the recently added account, go to Settings >> Google (under Accounts) >> Select account and remove that.

    Hope this tiny trick will help you a lot. You can use this same technique on your friend’s mobile to get the Inbox access.

  • Calltag helps to Send Message to Contact before Calling

    Do your friends, boss, or anybody often reject your calls? Don’t worry. It is not just you. Most of the people have been confronting this issue as this is the era of instant messaging. A large number of people wish to use different instant messaging apps rather than call. Now we scruple to receive a call because it wastes our time. When you are hanging on with someone on your mobile, it becomes difficult to do another thing in the meantime. However, you can simply do anything even when you are chatting with your friends on WhatsApp or Facebook. This is a common scenario.

    To get rid of this problem, some developers have built and launched such an extraordinary application that will let you send SMS before calling.

    As per them, you ought to tell your contacts why you are calling. If your intension is paramount for them, they will surely pick up your call. That is where Calltag comes in. You can send various tags like #lunch, #important, #hangout, #urgent and more others using Calltag app. This is also conceivable to write custom message alongside those tags.

    Calltag is now available on iOS and Android. You must have Android 2.2 and iOS 7.0 or later version to install Calltag. Both the apps are accessible at free of cost.

    Get Started with Calltag

    Actually, Calltag works like a third party or additional dialer app for mobile. The entire work process of Calltag is exceptionally simple and straightforward. In a simple line, Calltag sends a custom or pre-written SMS or iMessage to your contacts even before calling the number.

    At first, you should know everything about the visual outline. The UI looks something like the new material design. That means, you can find a flat user interface. Then again, this is a full screen application and all its options are managed very well.

    To start utilizing Calltag on your compatible mobile, at first, download the app on Android or iOS. This app asserts some basic information to get started. For instance, you will need to enter your name and place.

    Enter Name and Place in Calltag

    After that, you can select a readymade message to send to your contacts. This is also possible to compose your custom message.

    Preloaded Message in Calltag

    To devise your own message, just swipe from right to left until you get the following screen.

    Write Custom Message

    This screen will aid you to write your message. This is suggested to keep it short and simple.

    After that, it will ask for your contact. You can either enter a new mobile number or select one from Contacts.

    Select Contact

    To select any contact from your phonebook, just tap on the screen and type the name. Alternatively, you can type the number if that is not saved in your phonebook.

    Then, you will have to select a tag and custom message. To select any tag, just tap on preloaded tag(s).

    Select Tag

    After doing everything, you will have to swipe the Calltag button that is presented on your screen.

    Make Call by Swiping

    That’s all! By default, Calltag makes the call after 10 seconds of sending the SMS. You can change it from Settings.

    The core concept of this app is great since it helps users from being rejected. What do you think about this app?

    P.S.: Your carrier may charge different for sending the SMS. It varies from Carrier to Carrier as well as country to country.

  • Five Tips and Tricks You Should Know about Inbox by Gmail

    Five Tips and Tricks You Should Know about Inbox by Gmail

    It has been a week since users are utilizing Inbox that is powered by Gmail. This Inbox application and whole bundle is truly marvelous as far as straightforward entry, provided information and usefulness. In spite of the fact that, Inbox has been propelled however this is still in invitation-only position. That implies, an invitation is mandatory to use Inbox alongside your Gmail ID.

    Previously, we have given an introduction of Inbox by Gmail and today you can find some useful tips and tricks in the ensuing lines. Actually, this is quite difficult to explain all it’s features within one page. That is why today you can find only five of them. Inbox by Gmail is covered with huge amounts of accommodating features for every type of people. After using it for sometime, it seems Gmail coordinates Google Now into Inbox. Anyway, let’s check the tricks.

    Snooze Any Email

    If you have previously used Mailbox, you might have seen this kind of feature. You can get any email at predefined time by snoozing. The most important feature in Snooze is you can set location-based reminder. That means, Inbox will notify you when you would reach somewhere. To snooze any email, just open that and head over to the Alarm symbol.

    Snooze any Email


    Then, select the time. To set location-based reminder, just tap on Select Place and select a location.

    Make Use of “Done”

    Inbox has such a great artificial intelligence that moves any email to To-Do list menu. The feature works based on the subject line on email. If you have done any task and want to remove that from your inbox folder, you can send that to DONE folder instead of erasing. To move any email to the DONE folder, just open that and head over to TICK.

    Move Email in DONE Folder

    You will get a screen something like the above image.

    Make use of “PIN”

    Alike DONE, PIN is yet another great feature that helps you to get any important email of any month faster. For example, in October, you have box 500 emails but you want to get one of them very faster. You can simply PIN that email to the top of that month’s folder. Just open any email and hit the PIN icon to do so.

    Pin any Email

    This is very easy.

    Move Email to Any Bundle

    Select Bundle

    BUNDLE is new in Inbox by Gmail. BUNDLE helps users to gather same type of email as per your activity. For example, if you put any email in Travel folder, you will get same types of email in the Travel folder right away. To send any email to any folder, just open email and tap on Options. Then you can select any Bundle such as Purchases, Finance, Social and more others.

    Smart Search

    This is the most useful feature of Inbox. Inbox provides a refined search result to the users. On the other hand, you can get any product details on the Instant search in Inbox. For instance, you have made a purchase on Amazon and the product is still not delivered. If you make a search for Amazon in Inbox, you will get the purchase details in the instant search box.

    Final Thoughts

    After considering all the features available in Inbox, everyone will say this is brilliant. Actually, no other companies can provide such awesome features in a free version email app.

  • Nextbit to Synchronize Data without Cloud Storage and API

    Nextbit to Synchronize Data without Cloud Storage and API

    After getting a huge fund raising from Accel and Google Ventures, the next generation Android developer group has announced that they are going to introduce such a great synchronization process that doesn’t oblige any cloud storage or API. Synchronization of data across multiple devices is nothing new but synchronizing data over various cloud storage i.e. Dropbox, Google Drive, etc. is quite old now.

    Consequently, a great Android developer company, Nextbit has begun creating such a synchronization technique, to the point that would be incorporated in Cyanogenmod. That implies, you cannot get it on other platforms like iOS, Windows Phone etc.

    Nextbit to Synchronize Data without Cloud Storage and API

    According to Nextbit, today’s developers face various issues for APIs and other stuffs. Then again, users additionally confront very same issue since they must have sufficient memory to synchronize gigantic measure of data. In fact, there are some cloud storage synchronization clients those are not much trustworthy. That is where Nextbit comes in.

    If you have Nextbit access on multiple Android devices, you can easily get your work on any other device from current one. For instance, you are editing a photo on your tablet and you have to go for a work with your mobile. At such moment, you have to transfer that edited photo to your mobile and then start working again. Or, you can upload that to your Google Drive account and then download it on your mobile.

    However, the whole scenario is going to change in near future. By making use of Nextbit, you will not have to do whatever is mentioned above. After installing Nextbit, you would be able to send that photo (or anything) to another device without any other cloud storage. You will have the synchronized device list on your mobile or tablet. All you need to do is tap the Recent Apps button on your screen. After that, you will get all synchronized device list. Transfer will be completed within seconds.

    According to the press release, you have to flash custom Cyanogenmod ROM on your Android device. That means, it would be a headache for non-developers. Although, rooting and flashing custom ROM does not need an expert knowledge but still sometime you can fall in trouble.

    The Nextbit has officially announced all of these aforementioned information after building a team of 22 people and all of them are from various giant companies like HTC, Dropbox, Android and more others. According to some people, this will be the simplest method to synchronize any data.

    The most beautiful thing is you would be able to synchronize everything including media files, documents, games, and game data and so on. The next Cyanogenmod ROM will have the support to run Android TV. That means, you can stream video from your mobile to AndroidTV and Vice Versa.

    As of now, Nextbit is still in beta version and you can be a participant of this beta version by signing up. Please read all the terms and conditions before signing up for Nextbit.

    Via: TechCrunch

  • Top 6 Apps Optimized for iPhone 6 and iPhone 6 Plus

    Top 6 Apps Optimized for iPhone 6 and iPhone 6 Plus

    iPhone 6 and iPhone 6 Plus are now available in almost all the countries around the globe. If you have bought one of them, may be, you are looking for some useful apps for your next generation iPhone. Therefore, today I am going to introduce some great apps those had been available on previous version of iPhone and now optimized for iPhone 6 and iPhone 6 Plus.

    Top 6 Apps Optimized for iPhone 6 and iPhone 6 Plus

    1Password

    When it comes to remember all the unique and so-called strong passwords, most of the people fail. To help you to remember your strong passwords, there is couple of password managers for iOS and 1Password is one of the best among all of them. If you have been using it for a long time, this news will make your happy that 1Password is now optimized for iPhone 6 as well as iPhone 6 Plus. The user interface is really awesome and as usual iOS 8 friendly.

    1Password

    Evernote

    Even after being a free app, Evernote provides a lot of features and all of them are much useful for daily life. You know that Evernote is a note taking app that is available for almost all platforms including Android, MAC, Windows as well as iOS. Evernote has been available for iOS for a long time. Now, you can download Evernote that is well optimized for those new iPhones.

    Evernote

    iTranslate

    Android users are lucky that all of their mobiles are compatible with Google Translate. However, iOS users can get the same feature using iTranslate. iTranslate is a great language translator, which is now available for iPhone 6 and 6 Plus. You can use keyboard and voice recognition system to input anything. Along with the translator, you will get a dictionary too. As of now, Google Translate is not optimized for iPhone 6 and iPhone 6 Plus. Therefore, iTranslate can be used as a great substitute.

    iTranslate

    SwiftKey Keyboard

    Alike Android, iOS 8.0 and later versions support third party keyboard apps. That means, now you can get a different keyboard on your iPhones. As iPhone 6 and iPhone 6 Plus are running on iOS 8, you can download any third party keyboard. Among all available keyboard apps for iOS, Swiftkey is the best app out there. The prediction level is really high. The most beautiful feature is you can write an entire sentence without typing. All you need to do is Swipe.

    SwiftKey Keyboard

    OneDrive

    If you do not like to use any cloud storage that belongs to Apple, OneDrive may help you out. OneDrive or formerly SkyDrive is a great cloud storage that is powered by Microsoft. You can get the official OneDrive application on all major platforms such as iOS, Android, Windows and more others. Obviously, you will get free storage to store your files. If you would like to backup your photo to OneDrive, just enable auto backup system.

    OneDrive

    F-Secure Freedom VPN

    To browse the internet safely, you supposed to have a VPN service. If you are talking about most secure VPN service, there is no other app except Hotspot Shield that can fulfill your demand. However, Hotspot Shield app is not optimized for iPhone 6 and iPhone 6 Plus. That is where F-Secure Freedom VPN comes in to play. This free VPN app comes with unlimited bandwidth usage and no other logs. The only problem you may have is it does not provide lots of IP or GEO Locations.

    F-Secure Freedom VPN

    Bottom Line

    Most of the available iOS apps are now optimized for new iPhones. But all of the aforementioned applications are most useful and any kind of people need them to increase productivity. What is your favorite iOS app?

  • FireTube – Android App to be a YouTube Power User

    FireTube – Android App to be a YouTube Power User

    YouTube is one of the best video broadcasting websites as well as second largest search engine out there. YouTube provides tons of features both i.e. channel admins and viewers. However, as a viewer, have you ever experienced that YouTube has fewer options and it ought to include more features? If you have discerned it before, here you go.

    YouTube in Fire

    You know that Google owns YouTube and all Android devices have the respective YouTube application to watch videos. Although, the native YouTube app is pretty good for regular YouTube users but you may feel a lack of features to be an active YouTube user. Therefore, today, I am going to introduce a newly updated YouTube app replacement on your Android mobile.

    Introducing FireTube

    This is one of the best substitutes to YouTube app for Android. This app is available in two different versions. You can use either the free version or the premium version to get huge amount of features without any restriction or limitation. The paid app costs only $2.99. FireTube is available for Android 3.0 and later versions. The most beautiful thing is you can get this app and some of its features on Firefox web browser.

    First thing first. The user interface is pretty good but you can find an awkward layout even on a phone that provides 854 x 480 pixel of resolution. You will get single column layout on a low resolution phone.

    Firetube user interface

    But it actually has two column view. The second thing is advertisement. The free version comes with incongruous advertisements. Therefore, you must be aware when you tap on your screen. If you purchase the premium version, you won’t get any third party advertisements.

    Features of FireTube

    FireTube is covered with so many great features. All the features of FireTube are well organized. Some of the great features are mentioned below;

    Automatic Playlist:

    Check Playlist in Firetube

    This is the first awesome feature of FireTube. FireTube builds a playlist according to the current video. For example, if you are watching a movie song on FireTube, it will create a playlist of all songs of that movie. You do not have to add manually.

    Play Music in Background:

    Firetube Running on Google Play and Lock Screen

    This is the most useful feature of FireTube. Let’s assume that you want to read eBook as well as listen to music on YouTube. At such moment, you can try FireTube to play only music in background. FireTube will help you to play the music of any YouTube video in background. You can even lock your phone. It will be running on lock screen as well.

    Toggle Thumbnail:

    Toggle Thumbnail

    When you play a video on FireTube, it will show you the thumbnail. If you do not want to watch, you can keep watching the thumbnail but if you want to watch the video, just tap on the icon that is located on top right of your screen. Check the following image to know more;

    Bottom Line

    FireTube has more features but you have to utilize it to learn more. You can also use repeat menu to watch a particular video multiple times. Hope this little app will help you do more with YouTube.

    ➤Download FireTube: Free Version | Paid Version

  • Top 5 Apps Updated for OS X Yosemite to Get More Features

    Top 5 Apps Updated for OS X Yosemite to Get More Features

    MAC OS X Yosemite is a completely new operating system update that belongs to Apple. Despite the fact that OS X 10.9 Mavericks was a great platform for MAC lovers but, still, people love this Yosemite more than that. Apple has included tons of new features and improved old features. Among all the updates, Notification Center, iCloud Drive, Safari, Spotlight and user interface are the most popular.

    Top 5 Apps Updated for OS X Yosemite to Get More Features

    OS X Yosemite has yet another great feature to access your iPhone right from MAC. That is called Handoff. By making use of Handoff, you can make calls, check messages and do lot more other things.

    In this article, you are going to get some useful apps those were obtainable on previous MAC version and now available on OS X 10.10 Yosemite with more other features. You can also get some new apps as well.

    1Password

    This is one of the best password management services out there. You can get the app on almost all platforms like Android, Windows, and Mac etc. Although 1Password had more than enough features before it launched for Yosemite but still the developers have included even more features. The user interface is changed and couples of options are included in this updated 1Password. Now, you will get 1iCloud Drive synchronization, Wi-Fi synchronization and more others in 1Password 5.

    Continuity Keypad

    Continuity Keypad

    It is possible to get all notifications and receive calls using Handoff. But, this is not possible to make calls from your Mac via iPhone. Continuity Keypad is such a great application that will let you make calls right from your Mac. Although, Continuity Keypad is still in beta version yet you will get an attractive visual design since this is developed for OS X Yosemite.

    Wunderlist

    Wunderlist is a popular cross-platform to-do list manager. You can get the Wunderlist app on various platforms including Windows, Android, iOS and Mac. However, the Wunderlist is now updated for OS X Yosemite. Certainly, the visual design is awesome like other available apps for Yosemite. You will also get the Notification Center integration into Wunderlist 3.1.0. This is possible to check your upcoming tasks and do lot more things than previous versions.

    Tumblr

    You know what Tumblr does. Previously, you used to open tumblr.com from your browser to update or share anything on your Tumblr account or blog. However, the scenario is now changed. Now, the dedicated Tumblr app is available for Mac OS X Yosemite. The user interface is mainly designed for OS X 10.10. On the other hand, you would be able to share any image, link or anything else right from your hard drive. You can also share posts on various social networking websites like Facebook, Twitter etc. all the features are well organized like the web version of Tumblr.

    Mailbox

    Mailbox is Now Available for Mac

    If someone doesn’t like the Apple Mail, I am pretty sure that he/she is using Sparrow, which was acquired by Google. Now, Sparrow has a competitor for Mac and this is known as Mailbox. Mailbox comes with tons of great features. You will get almost features what the mobile version generally provides.

    Bottom Line

    You will get even more new apps and improvements in old application. For instance, iStat Mini, PCCalc etc. Among all of them, Continuity Keypad is the best app for OS X Yosemite.

  • Two Ways to Change Default Android Font [Root Required]

    Do you feel boring with the default system font of Android? Do you want to replace it with your favorite font? Here are two great tricks for rooted Android phone users to change default Android font. Although, the first method is paid but you can try the second method to do the same at free of cost.

    How to change default Android font?

    ROM Toolbox Pro

    ROM Toolbox Pro is a paid Android application, which is available on Google Plat Store at $5.99. You can get this app for your rooted Android phone but make sure it is Android 2.3 or later version. Actually, ROM Toolbox is a great and must have application for rooted Android phone users. You can do many things using ROM Toolbox. For instance, if you want to change your default boot animation or if you want to add something in build.prop file, you can do so using ROM Toolbox Pro. ROM Toolbox can also change the default font of your Android device. All you need is rooted Android phone. To get started with this, just head over to Google Play and download ROM Toolbox. After that, open it and navigate to Interface tab. Then, you will get an option called Font Installer.

    Font Installer in ROM Toolbox Pro

    Just tap on that and select a font. You can wither use your own custom font that is in your SD card or preloaded font. After installing the font, you may have to restart your phone.

    P.S.: I do not know whether the free version has this option or not. Therefore, it would be better to check the free version before purchasing paid version of ROM Toolbox.

    Fonter

    This is yet another great app that will aid you to change default Android font within moments. However, it is better than ROM Toolbox Pro since you can change whole system font or any particular app font by making sue of Fonter. Actually, Fonter is a Xposed Fraamework module that works with Xposed Framework. You supposed to have Xposed Framework on your rooted Android phone to get Fonter. So, at first, install Xposed Framework. For that, head over to this link. After installing Xposed Framework on your phone, open it and search for Fonter. You can also check this link to download Fonter directly. After installing Fonter, you may have to restart your phone.

    After that, open Fonter on your mobile or tablet and go to Home to download your favorite font. Then, head over to Change app font.

    Fonter Start Screen

    Now, you will get all your installed apps on your screen.

    App list in Fonter

    Just select any app and you will get a screen something like the following picture;

    Enable Change app font and change font

    You need to enable change app font and choose a font from your installed fonts. After that, you can launch that app to get the change. This is as easy as said.

    You can also use some apps from Google Play Store but I personally do not like them. Instead of using any particular font changer, this is better to use these two methods.