How to get faster and more secure internet by using Cloudflare DNS
Most Internet service providers use their custom DNS for their servers which is basically a database with information about all the websites and the IP addresses across the internet named as the Domain Name System.
What happens behind the screen is that, when you type the name of a website and press enter on the web browser of your choice, your browser will send a request to the DNS server and if it contains the website you want to access in its database, it will send you an IP address in response.
While most users generally use the default DNS that has been provided by their ISPs, they are not always fast and reliable and sometimes they might get unresponsive if faced with a lot of query requests or a huge amount of traffic. In such situations, you can manually configure your device to use a different DNS server address for resolving the IP addresses.
You May Like: How To Get Unlimited Free WiFi In Restricted Public WiFi
There are several popular custom DNS server addresses you can use on your device like Google’s 8.8.8.8 and Open DNS’s 208.67.222.222. But not all of these are faster or secure than your default DNS server provided by your ISP.
However, Cloudflare, a web performance and security company based on US, has recently released a new DNS server address 1.1.1.1 which is said to be the fastest and the safest one yet. It was released on 4th April 2018, Since it has 4 and 1 in it, they chose this name with four 1s.
The company claims that this is currently the world’s fastest DNS service with a global response time of 14ms which is considerably faster than the 34.51ms response time for the Google DNS server and the 20.64ms for the Open DNS one.
While this might not increase your internet or download speed, it will certainly leave a positive impact on your website loading and internet browsing speeds since it takes lesser time than other DNS services to resolve the IP addresses.
You May Like: How to block websites in Google Chrome for PC and Android
How to get faster and more secure internet by using Cloudflare DNS
In order to use Cloudflare DNS on your device to improve your browsing and website loading speeds, you have to first replace your default DNS server addresses with the Cloudflare ones, 1.1.1.1 and 1.0.0.1.
Just follow the below step by step instructions to get faster internet on your PC and your smartphone by using Cloudflare DNS instead of the default one provided by your ISP.
For Windows Devices
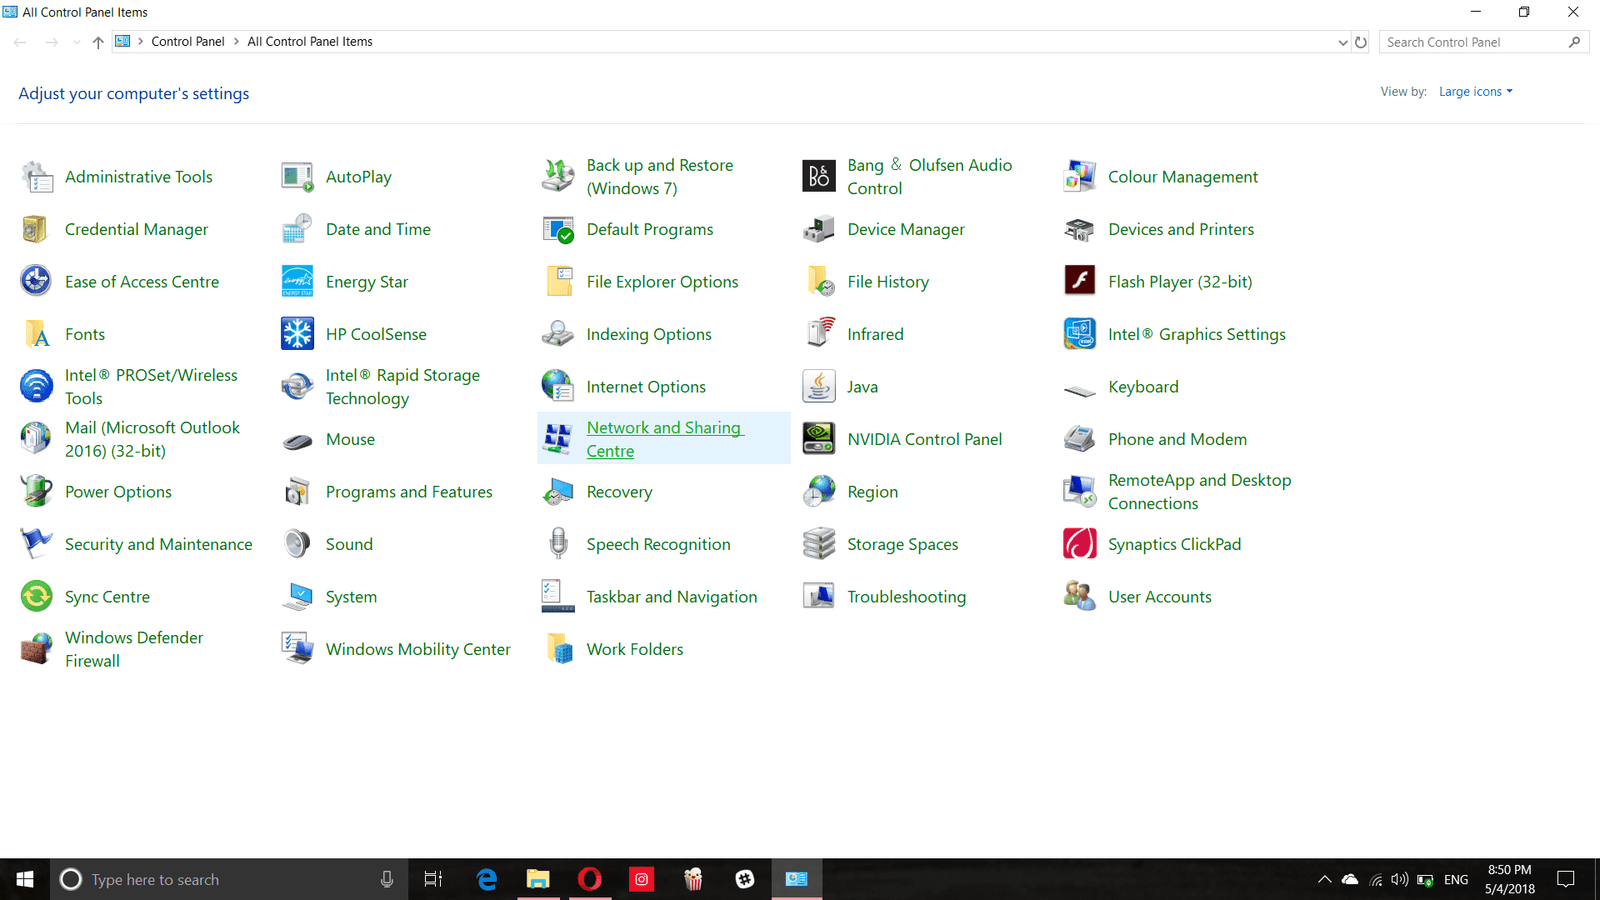
Step 1:
Open the Control panel on your PC and then go to the Network and sharing centre setting.
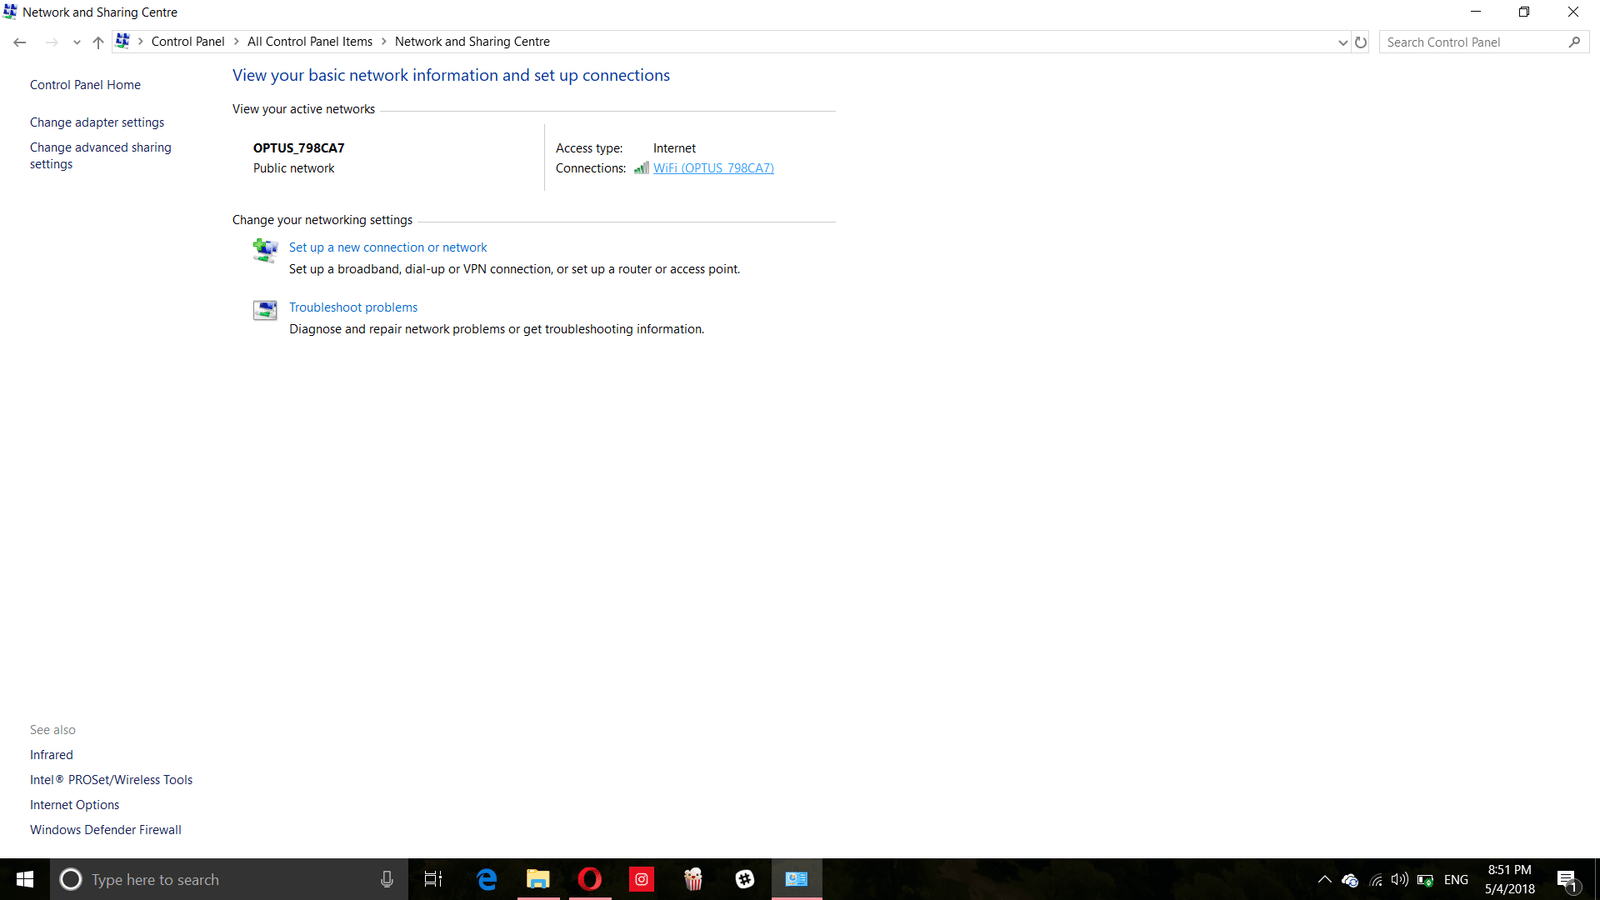
Step 2:
Select the name of your connected network in the top right corner of the network and sharing centre settings page.
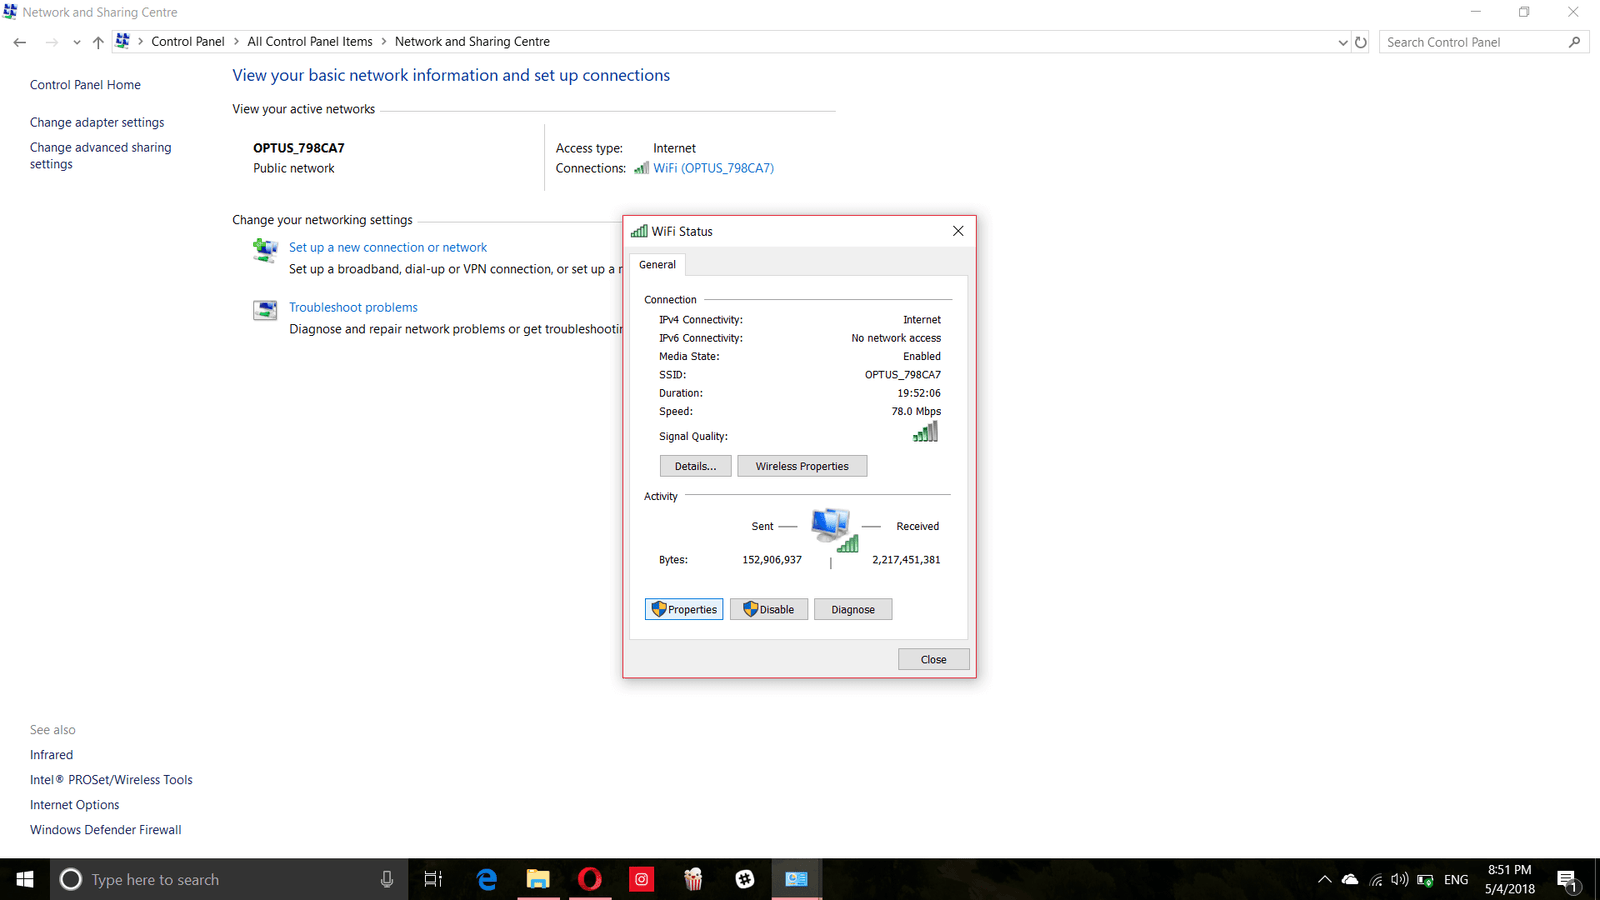
Step 3:
Click on the properties button on the window that pops up.
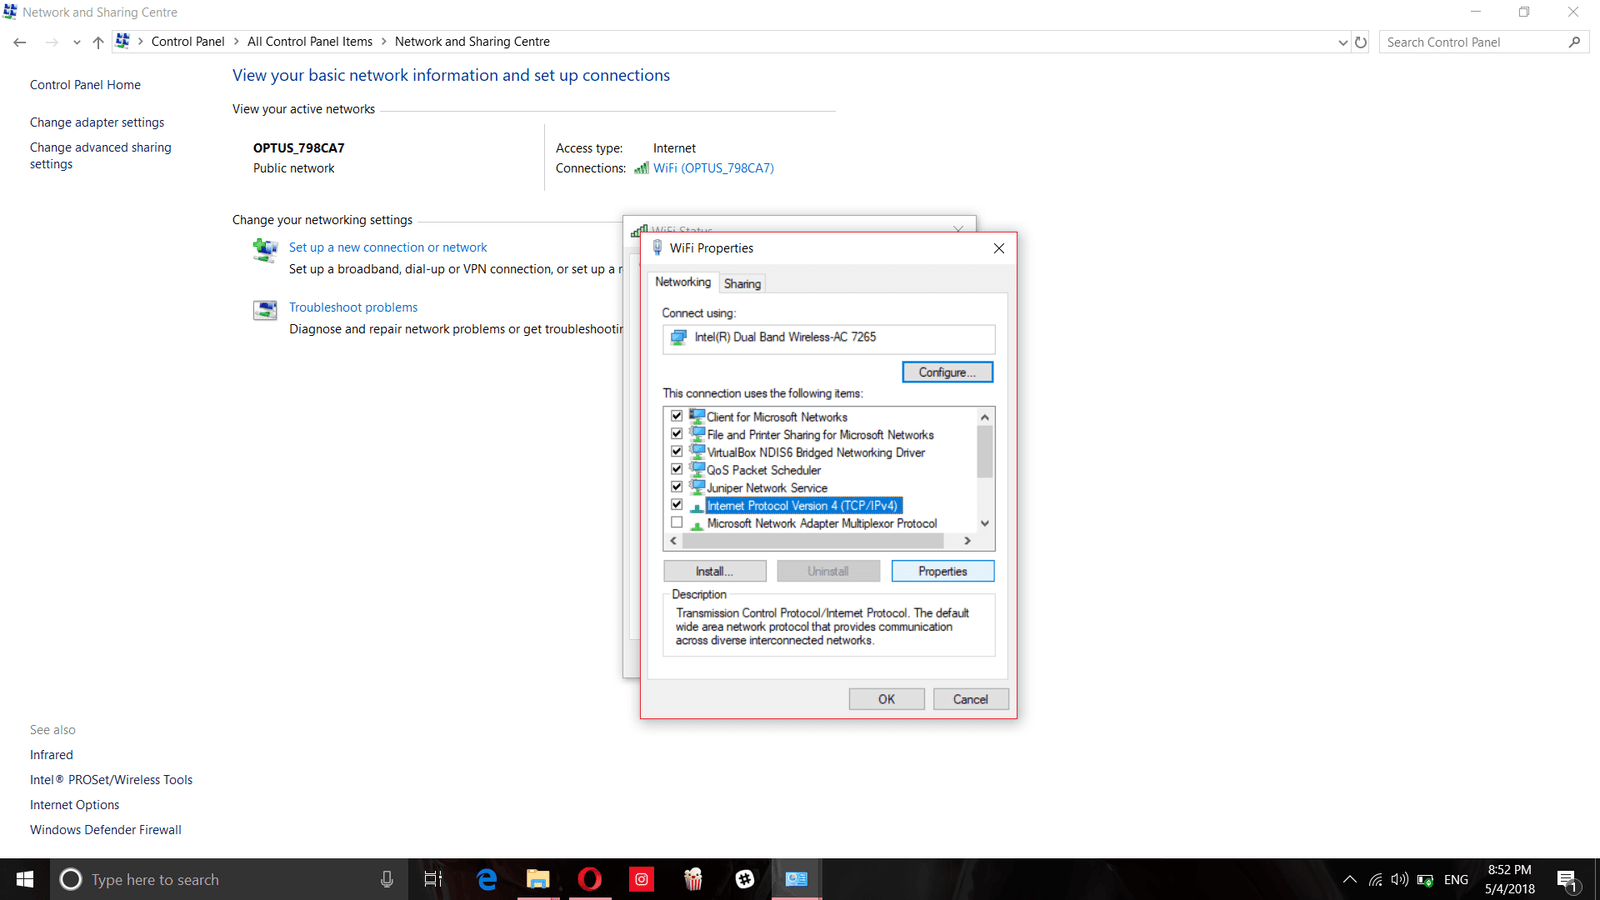
Step 4:
In the next WiFi properties dialog box scroll down and select the Internet Protocol Version 4 (TCP/IPv4) option and then click on properties.
You May Like: What does the Airplane mode setting in Android do
Step 5:
In the general tab of the window that opens, click on the Use the following DNS server addresses radio button and then enter the following into the respective text fields.
Preferred DNS Server: 1.1.1.1
Alternate DNS Server: 1.0.0.1
You can also interchange the addresses as the order of them doesn’t matter much.

Step 6:
Once you have entered the addresses just click on Ok to save and continue.
That’s it you are now using the latest DNS server addresses of Cloudflare and you can notice significant improvement in your internet browsing speed.
For Android Devices
If you want to achieve the same effect on your Android device, just follow the steps below.
Step 1:
Go to Settings->WiFi and then long press on the WiFi network you want to modify the DNS server address with and then click on the modify network settings option.

You May Like: 5 less known Google Chrome Browser tricks for Android
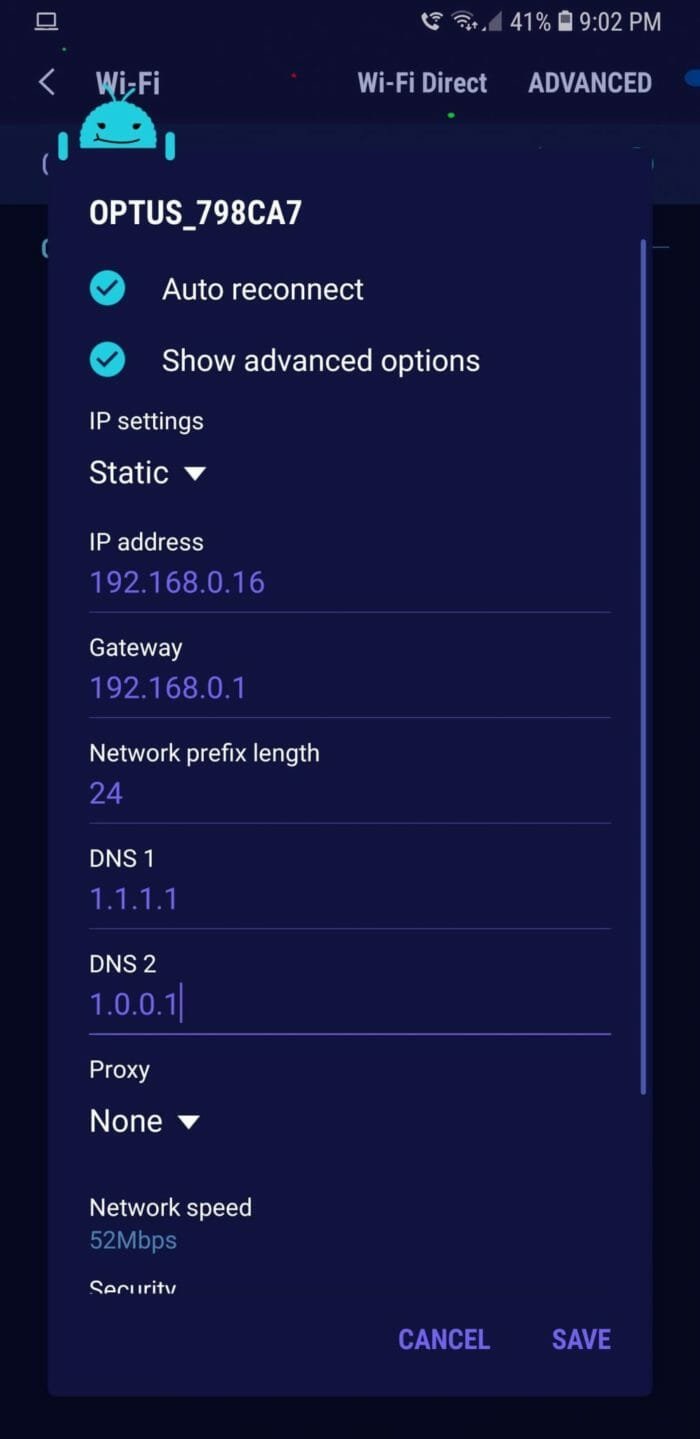
Step 2:
Now click on the Advanced settings check box and then enter the DNS server addresses 1.1.1.1 and 1.0.0.1 to the DNS 1 and DNS 2 text fields respectively.
For iOS Devices
For iOS device, follow the procedure below to change the DNS server address.
Step 1:
Open the settings app and go to WiFi settings.
Step 2:
Click on the small ‘i’ button next to the WiFi network you want to change the DNS server address to.
Step 3:
Select the configure DNS button and then change from automatic to manual.
Step 4:
Now click on the Add server option and then enter the new DNS server addresses in the respective fields.
You May Like: How to recover deleted Whatsapp photo or video from Android or iOS
You can also manually change the DNS server addresses of your router device by going to the official website of your router and then replacing the default DNS server address with the Cloudflare DNS addresses.
Let us know in the comments below if you have any queries regarding the process for any of the above mentioned devices and don’t forget to mention if you see any considerable change in the speed of your internet.
Thanks for Sharing excellent Information about “How to get faster and more secure internet by using Cloudflare DNS”, I love your article. I will definitely share your article on my social networks. I will apply your tips and I hope I will get the best result. Again thank you!
Keep sharing this type of article!
Best information for Secure Internet Browsing
Thanks