How to Run Android 9 on pc Using Android Studio? The best Android Emulator.
Are you not being able to resist yourself to get your hands dirty with Android 9? Do you want to run Android 9 on pc? Have you tried anything? Any android emulator or so? Too many questions. Right?
Yah. Let’s cut the crap. Android Studio is the single common answer to all of these questions as it’s the best android emulator out there on the web. If you want to run Android 9 on pc then Android studio is the best thing you should start with. In this article, we will guide you through a detailed and step-by-step process for doing exactly that.
Now, before even starting the actual process, you will need to make sure that your system has the latest ‘Java SE Development kit’ installed. No? Download and install the same with this link.
Done? Let’s roll.
First step: Download Android studio

It’s no brainer. To install and run Android Studio you will need to download the latest version of the same from the official Android developer’s website. Currently, the latest version is Android Studio 3.3.1 for Windows 64-bit system architecture and the size of the ‘.exe’ file is around 950 Mb. Download the same using this link.
Further, if you are running Mac or other Windows systems, you can also check this ‘Download options‘ for downloading the exact file according to your system needs.
Let’s roll to the next step.
Second Step: Install Android Studio Emulator on pc
- First, locate the downloaded file on your pc. Usually, The ‘downloads’ folder on your system drive(usually, C drive) where Windows is installed. The screenshot may help you better.

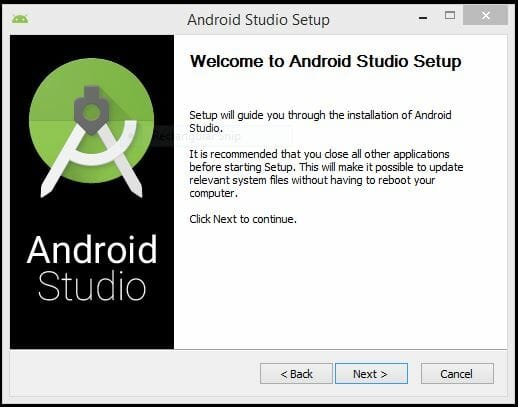
- Double click on the Android Studio IDE file. You will be guided to the first welcome screen and that’s will look similar to the image below.
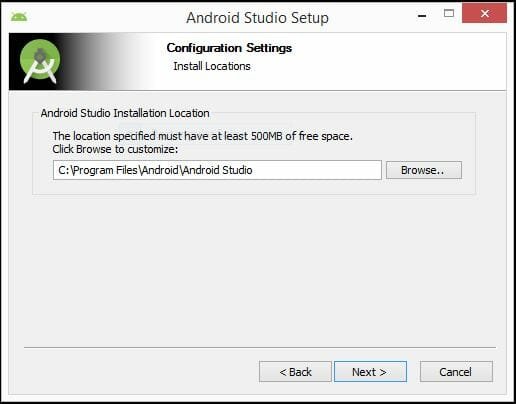
- Click ‘Next’ and you will be asked to set the Android Studio installation location and space it needs to stay on your hard drive. It requires a mere 500 MB space on your HDD as the next image shows.
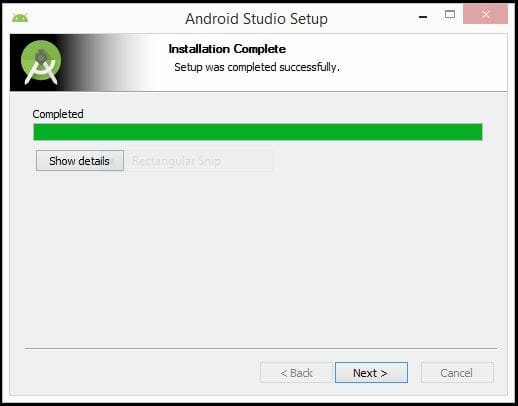
- Click ‘Next’. The installation process will get initiated. Wait until it finishes its task. Now, if there’s no glitch, the installation process will finally come to an end you will get a similar window below.
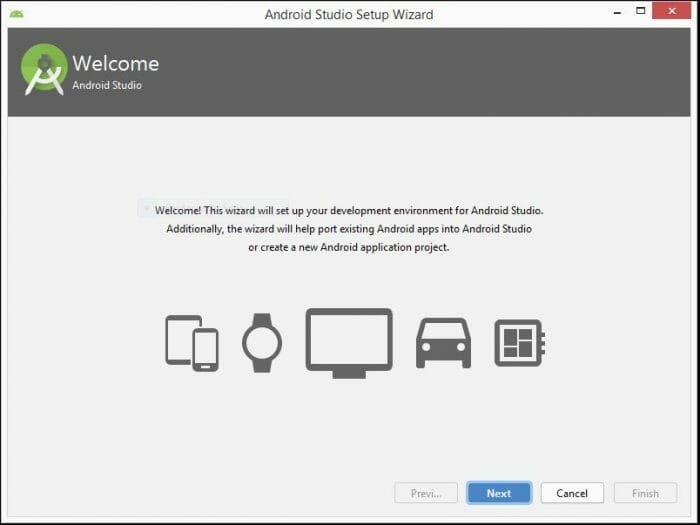
- Click ‘Next’ to complete the installation process. On the next window, you will be asked to launch Android Studio. Click on the ‘Finish’ button to launch the program. Now, Android Studio will get launched and you will get dropped on the setup wizard for the very first time.
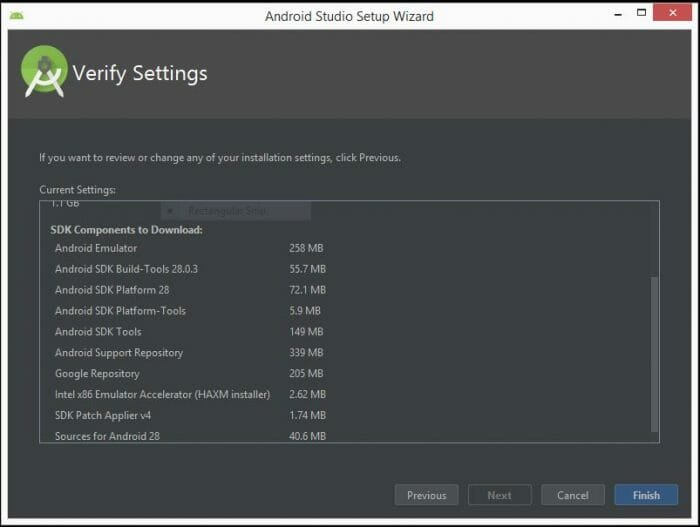
- Now, click next to go to the next window where you will have to choose the type of setup you require for Android Studio. You can choose ‘Standard’ as I have done. Moreover, you will also be asked to set the ‘UI Theme’. I have chosen the ‘Dracula’ or black theme as it soothes my eyes but you can choose as it seems fit to you. Finally, It will prompt you to finish the settings setup. Hit ‘finish’ to initiate the downloading process of the necessary files to complete the setup process.
- Now, when the download process starts, you will be able to see the progress of the downloading of the Android studio components as the image below.
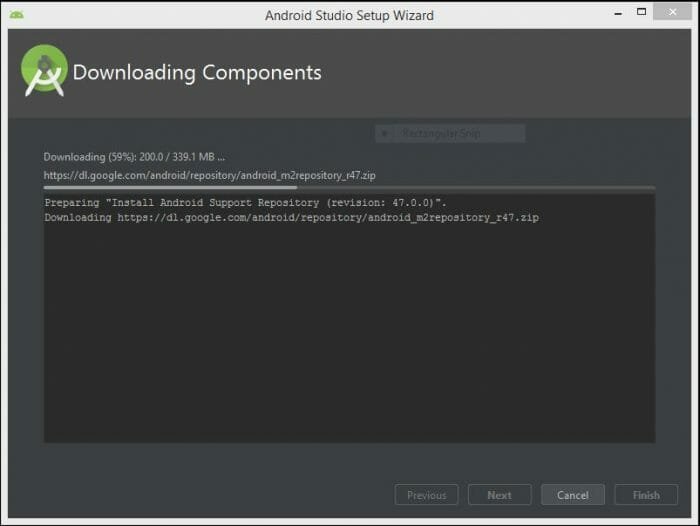
- Wait for a while as it will take from few to several minutes depending upon the strength of your internet connection. Now, when this process gets completed you will get dropped on the welcome screen to create a new Android project.
- You are done. You have completed the process of successfully installing Android Studio. From here the installation and set up of Android 9 begins.
Also read: How to install Android P Developer preview on Google Pixel devices
Also read: How to setup and run android 9 on PC? Ways to Do it.
Third Step: Install and Run Android 9 on pc through Android Studio
This is the final phase of this article and in this section, we will walk you through the process of how you set up and install Android Pie emulator on Android Studio. So, let’s roll.
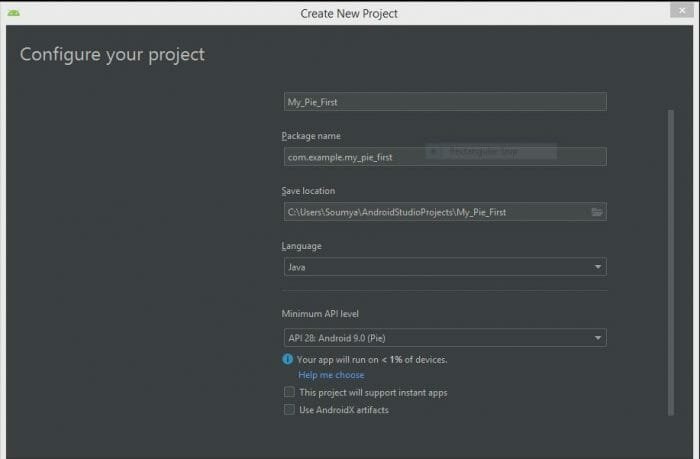
- Launch Android Studio and hit on the ‘create a new project’ to prepare a new setup for Android 9 on it. Now name your project as I have named it ‘My_Pie_First’. Now, set the ‘save location’ or you can use the default location it sets up for your Pie project. After this, come to ‘Minimum API level’ drop-down box. On this list you will find the option namely, ‘API 28: Android 9 (Pie)’ and finally, create your project.
- Now, the controller will start downloading the components of API: 28 aka Android 9 aka Android Pie within the Android Studio setup. Wait for it to get completed and immediately, you will be guided to your newly created Android 9 project home window. On this window, you will be able to locate the ‘AVD’ manager or ‘Android virtual device manager’.
- Click on the AVD manager and you will be prompted to create and new Android virtual device which will run on Android 9 or Pie engine.

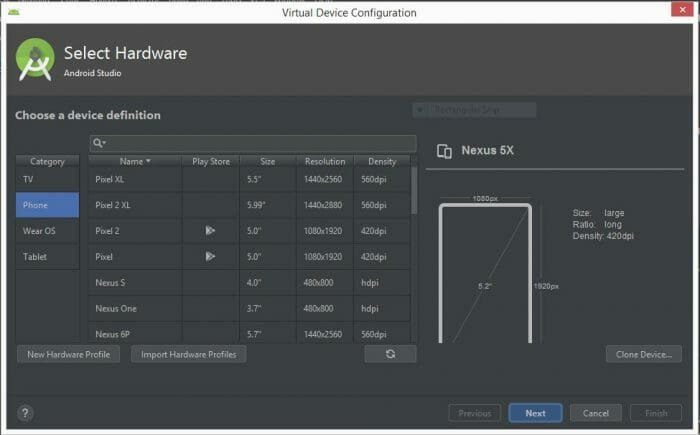
- Immediately after you hit the ‘create virtual device’ button, you will be guided to the next window from where you will be able to choose a virtual android device that runs on Android pie. You will be provided with a device category list and under each device category, you will find an array of similar devices. Here I chose a Google Pixel 2 device under the Android phone category.
- After you have done with the ‘select hardware’ window, you will be guided to the next window where you will be able to choose the OS of your virtual Android device and that’s Android 9 aka Pie. Hit download and the fun begins!

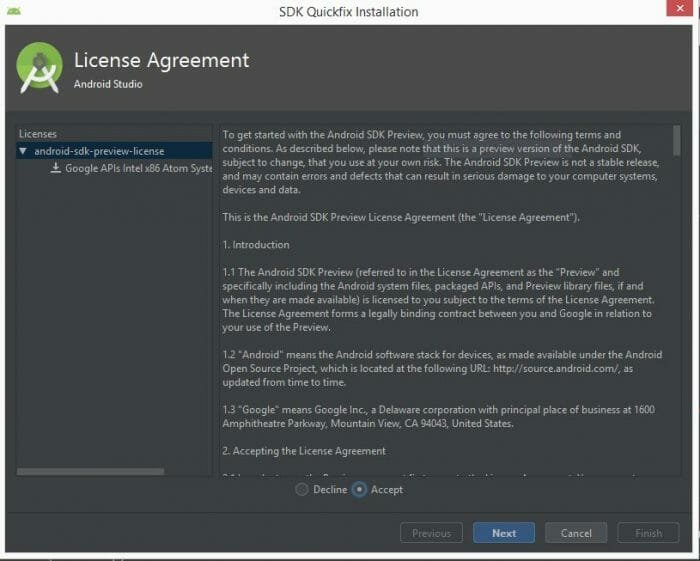
- Wait! You will have to agree with the ‘License Agreement’ of the system image you are downloading. Hit ‘Accept’ and then, the ‘Next’ button.
- A download process of the system image will get initiated. Let it get completed. Then on the next window hit the green colored play icon to run Android 9 on pc through Android Studio. It will launch your virtual device which is a Google Pixel 2 running on Android 9 or Pie emulator.

- Congrats! Welcome to the world of Android 9 on your pc. You have successfully installed Android 9 emulator on Android Studio and you are ready to run Android 9 on pc powered by the simplicity of Android Studio. Here is how it looks like:

Thanks for staying with us during the entire installation and setup process. Enjoy. Further, if you face any glitch during this workaround, feel free to bug us anytime. We will be extremely happy to help you.
When I finish this process, I click on the play button, and it pops up a box: The emulator process for AVD Pixel_6_Pro_API_28_0 has terminated