How to Boot into Legacy Mode in Windows 10

UEFI firmware is our present and the future, that we all know. But, since Legacy booting has not occurred in history pages yet, a lot of Windows 7 and Linux users feel comfortable around BIOS environment. So, we will be discussing on how to access it in different OSs. We are going to access the BIOS setup in Windows 10, to begin with.
Legacy Mode in Windows 10
As we all know now, Windows 10 PCs come with default UEFI settings these days. So, it is quite obvious that Legacy or BIOS-compatible modes are not our first choice. But, if you have an older PC to start with, there are a lot of reasons for you to seek for the Legacy boot process. How? Let’s say, you’ve got a Windows 10 installation drive along with the MBR file format. You know now, how difficult it is to boot in the UEFI mode. Moreover, if you own an HDD formatted as a GPT drive, it will also be a big deal for you to try installing Windows 10 from an MBR drive. And the same applies for the opposite condition too. The simpler way people choose in these cases is to opt for the Legacy mode for now. Let’s see how do we do that.
Here, we will be discussing it in two ways. First one is by navigating through the firmware settings, and the other one is by using the command prompt.
Changing firmware settings
- Click on the “Start” icon at the bottom left corner of the Windows 10 PC, and then press the gear icon. Or, just press “Windows+I” from the keyboard to open “Settings”.
- Then navigate to “Update & Security → Recovery → Advanced Startup → Restart now”.

- To reach up to the UEFI settings, it’s just pretty much the same as before.
- After the machine starts rebooting, it will take you to the same blue screen as before.
- Then, you have to choose “Troubleshoot → Advanced Options → UEFI Firmware Settings → Restart”.

- That’s it, it was the common part to enter inside the firmware settings.
- Now, when you are inside, go to the Boot section and change the mode from UEFI to Legacy mode or BIOS-compatible or Legacy BIOS mode.
- But, sometimes this option doesn’t allow you to change it. In that case, you need to set your Administrator password, and then restart the machine.
- After that, you’ll need to provide the boot password to access the firmware settings. See, if you can alter the mode of the BIOS now. As in my opinion, this time it should work.
- Again, don’t forget to remove the Administrative password after you are done, if you don’t want the password to pop-up each time you boot your machine.
Now, if you don’t want to go through all the hassles, you can use the command prompt to do the same, if you are comfortable with that.
Using command prompt window
- Type “cmd.exe” in the dialogue box at the bottom left side of the taskbar. Or write the same in the Run window.
- You will see the Command Prompt as Desktop app.
- Right click on it, and click on the Run as Administrator option.
- Once inside, copy the code below, or write it down manually taking extra care for the spaces:
“bcdedit /set “{current}” bootmenupolicy legacy” - Then press “Enter”, and write “Exit” in the window, and hit the “Enter” again from the keyboard. Not much is left here.

- Now, you just need to restart the machine.
- Once it opens again, check if the firmware settings have changed into the Legacy mode or not. It should do. If not, please feel free to ask anything to us.
Ok, you can congratulate yourself now that you have changed your BIOS settings. But, do you think you want to go on like this forever? I mean, is there no reason for you to return to the older setting? If yes, you are in the right place to make your own choices whenever you like.
Since you have come this far with us, it will not be a big deal for you to return.
- Just open the command prompt similarly as before.
- Of course, it should be in the Run as Administrator mode.
- Now, a bit of alteration in the code before will do the job. Write down,
“bcdedit /set {default} bootmenupolicy standard”
Then hit the “Enter” button as before, and exit similarly. - Yes, you guessed right, you need to reboot the machine to finish the job. And, you are done.
Another thing we want to brief out here. If you are enjoying a new drink in an old bottle, that is, if you are using Windows 10 in an older PC, most likely you have already got the Legacy BIOS settings itself. In that case, the process of booting is similar to the older OSes like Windows 7.
Based on your motherboard, you may still see the message showing the setup key in your machine as “Press ‘key’ for setup”, whenever you turn on the machine. This key is important. If you haven’t noticed it yet, power on the device, check if you see the message, and note down the key.
- Now, press the “Shift” button and hold it while you turn off the machine.
- Then thumb on the function key you have noticed before, and hold it that way when you turn the machine on.
- The key may also be the “Delete” or “Esc” key based on the model. To know for sure, consult your manufacturer site, or the user manual, if you can’t check it for the fast boot feature.
- Now you have to hold on to the exact key until you reach the BIOS menu. You will see the boot option there.
Lastly, we want to waste a little more time of yours, if you are interested in disabling the Fast Boot feature. A lot of users facing trouble as the Windows 10 version 1803 update changes the settings and auto-enable the Fast Boot option.
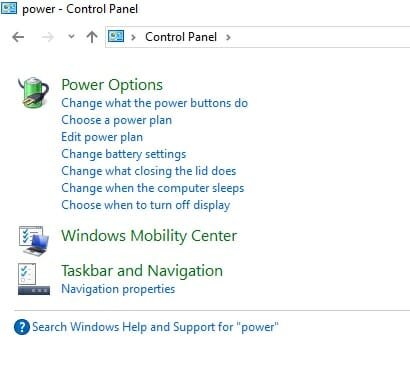
- To disable it again, you need to open up the “Control Panel”. You can write it down in the Start menu search box or in the Run window to launch it.
- Once there, type “Power” on the search box.
- Then select “Power Options → Choose what the power buttons do”.
- Now, you may have to provide the administrator details, i.e., the username and password to access the Fast Startup option.
- Uncheck the box enabling that option and save the changes. You should now be able to use your BIOS options in older ways as before.
Our next topic covers the firmware access for older Windows OSs. If you are fascinated, just give it a try.
Go to the next topic How to Access BIOS in Older PCs.